This document describes the Zanussi ZOB 230 built-in oven, providing user information, technical specifications, and usage and maintenance instructions.
Function Description:
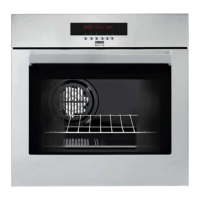
The Zanussi ZOB 230 is a built-in electric oven designed for domestic cooking. It features a fan cooking function that provides uniform heating, allowing for simultaneous cooking of multiple dishes without flavor transference. This system promotes natural air circulation and steam recycling, aiming to keep dishes soft inside and crispy outside while reducing cooking time and energy consumption. The oven also includes a grill function for browning and toasting, and a defrost setting that circulates air at room temperature to speed up thawing of frozen foods. A cooling fan operates automatically when the oven is activated to keep the front panel, knobs, and door handle cool, and may continue to run after the oven is switched off.
Important Technical Specifications:
- Heating Element Ratings:
- Grill element: 1650 W
- Convection element: 2000 W
- Oven light: 25 W
- Cooling Fan: 25 W
- Convection Fan: 25 W
- Total Rating: 2075 W
- Operating Voltage: 230 V (50 Hz)
- Oven Capacity: 56 liters
- Dimensions of the Recess (for installation):
- Height (under top): 593 mm
- Height (in column): 580 mm
- Width: 560 mm
- Depth: 550 mm
- Oven Dimensions:
- Height: 335 mm
- Width: 405 mm
- Depth: 400 mm
- Oven Light Bulb Specifications: 15 W/25 W, 230 V (50 Hz), resistant to temperatures of 300°C, Connection type: E14.
- Electrical Connection: Designed for 230V (50Hz) electricity supply, requires a double pole switch with a minimum 3mm gap between contacts. Earth cable should be 2-3 cm longer than other cables.
- 13 A socket outlet: 2.5 mm² 3 core butyl insulated cable, 13 A min. fuse.
- 13 A spur box: 2.5 mm² 3 core butyl insulated cable, 13 A min. fuse.
- Oven Control Circuit: 2.5 mm² PVC/PVC twin and earth cable, 15 A min. / 20 A max. fuse.
- For Europe use only (2.5 mm² cable/flex): H07 RN-F, H05 RN-F, H05 RR-F, H05 VV-F, H05 V2V2-F (T90), H05 BB-F, 15 A fuse.
- Safety Thermostat: Interrupts power supply in case of dangerous overheating, automatically switches back on when temperature drops.
Usage Features:
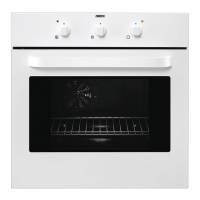
The oven is controlled via a Control Panel featuring an Oven Function Control Knob, a Minute Minder, and a Thermostat Control Knob.
- Oven Function Control Knob:
- 0 (Off): Oven is off.
- Oven light: Turns on the oven light without any cooking function.
- Defrost Setting: Thaws frozen food by circulating air at room temperature.
- Fan cooking: Allows roasting and baking simultaneously on any shelf without flavor transference. Generally requires lower temperatures (20-25°C less than conventional recipes) and offers faster preheating, though preheating for 5-7 minutes is recommended for higher temperatures or specific items like bread and pastries.
- Grill: Provides heat from the top element only for grilling. Food should be placed on the grid in the grill pan for maximum air circulation and to lift food from fats. Preheating the grill for a few minutes is recommended for sealing steaks or toasting.
- Thermostat Control Knob: Selects temperatures between 50°C and 250°C. A thermostat control indicator lights up when the knob is turned and cycles on/off to show temperature maintenance.
- Minute Minder: An acoustic alarm marks the end of a timed period (max 60 minutes). It does not affect oven operation.
- Shelf Levels: The oven has four shelf levels, counted from the bottom. Cookware should not be placed directly on the oven base.
- Oven Door: Always hold the handle in the center to open. Stand back when opening to allow steam/heat to release. The door should be supported until fully open.
- Cooking Guidelines: Cooking times vary by dish composition, ingredients, and liquid amounts. Users are encouraged to note their initial cooking settings to gain experience.
- Hints and Tips:
- Baking: Preheat for about 10 minutes for cakes and pastries (150-200°C). Avoid opening the door before 3/4 of the baking time. If using two baking trays, leave a shelf level free between them and swap/turn trays after 2/3 of baking time.
- Roasting: Do not roast joints smaller than 1 kg. Use higher temperatures (200-250°C) for dark meat and lower temperatures (150-175°C) for white meat, poultry, and fish. Use a trivet in the meat tin to drain fat and prevent splashes. Add water to the roasting pan to reduce smoke and condensation.
- Defrosting: Cover food to prevent drying. Cook thoroughly immediately after thawing. Place frozen food in a single layer and turn halfway through. Suitable for meat and poultry up to 2 kg.
- Safety during use: Do not line the oven with aluminum foil or place roasting pans/baking trays directly on the floor, as this can damage the enamel.
Maintenance Features:
- General Cleaning: Always allow the oven to cool down and switch off the electrical supply before cleaning. The oven should be kept clean to prevent fat/foodstuff build-up, which could cause fire.
- External Cleaning: Wipe the control panel, oven door, and door seal with a soft cloth wrung out in warm soapy water.
- Oven Cavity Cleaning: The enamelled base is best cleaned while still warm with a soft cloth soaked in warm soapy water. For more thorough cleaning, use a proprietary oven cleaner.
- Cleaning Materials: Use only manufacturer-recommended cleaning materials. Avoid bleach, harsh abrasives, sharp metal scrapers, steam cleaners, impregnated pads unsuitable for non-stick saucepans, Brillo/Ajax pads, steel wool pads, chemical oven pads/aerosols, rust removers, and bath/sink stain removers.
- Oven Door Cleaning: The oven door can be removed for cleaning.
- Open the door completely.
- Locate and unlock the small levers on the hinges.
- Turn the door slowly towards the oven until it is half-closed.
- Gently pull the door off its site.
- Place it on a steady surface.
Clean the glass with warm soapy water and a soft cloth only. Do not clean while glass panels are warm, as this may cause shattering. If glass is chipped or scratched, it must be replaced by an authorized service engineer.
- Stainless Steel or Aluminium Appliances: Clean with a wet sponge and dry with a soft cloth. Avoid steel wool, acids, or abrasive products.
- Replacing the Oven Light:
- Ensure the oven is isolated from the electrical supply.
- Push in and turn the glass cover anticlockwise.
- Remove the faulty bulb and replace with a new one (specifications: 15 W/25 W, 230 V (50 Hz), 300°C resistant, E14 connection).
- Refit the glass cover and restore electrical supply.
- Troubleshooting: A guide is provided for common issues like the oven not switching on, temperature light not coming on, oven light not working, slow/fast cooking, condensation, and noisy fan, with corresponding solutions.