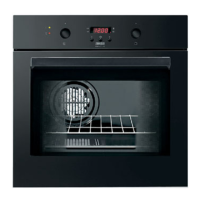
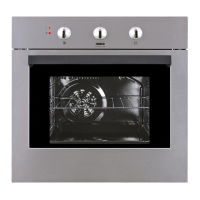
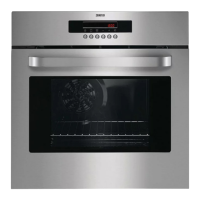
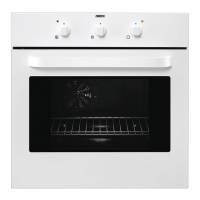
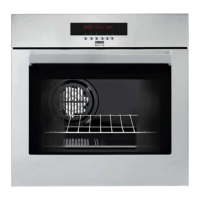
This document describes a built-in electric oven, available in models ZBM 763, ZOB 668, and ZOB 892, with various functions, technical specifications, and maintenance guidelines.
Function Description
The oven is designed for cooking edible foodstuffs only. It features push-pull control knobs on some models (Fig. 1) that can be fully recessed when not in use. The oven function and thermostat control knobs (Fig. 2) allow selection of heating types and temperature adjustment.
Oven Functions:
- OFF position: The oven is turned off.
- Oven Light: Illuminates the oven interior without any cooking function.
- Conventional cooking: Heat comes from both top and bottom elements, ensuring even heating.
- Top heating element: Heat from the top element only.
- Bottom heating element: Heat from the bottom element only.
- Inner grill element only: For grilling small quantities.
- Grill turnspit: For spit roasting meat or kebabs.
- Double Grill: Activates the full grill element.
- Fan cooking: Allows roasting and baking simultaneously on multiple shelves without flavor transfer. Also suitable for sterilizing preserves, cooking fruit in syrup, and drying mushrooms or fruit.
- Defrost Setting: Assists in thawing frozen food.
Electronic Programmer:
The electronic programmer (Fig. 7) includes:
- Push button for selecting a function.
- Decreasing control button "–".
- Increasing control button "+".
- Display.
- "Cooking Duration" pilot lamp.
- "End of cooking" pilot lamp.
- "Minute minder" pilot lamp.
- "Time of day" pilot lamp.
The oven operates only if the time of day is set. It can also be used without a programmed function.
- Setting the time of day: When power is switched on or after a power failure, the "Time of day" pilot lamp flashes. Use "+" or "–" buttons to set the time, then wait 5 seconds.
- "Cooking Duration" function: Automatically switches off the oven after a programmed duration. Set the duration using "+" or "–" buttons.
- "End of cooking" function: Automatically switches off the oven at a programmed end time. Set the end time using "+" or "–" buttons.
- "Cooking duration" and "End of cooking" combined: Allows setting the oven to switch on and off automatically at a later time.
- "Minute minder" function: An alarm sounds after a timed period, but the oven remains on if in use. Set the duration using "+" or "–" buttons (maximum 2 hours, 30 minutes).
Important Usage Features:
- Safety: Always stand back when opening the oven door to release steam/heat. It is dangerous to alter specifications or modify the product. Appliances get very hot; avoid touching heating elements. Ensure control knobs are "off" when not in use. Keep the appliance clean to prevent fat/food build-up and fire risk. Never line the oven with aluminum foil.
- Child Safety: Designed for adult operation. Children should not tamper with controls, play with the product, or touch hot surfaces. Supervise children near the oven.
- Oven door: Always catch the handle in its central part to open. Always cook with the oven door closed.
- Cooling fan: Keeps the front panel, knobs, and door handle cool. May run after the oven/grill is switched off until a normal temperature is reached.
- Cooking with turnspit: Place the spit-support frame in the second runner from the bottom. Pierce and secure food on the spit, fit the spit tip into the motor drive, and rest the front part on the frame groove. Remove the spit handle. Turn the oven function control knob to the turnspit symbol. Leave the oven door closed.
- Cooking times: Vary by food type, consistency, and volume. Experience will help in adjusting values from the cooking tables. Pre-heat the oven for about 10 minutes before cooking.
- Hints for baking cakes: Use moderate temperatures (150-200°C). Pre-heat for 10 minutes. Do not open the door for at least 3/4 of the cooking time. Ensure dough/mix consistency is not too moist.
- Hints for cooking meat and fish: Meat should weigh at least 1 kg. Red meat: 200-220°C for rare. White meat, poultry, fish: 150-175°C. Add sauce ingredients during the last half hour for longer cooking times. Check doneness by pressing with a spoon. Let meat rest for 15 minutes before carving. Pour a little water into the dripping pan to prevent smoke.
Important Technical Specifications
- Oven recess dimensions:
- Height: 593 mm
- Width: 560 mm
- Depth: 550 mm
- Oven cavity dimensions:
- Height: 335 mm
- Width: 395 mm
- Depth: 400 mm
- Capacity: 53 l
- Oven thermostat regulation: 50°C to 230°C
- Heating elements ratings:
- Bottom heating element: 1000 W
- Top heating element: 800 W
- Full Oven (Top+Bottom): 1800 W
- Grill heating elements: Simple 1650 W, Double 2450 W
- Fan Oven heating element: 2000 W
- Oven lamp: 25 W
- Convection fan: 25 W
- Cooling fan: 25 W
- Turnspit motor: 4 W
- Maximum power rating: 2500 W
- Voltage tension (50 Hz): 230 V
- Compliance: This appliance complies with E.E.C. Directives: 73/23 - 90/683 (Low Voltage Directive); 89/336 (Electromagnetical Compatibility Directive); 93/68 (General Directives) and subsequent modifications.
Maintenance Features
- General Cleaning: Switch off the oven and let it cool down before cleaning. Disconnect from the mains power supply. Use lukewarm water and detergent for enamelled parts. Do not use abrasive products, steel wool pads, or acids. Rinse stainless steel parts with water and dry with a soft cloth. For persistent stains, use non-abrasive detergents or hot vinegar. Clean the oven door with hot water and avoid coarse cloths. Clean the oven thoroughly after each use to remove residuals.
- Oven door cleaning:
- Open the door completely.
- Lift small levers on the hinges and turn them inwards (Fig. 5).
- Slowly close the door until it touches the levers.
- Push it towards the oven and remove it by pulling outwards.
- Place the door horizontally for cleaning.
- Reassemble by reversing the steps.
- Replacing the oven light: Disconnect the appliance from power. Push in and unscrew the glass cap (Fig. 6). Unscrew the bulb and replace it with a new heat-proof bulb (300°C) with the following features: 230 V (50 Hz), 25 W, Fitting E 14. Reconnect the appliance.
- The Hinged Grill (some models):
- Ensure the oven is cool and isolated from electricity.
- Undo the screws holding the grill (Fig. 7).
- Gently pull the grill downward to access the oven roof.
- Clean the oven roof with a suitable cleaner and wipe dry.
- Push up the grill element into place and firmly screw in the holding nuts. Ensure nuts are firmly in place to prevent the grill from falling.
Troubleshooting (What happens if something goes wrong):
- Oven does not come on: Check if in manual operation, cooking function and temperature are selected. Check wiring, socket switch, or mains supply switch.
- Oven temperature light does not come on: Turn thermostat knob to a temperature or oven function control knob to a function.
- Oven light does not come on: Turn oven function control knob to a function. Buy and replace the bulb as per instructions.
- Dishes take too long or cook too fast: Refer to "Hints and tips for using the oven" chapter.
- Steam and condensation settle on food/oven cavity: Leave dishes inside the oven no longer than 15-20 minutes after cooking.
Service and Spare Parts:
If issues persist after checking, contact your local Service Centre. Provide the appliance model, product number, and serial number from the identification plate (located on the front external edge of the oven cavity). Use only genuine spare parts, certified by the manufacturer and carrying the Electrolux Distriparts symbol.