8
Assembling
Assembling
Assembling
Assembling
Assembling
Assembling
Assembling
Assembling
The
The
The
The
The
The
The
The
Zappy
Zappy
Zappy
Zappy
Zappy
Zappy
Zappy
Zappy
3
3
3
3
3
3
3
3
Z
Z
Z
Z APPY
APPY
APPY
APPY
3
3
3
3
PRO-FLEX
PRO-FLEX
PRO-FLEX
PRO-FLEX
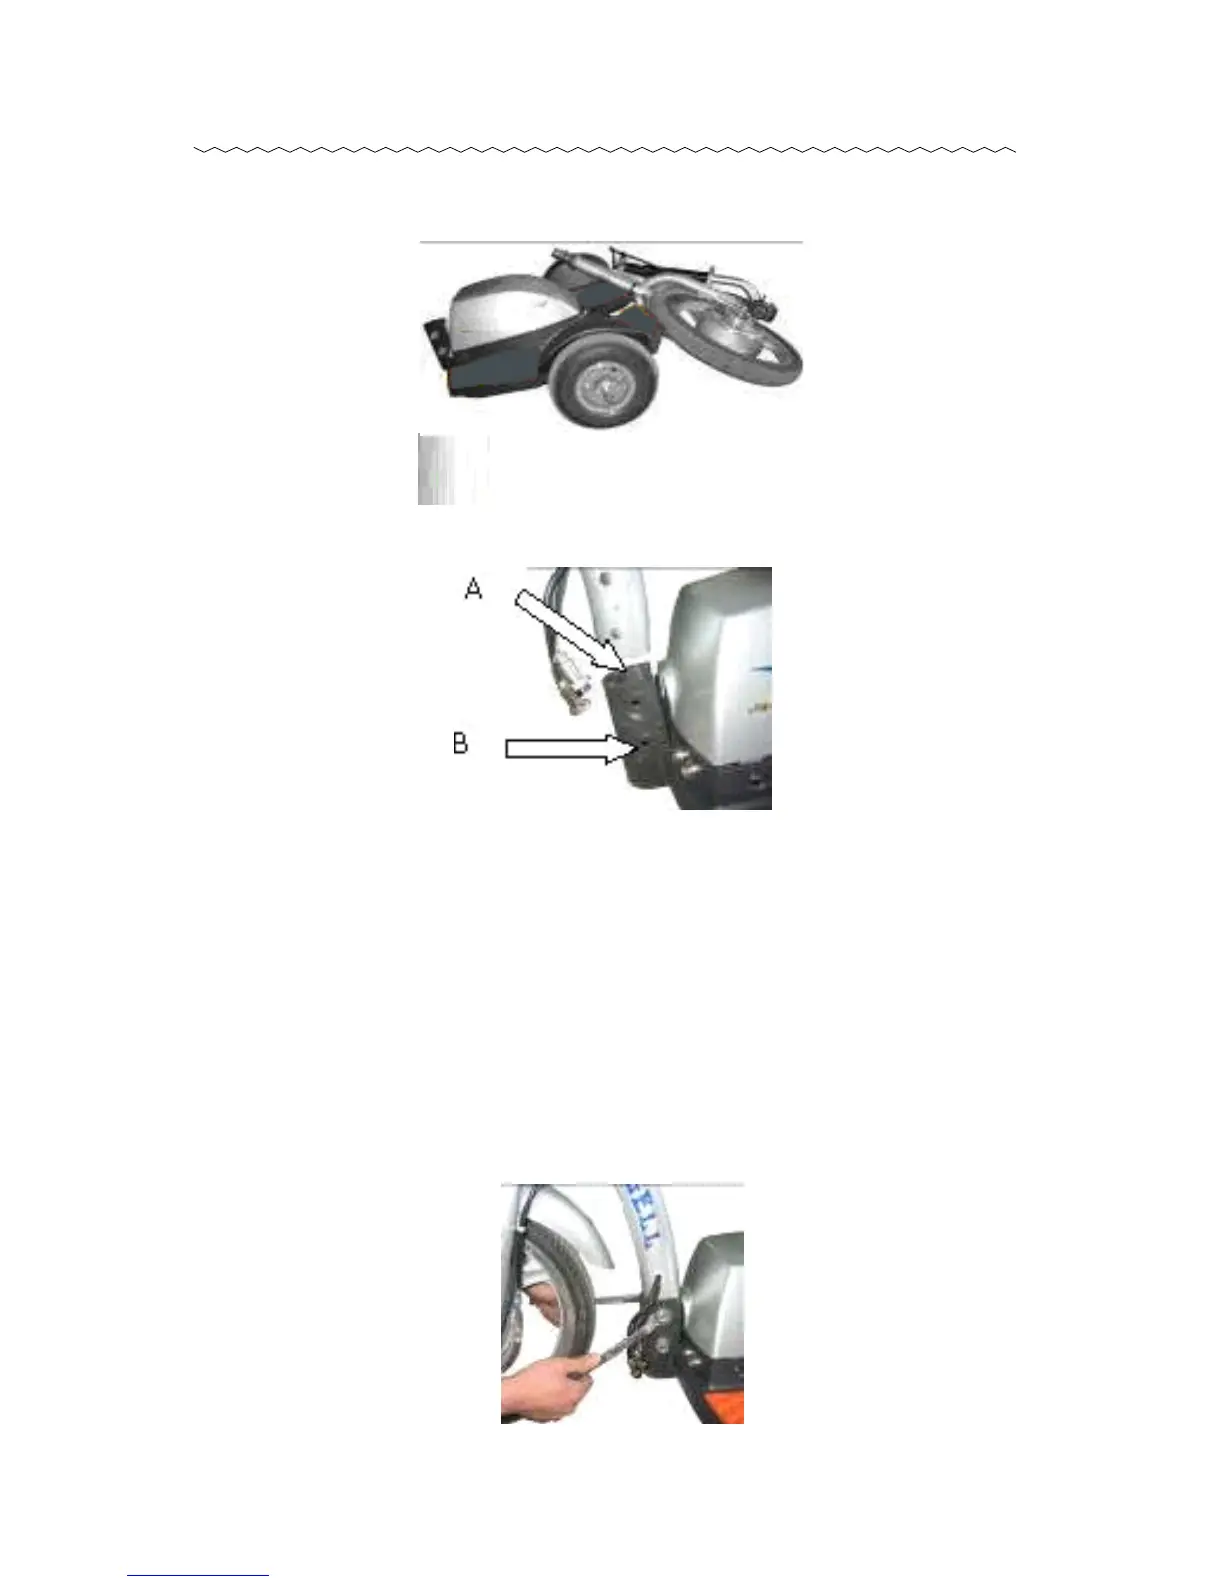
1. Unpack the ZAPPY
3
carefully so that you do
not misplace any of the parts.
2. Place the ZAPPY
3
on a flat, level surface.
Block the front up 3.5''. This will make the next
step easier
3. Remove the bolts and nuts from the
connecting tube clamp (B). Place the
connecting tube into the top opening (A) .
After aligning the holes, place the two bolts
through the connecting tube and neck
assembly. Twist the bolts, do not hammer
them through . Tighten these two bolts with the
nuts provided.