10
Assembling
Assembling
Assembling
Assembling
Assembling
Assembling
Assembling
Assembling
The
The
The
The
The
The
The
The
Zappy
Zappy
Zappy
Zappy
Zappy
Zappy
Zappy
Zappy
3
3
3
3
3
3
3
3
Z
Z
Z
Z APPY
APPY
APPY
APPY
3
3
3
3
PRO-FLEX
PRO-FLEX
PRO-FLEX
PRO-FLEX
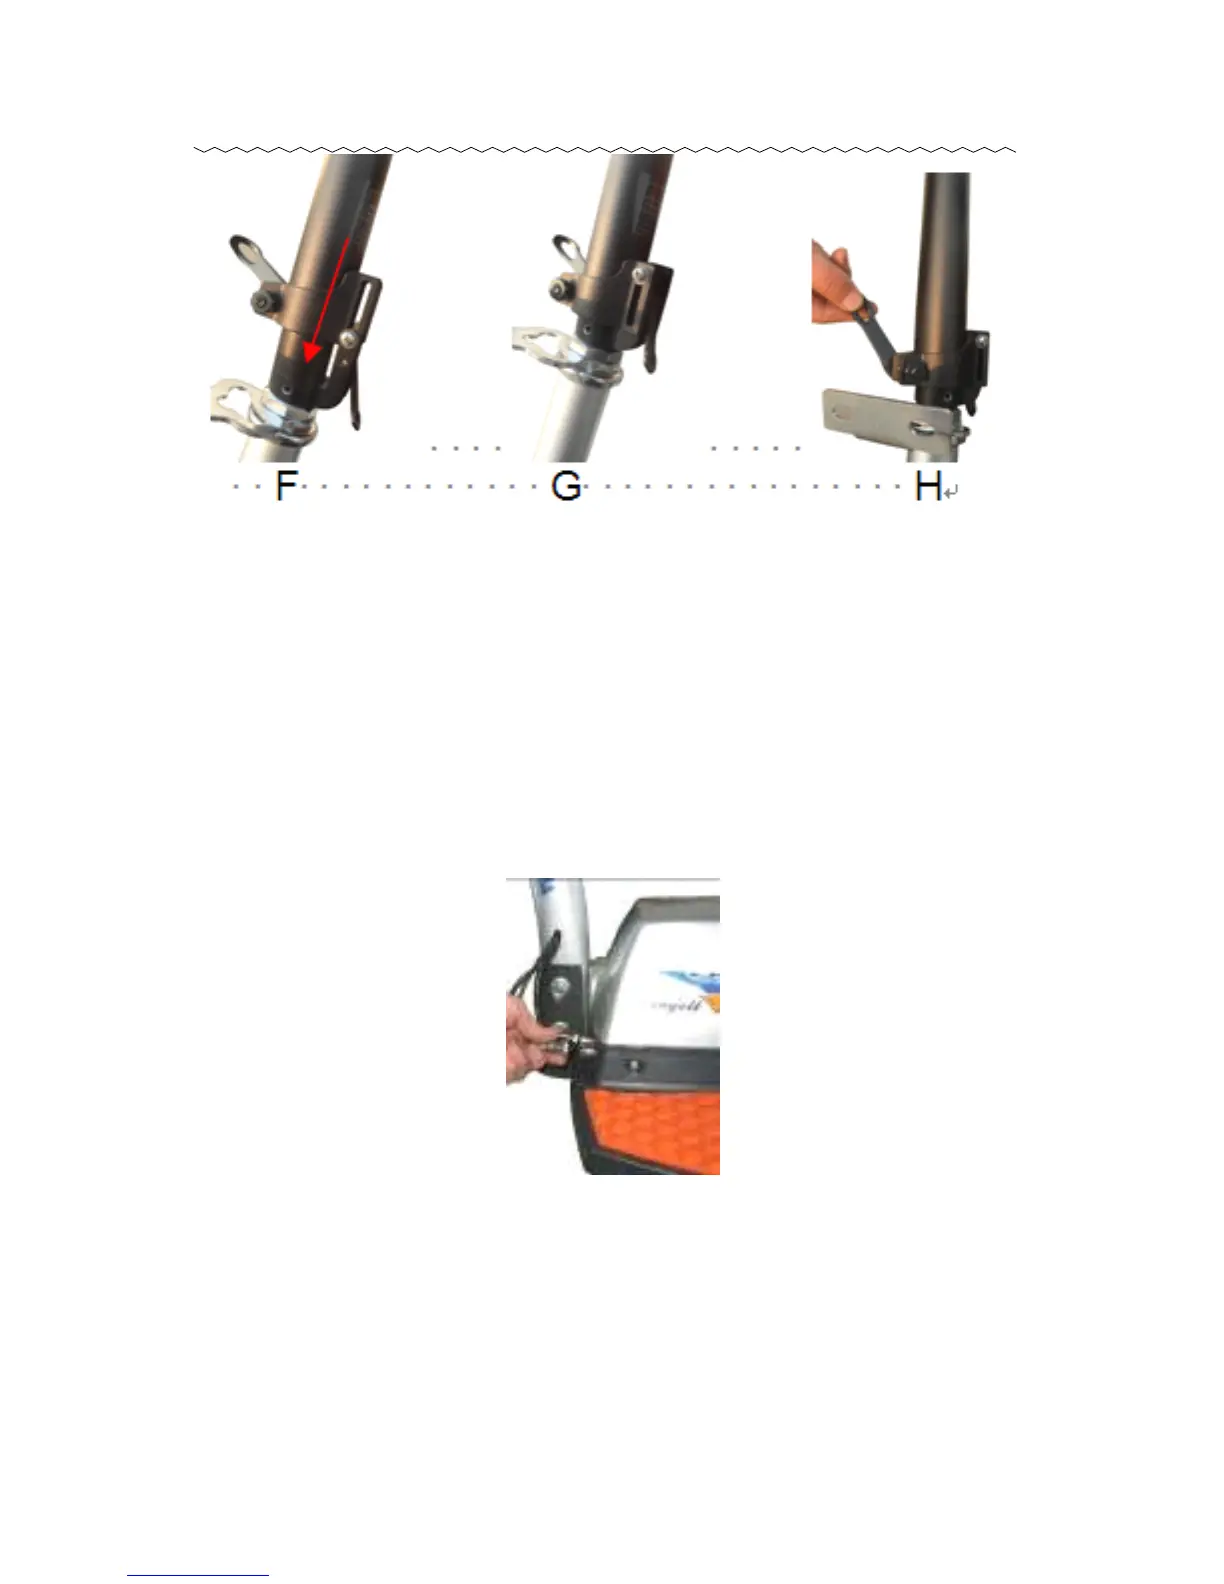
7. Ensure that the handlebar is facing front, the
brake on the left side and the throttle on the
right , then tighten the handlebar tube collar
clamp using the enclosed 5mm wrench
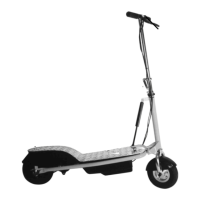
8. Plug in the two power connecting plugs into
the sockets. The design of each plug and
socket is different. Connect the ones which
best fit each other to finish the assembly.
9. Match the pins of the plugs to the holes of the
sockets. Note the alignment notches.