8
Setup: Installing the Print Ribbon
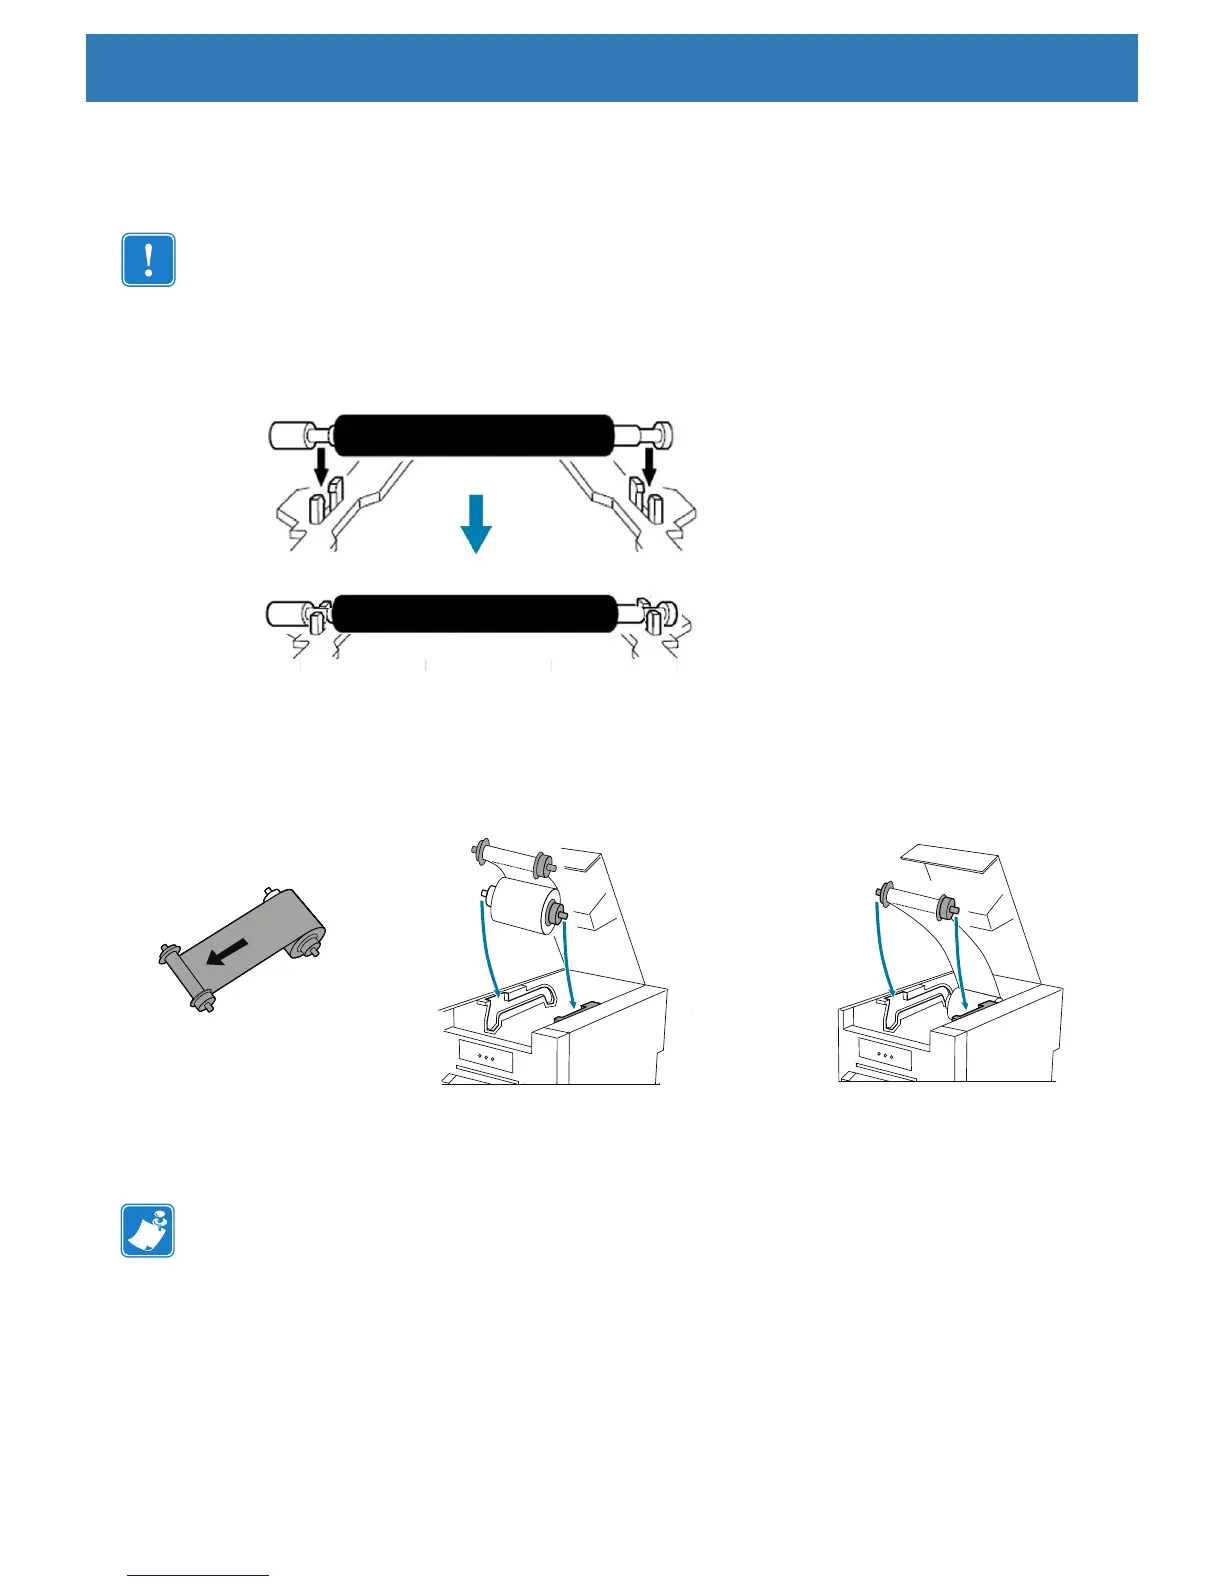
Installing the Cleaning Roller
Step 1. Open the top cover.
Important • The cleaning roller can only be installed in one direction: the longer barreled side of the
cleaning roller goes to the left, and the shorter barreled side to the right. Do not force the cleaning
roller into an incorrect position.
Step 3. Place the cleaning roller into the printer.
Step 4. Push the cleaning roller into place as shown until you hear an audible click.
Installing the Print Ribbon
Step 1. Install the ribbon by sliding the supply spool into the guide rails and toward the rear of the printer.
Step 2. Slide the take-up spool into the guide rails and toward the front of the printer.
Step 3. Rotate the supply spool slightly to remove excess slack in the ribbon.
Step 4. Close the top cover.
Note • If the ribbon should break, apply a piece of tape to connect the broken ends and advance the
ribbon past the break point.