UNPACKING AND INSTALLATION
SDA Stand for Stereomicroscopes Carl Zeiss
B 46-0075 e 05/06 11
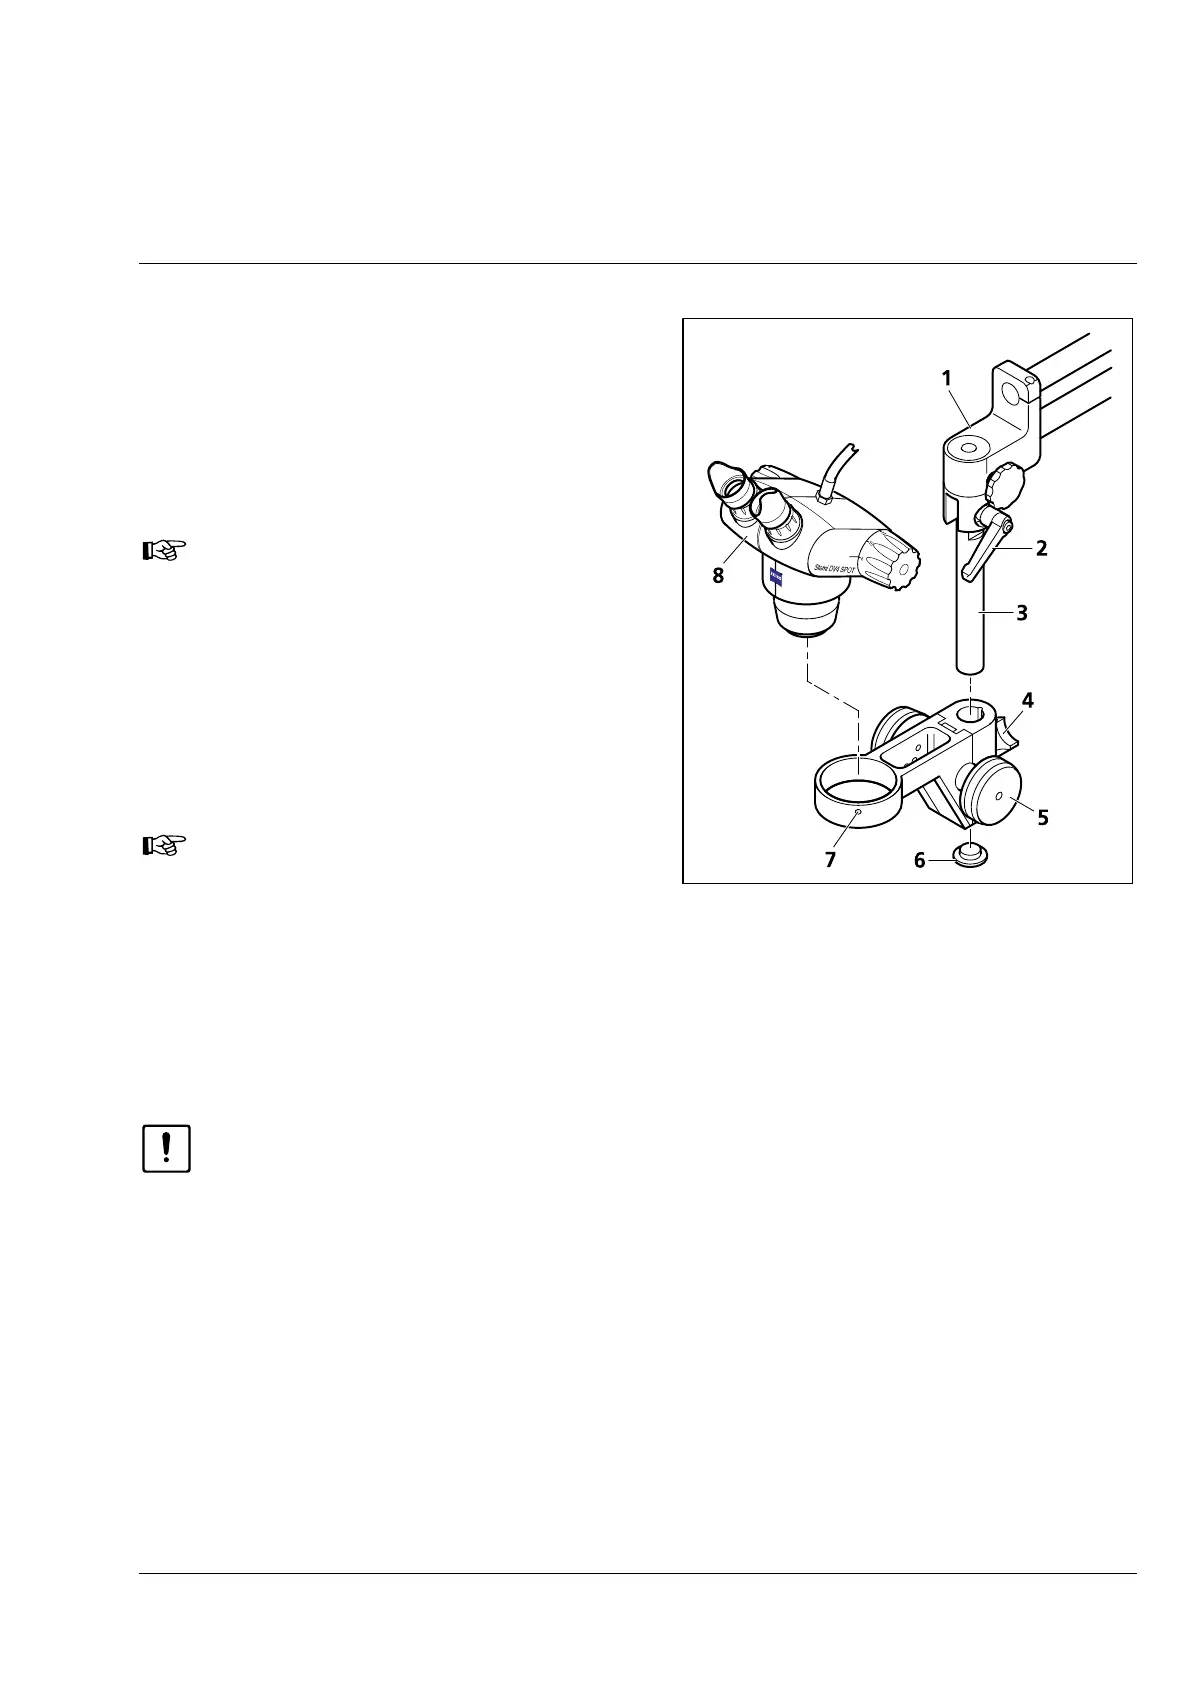
3.2 Installing Stemi mount and
microscope body
• Loosen clamp lever (
3-3/2) on rotating/tilting
head (
3-3/1).
• Align column 32 (
3-3/3) vertically and retighten
the clamp lever.
The angular position of the clamp lever
on the rotating/tilting head may be
varied analogously to the clamp lever
of the retainer ring.
• Unscrew end piece (
3-3/6) from column 32
(
3-3/3).
• Slip Stemi mount (
3-3/5) from the bottom over
column 32 and fix it in the desired position by
means of clamp knob (
3-3/4).
With a short working distance of the
supplementary lens system / objective,
you may also slip the Stemi mount
turned about over the column 32 to
increase the spacing to the object and
the base plate.
• If available, slip the fiber holder over and clamp
it.
• Screw the end piece back into column 32.
CAUTION
Before inserting the microscope body make sure that its objective does not collide with the base
plate or the mounting surface of the stand when inserting it. Change the vertical adjustment of
the double boom and the retainer ring, if necessary.
• Insert the microscope body (
3-3/8) into the 76 mm wide mounting hole of the Stemi mount (3-3/5)
and fix clamp screw (
3-3/7) by means of the SW 3 ball-headed screwdriver.
Fig. 3-3 Installing Stemi mount and
microscope body