Do you have a question about the ZERO-X polaris and is the answer not in the manual?
Crucial safety guidelines, local legislation, and operational restrictions for drone flight.
Instructions for correctly inserting the drone's battery.
Important safety precautions to consider before and during drone operation.
Procedure for pairing the drone with its remote controller.
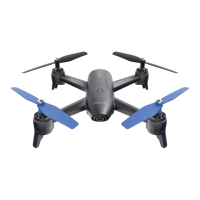
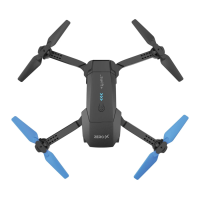
The Zero-X Polaris is an HD drone with Wi-Fi FPV (First Person View) capabilities, designed to offer an engaging aerial experience. It is accompanied by a user manual that provides comprehensive instructions for setup, flight, maintenance, and safety. The drone is intended for recreational use, allowing users to capture photos and videos from the sky while maintaining visual line-of-sight.
The Zero-X Polaris drone is equipped with a camera for capturing high-definition photos and videos. Its core function is to provide an aerial platform for photography and videography, controllable via a dedicated remote control or a smartphone application. The drone utilizes Wi-Fi to establish a connection with a smartphone, enabling live video streaming (FPV) and advanced control features through the Zero-X Swift+ app.
Basic flight functions include ascending, descending, moving forward, backward, left, and right, as well as rotation. The drone incorporates a trim function to correct any drifting during flight, ensuring stable hovering. For enhanced maneuverability and user experience, it offers three speed modes: low, medium, and high, catering to different skill levels, with low speed recommended for beginners.
Advanced flight features include a 360° flip function, allowing the drone to perform aerial acrobatics. It also features a Headless Mode, which simplifies control by orienting the drone's movement relative to the pilot, regardless of the drone's actual front-facing direction. This is particularly useful for bringing the drone back to the pilot when it is far away. A One Key Reverse function further aids in returning the drone by flying it backward with a single button press. For safety, an Emergency Stop feature is included, which locks the rotor blades and causes the drone to fall, intended for critical situations.
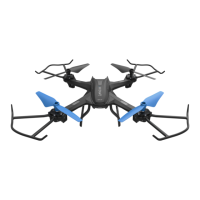
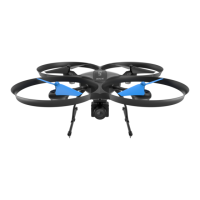
Setting up the Zero-X Polaris drone involves several steps to ensure safe and optimal operation. The battery needs to be fully charged and correctly installed into the rear of the drone. Rotor guards are optional but recommended for protecting the rotor blades and motors from bumps and light crashes; they are installed by inserting pegs into designated holes and tightening screws.
The remote control requires two AAA batteries and features extendable arms. To power on the controller, the right arm is extended downwards, which triggers a beep and illuminates the power indicator. Closing the right arm powers off the controller.
Before flight, the drone and controller must be synced. This involves turning on the drone, which causes its LED lights (blue at the front, red at the rear) to blink. The controller is then powered on, and the left control stick is moved up and down for one second each, causing the controller to beep and the drone's LED lights to stop blinking, indicating a successful sync.
Calibration is a crucial step before every flight. The drone should be placed on a flat surface, and both the left and right control sticks should be held inward and downward for three seconds. The drone's indicator lights will change from constant to quick flashing and then back to solid, confirming successful calibration.
To take off, users can either press the One Key Take Off/Landing button or simultaneously push both the left and right control sticks outward and downward for three seconds, which will start the rotor blades. The drone is then ready for flight by pushing the left control stick upwards.
The Zero-X Swift+ app, available for both iOS and Android devices, extends the drone's functionality. Users connect their smartphone to the drone's Wi-Fi network (ZX-POL_XXXXXXX) to access the app's features, including live camera view, recording initiation, and drone control. The app allows users to view recorded photos and videos.
For capturing media, the remote control has dedicated Photo and Video buttons. Pressing the Photo button once takes a picture, indicated by a single beep from the remote and a blink of the drone's LED lights. Pressing the Video button starts recording, with continuous beeps and blinking LED lights from the drone. Pressing it again stops the recording.
Proper maintenance is essential for the longevity and performance of the Zero-X Polaris drone. Users are advised to avoid exposing the drone and its accessories to dust, sand, and moisture, as these elements can damage components. If exposed, a soft brush should be used to remove any visible particles.
Rotor blade replacement is a common maintenance task, especially if blades become damaged or if the drone no longer flies straight. The manual specifies that there are two types of rotor blades, A (clockwise rotation) and B (counter-clockwise rotation), marked on their tops. The drone's arms are also marked A and B, indicating which blade type is compatible with each motor. It is crucial to install the correct blade type on the designated motor to ensure proper flight and prevent motor burnout.
The replacement process involves unscrewing the securing screw counter-clockwise with the included screwdriver, gently pulling the old rotor blade upward from the motor stem, placing the new rotor blade over the motor stem, pressing it to lock it in place, and then replacing and tightening the screw. When replacing multiple blades, it is recommended to do so one at a time to avoid confusion.
Battery safety is heavily emphasized, with strict guidelines for charging, storage, and handling. Only certified Zero-X chargers and batteries should be used. Batteries should be charged in a safe area away from flammable materials, under adult supervision, and never left unattended overnight. Overcharging should be avoided, and batteries should be removed from the charger once fully charged. It is also important to allow the battery to cool down for at least 30 minutes after flight before recharging. Any damaged, leaking, or swollen batteries must be immediately and safely disposed of. The manual explicitly states that using a non-certified USB AC charging adapter will void the warranty and may damage both the battery and the drone.
| GPS | Yes |
|---|---|
| Camera | Yes |
| Camera Resolution | 12MP |
| Follow Me Mode | Yes |
| Photo Resolution | 12MP |