Do you have a question about the ZF CruiseCommand 785CE and is the answer not in the manual?
Outlines the purpose and structure of the manual.
Describes the designed purpose and capabilities of the CruiseCommand System.
Lists the key features and functionalities of the CruiseCommand System.
Details the system's behavior when DC power is initially supplied.
Explains the procedure for a station to gain control of the system.
Describes the fundamental operation of the control head lever and detents.
Explains the safety conditions required for the engine to start.
Details the step-by-step process for transferring system control between stations.
Describes the procedure for engaging engine warm-up mode.
Explains the two available engine idle speed settings.
Details how to switch between High and Low Idle engine speed modes.
Explains the dual lever synchronization feature for multi-engine systems.
Describes the mode where a single lever controls all engines and gears.
Covers the control of electric trolling valves for slow-speed operation.
Details the two operational modes: Troll and Non-Troll.
Explains how to engage and operate the system in Troll Mode.
Step-by-step guide to activating the Troll Mode feature.
Step-by-step guide to deactivating the Troll Mode feature.
Lists the different configuration types for trolling valve commands.
Describes the function and role of the central processor unit in the system.
Details the types, connections, and requirements for control heads.
Specifies the power source requirements and circuit protection for the control system.
Outlines the dedicated power source for the clutch solenoid.
Lists available wire harnesses and selection criteria based on system features.
Lists the necessary and optional tools required for system installation.
Lists the essential tools for performing the installation.
Lists recommended optional tools that may aid in installation.
Mandates the installation of an engine stop switch at each remote station.
Provides guidance on selecting an appropriate and safe location for the processor.
Discusses considerations for mounting control heads in accessible and protected locations.
Specific mounting instructions and considerations for 400 and MC2000 series control heads.
Emphasizes the importance of minimizing power cable lengths to reduce voltage drop.
Details the step-by-step procedure for physically installing the processor unit.
Guides on connecting power, start interlock, and optional circuit harnesses.
Instructions for wiring the main power cable to the system's processor.
Details the correct procedure for installing the start interlock cable.
Explains the choices and installation process for control head wiring harnesses.
Refers to the 'Control Options' section for alarm circuit details.
Refers to the 'Control Options' section for clutch pressure details.
Information on control head variations, dimensions, and mounting hole locations.
Specific mounting instructions for different control head series (400, 700, MC2000).
Details on connecting wiring harnesses to the control heads and processor.
Specific instructions for installing control heads that face aft.
Instructions for setting up and enabling engine synchronization for multi-screw vessels.
Details the tachometer harness connection for active synchronization systems.
Connects the processor to the engine interface using the throttle harness.
Covers the harnesses required for clutch and optional troll control functions.
Details the clutch harness for systems with clutch control only.
Details the clutch and troll control harness for systems with both functions.
Installation guidance for engine stop switches at each station.
Identifies the processor's display and buttons used for system configuration.
Describes the function and display segments of the processor unit.
Explains the use of arrow push buttons for navigating functions and values.
Details the function of the up and down arrow buttons for menu navigation.
Explains the function of left and right arrow buttons for mode activation and saving.
Details the function of the left arrow button for exiting set-up without saving.
Details the function of the right arrow button for clearing error codes.
Step-by-step guide to entering the system's set-up configuration mode.
Lists and explains various system set-up functions, their codes, and default values.
A comprehensive table of all system functions, codes, names, and value ranges.
Sets a unique identification number for each processor in multi-processor systems.
Configures the total number of engines connected to the system.
Enables or disables the one-lever control mode for engine and gear operation.
Selects the correct throttle profile for compatibility with different engine types.
Adjusts throttle signal levels for neutral/idle and when the clutch is engaged.
Sets the minimum throttle output signal level.
Sets the maximum throttle output signal level.
Sets the maximum allowed throttle percentage when operating in astern.
Defines the pause duration after clutch engagement before throttle increases.
Allows adjustment of an elevated idle speed for the engine.
Enables or disables the active synchronization feature between engines.
Enables or disables the clutch oil pressure interlock safety feature.
Sets the delay time for the clutch oil pressure interlock system's response.
Selects whether the reversal pause occurs in-gear or in neutral during direction changes.
Sets the duration of the pause during directional reversals for engine deceleration.
Determines how the reversal pause time value is applied for different maneuvers.
Configures the lever range settings for the trolling valve operation.
Sets how the trolling valve current signal behaves based on clutch pressure.
Sets the minimum pressure level for the trolling valve operation.
Sets the maximum pressure level for the trolling valve operation.
Sets the maximum throttle limit when the trolling valve is actively engaged.
Sets the time duration in seconds for trolling valve commands.
Sets the percentage of maximum troll command for the trolling valve.
Accesses diagnostic information for system troubleshooting purposes.
Resets all system parameters to their factory default values.
Enables monitoring of clutch and troll solenoid circuits for faults.
Maps solenoid states to specific error status values for monitoring.
Tests control head functionality and lever response with engines not running.
Tests the start interlock system's function with engines stopped.
Explains the proper use of test equipment for system adjustments and diagnostics.
Lists system functions that require specific test equipment for adjustment.
Adjusts throttle minimum and maximum signals with the engine stopped.
Provides adjustment values and procedures for throttle signal outputs.
Verifies the functionality of engine stop switches while the engine is operational.
Verifies warm-up mode operation with the engine running.
Adjusts throttle signal levels for neutral/idle and when the clutch is engaged.
Sets the maximum allowed throttle percentage when operating in the astern direction.
Adjusts the elevated idle speed setting for the engine.
Procedures for adjusting and verifying engine RPM during underway operation.
Details the feature for engine deceleration during high-speed directional reversals.
Adjusts trolling minimum and maximum pressure settings with the engine running.
Records propeller shaft RPM measurements after the transmission reaches operating temperature.
Records data related to minimum trolling pressure measurements.
Sets the maximum throttle limit when the trolling valve is actively engaged.
Records data related to maximum trolling pressure measurements.
Sets the time duration in seconds for trolling valve commands.
Sets the percentage of maximum troll command for the trolling valve.
Describes the single alarm connection for system power failure or circuit malfunctions.
Explains the safety interlock to prevent high RPM when the clutch is not fully engaged.
Maintenance checks for the control processor's terminal connections for corrosion or looseness.
Maintenance checks for control head terminals for security and corrosion.
Lists available system components, part numbers, and descriptions.
Details variations and dimensions for 400 and MC2000 series control heads.
Instructions for making standard cable connections to various control heads.
Technical specifications and diagrams for the 700 series control head.
Instructions for making standard cable connections to the 700 series control head.
Technical specifications and diagrams for the 464-4 control head.
Instructions for making standard cable connections to the 464-4 control head.
Technical specifications and diagrams for the CH14450 control head.
Instructions for making standard cable connections to the CH14450 control head.
Details and diagrams for the 400 series watertight enclosure for control heads.
Information on Deutsch industrial products and correct assembly of connectors.
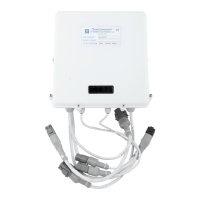
Specifications, installation, and wiring diagram for the Automatic Power Selector unit.
Wiring diagram illustrating the installation of the Automatic Power Selector.
Bonding requirements for electrical systems per ABYC standards for marine vessels.
Lists relevant industry standards, regulations, and sources for system parts.
Lists specific part numbers for various components and tools required for the system.
Provides an overview of the CruiseCommand Control System and its main components.
Describes the primary function of the control head in sending voltage signals to the processor.
Explains the role of the processor in receiving inputs and controlling outputs.
Details the function of electrical wiring and the types of harnesses used.
Stresses the critical importance of a reliable and charged power source for system operation.
Basic questions to ask the customer to help narrow down troubleshooting issues.
Identifies the system configuration (single, twin, or multiple screw) for troubleshooting.
Determines the number of remote stations to help isolate potential issues.
Identifies system issues by analyzing audible tones emitted by the control head.
Checks the status of control head LEDs (lit, not lit, blinking) for diagnostic purposes.
Lists and describes the various audible tones indicating system status or errors.
Explains the initialization tone and potential causes of low voltage issues.
Identifies an invalid command signal received from a control head.
Indicates a general problem or malfunction within the control system.
Signals a malfunction in one or more of the clutch or neutral solenoid circuits.
Indicates a fault detected with the troll ON/OFF or troll proportional solenoids.
Outlines the requirements and conditions for transferring command between stations.
Explains the DC voltage signal representing the control head lever position.
Details the function and testing of the station select/transfer button.
Identifies symptoms and verification steps for a stuck transfer button.
Lists and provides brief descriptions of system error messages.
A comprehensive table detailing error codes and their associated descriptions.
Lists possible causes and solutions for identified system error messages.
Maps specific error codes to potential causes and recommended remedies.
Continues the mapping of error codes to potential causes and remedies.
Continues the mapping of error codes to potential causes and remedies.
Continues the mapping of error codes to potential causes and remedies.
Continues the mapping of error codes to potential causes and remedies.
Continues the mapping of error codes to potential causes and remedies.
Continues the mapping of error codes to potential causes and remedies.
Continues the mapping of error codes to potential causes and remedies.
Continues the mapping of error codes to potential causes and remedies.
Continues the mapping of error codes to potential causes and remedies.
Continues the mapping of error codes to potential causes and remedies.
Continues the mapping of error codes to potential causes and remedies.
Continues the mapping of error codes to potential causes and remedies.
Continues the mapping of error codes to potential causes and remedies.
Continues the mapping of error codes to potential causes and remedies.
Continues the mapping of error codes to potential causes and remedies.
Continues the mapping of error codes to potential causes and remedies.
Continues the mapping of error codes to potential causes and remedies.
Continues the mapping of error codes to potential causes and remedies.
Engine RPM varies without lever movement, synchronization is disabled.
No audible tone at one control head on power-up; system otherwise functions normally.
Control head red LED remains off when in command, but other functions operate correctly.
Warm-up Mode is unavailable in the Ahead direction, only functioning in Astern.
System shows no tone, light, or command; display remains unlit.
Engine starts turning over then stops; a slow repetitive tone is heard at all stations.
The active synchronization feature between engines is not functioning correctly.
Engine idle and full throttle RPMs are either excessively high or too low.
Information on various cable harnesses manufactured and tested by ZF Mathers.
Wiring information and pin-outs for power and start interlock harnesses.
Wiring details for power, start interlock, and pressure switch harnesses.
Wiring details for power, start interlock, pressure switch, and alarm harnesses.
Wiring information and pin-outs for Throttle PWM harnesses.
Wiring information and pin-outs for Throttle Voltage harnesses.
Wiring information and pin-outs for Throttle Current harnesses.
Wiring information for clutch power, ahead, and astern harnesses.
Wiring information for clutch power, ahead, neutral, and astern harnesses.
Wiring for clutch, troll on/off, and troll command harnesses.
Wiring information and pin-outs for serial communication harnesses between processors.
Wiring details and pin-outs for tachometer sensor harnesses.
Wiring pin-out information for connecting control heads to the processor.
Procedures for testing the throttle signal's DC voltage output.
Procedures for testing the throttle signal's current (mA) output.
Testing PWM throttle signals using a duty cycle meter.
Testing PWM throttle signals using a DC voltmeter.
Steps to test the voltage output of the ahead clutch circuit.
Steps to test the voltage output of the astern clutch circuit.
Steps to test the voltage output of the neutral solenoid circuit.
Steps to test the voltage output of the troll on/off solenoid circuit.
Steps to test the current output of the troll command proportional valve.
Function to restore all system parameters to factory default values.
| Brand | ZF |
|---|---|
| Model | CruiseCommand 785CE |
| Category | Computer Hardware |
| Language | English |