4
109
i Timer on Button: Press this button to initiate the auto-on time sequence. Each press will increase the
auto-timed setting in 30 minutes increments. When the setting time displays 10Hr, each press will incre-
ase the auto-timed setting 60 minutes increments. To cancel the auto-timed program, continue pressing
the button until nothing displays.
j Timer off Button: Press this button to initiate the auto-off time sequence. Each press will increase the
auto-timed setting in 30 minutes increments. When the setting time displays 10Hr
, each press will incre-
ase the auto-timed setting 60 minutes increments. To cancel the auto-timed program, continue pressing
the button until nothing displays.
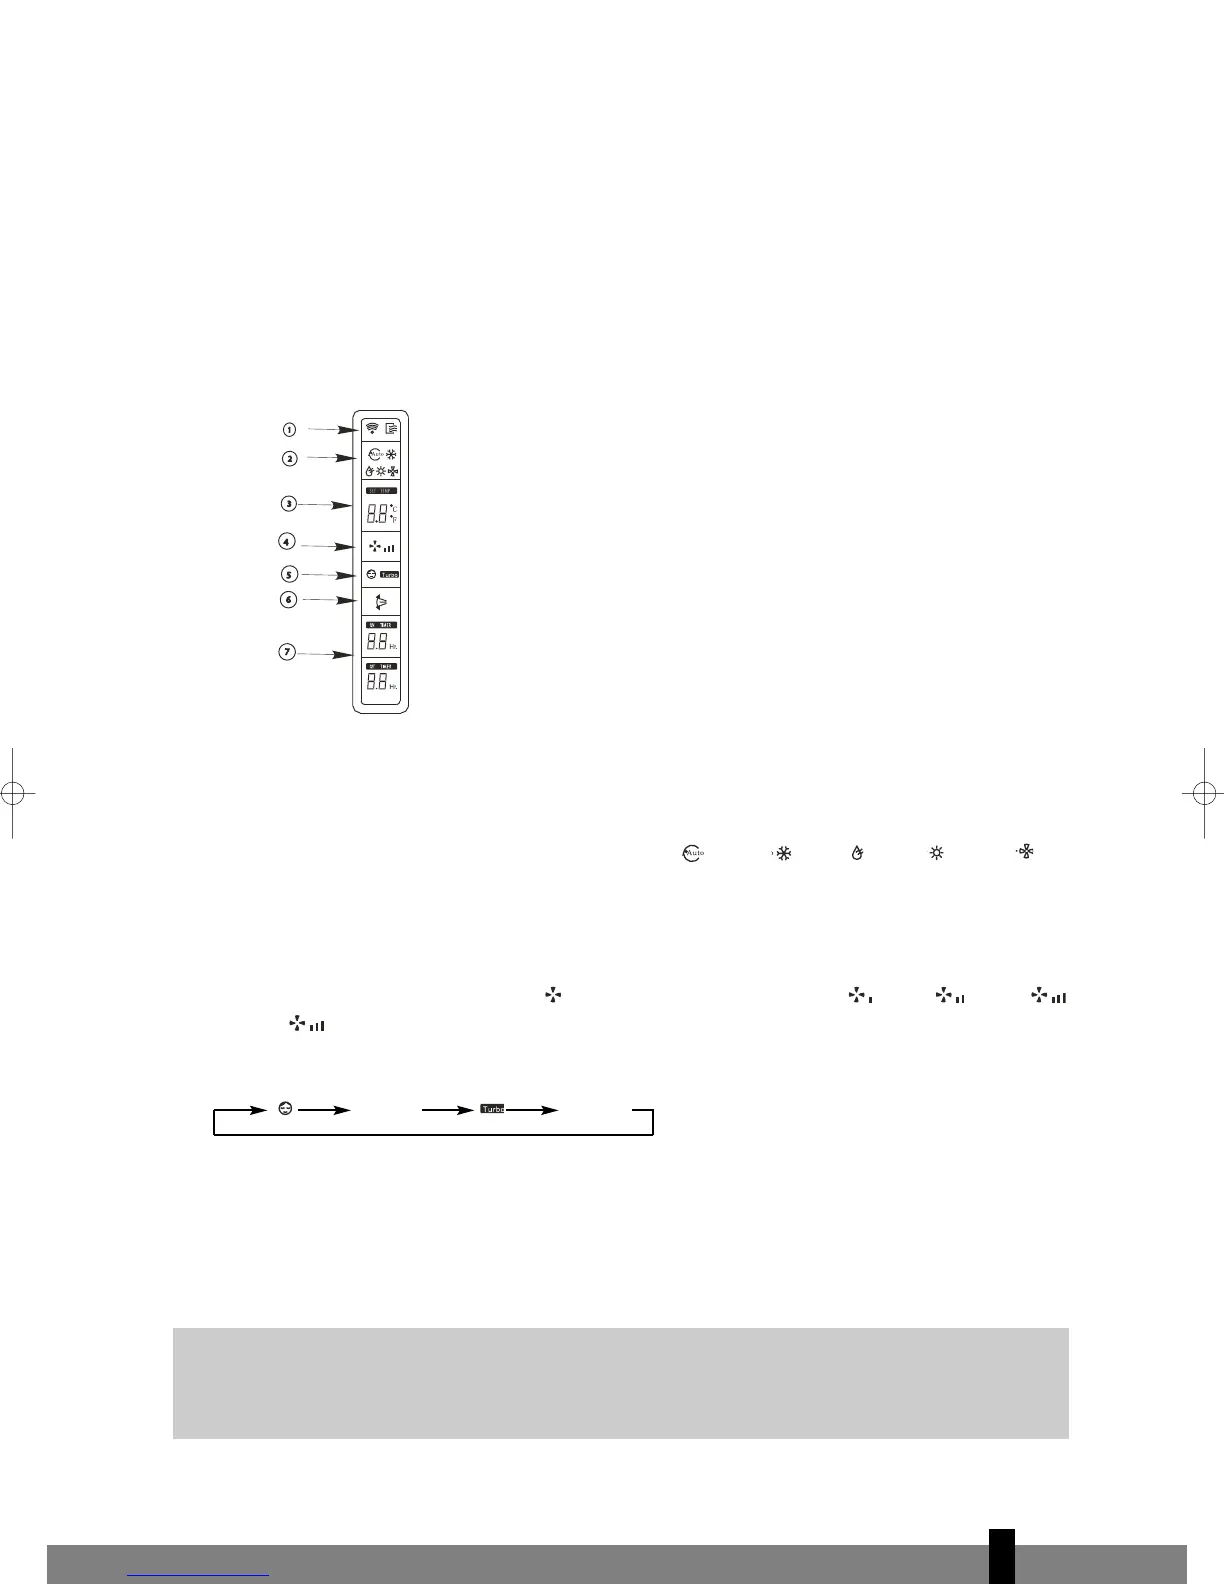
Names and Functions of indicators on Remote Controller
Display Panel
a TRANSMISSION Indicator:
This indicator lights when remote controller transmits signals to indoor unit.
b MODE indicator:
Displays the current operation modes. Including AUTO , COOL
, DRY , HEAT or FAN .
HEAT only available for heat pump model.
c TEMPERATURE indicator:
Displays the temperature settings(17ºC to 30ºC).
d FAN SPEED indicator:
Displays the selected fan speed, AUTO and three fan speed levels LOW , MED , HIGH .
Displays
(flashing) when the operating mode is either AUTO or DRY.
e SLEEP/TURBO indicator:
Each time the Sleep/Turbo button is pushed, the signal displays in the following sequence:
Nothing
Nothing
Nothing appears when the operating mode is either DRY or FAN only
f SWING indicator:
This indicator lights up when the SWING button is pressed.
g TIMER indicator:
The time set for timer operation is indicated. (0.5 ~ 24 hours)
G
NOTE!
All items are shown in the Fig.2 for the purpose of clear presentation But during the actual
operation only the relative functional items are shown on the display panel.
fig. 2
man_S10xx_uk.qxd 02-02-2007 14:39 Pagina 109
 Loading...