EasyManua.ls Logo

Zippity Huntersville ZP19036 User Manual

Zippity Huntersville ZP19036
12 pages
To Next Page IconTo Next Page
Page #1 background imageLoading...
Page #1 background image
WWW.ZIPPITY-OUTDOOR.COM
1
ASSEMBLY
INSTRUCTIONS
ZP19036
WWW.ZIPPITY-OUTDOOR.COM
VER. 031121
ASSEMBLY
INSTRUCTIONS
ZP19036
If necessary, this screen can be trimmed down vercally to t
your custom space. Use a ne-toothed circular or hack saw.
Rails will need to be re-spaced and congured accordingly.
60 MIN
Approximate assembly me for 2 screens
Want to see a video on how to
assemble this product?
Scan the QR code
HUNTERSVILLE
VINYL SCREEN


Question and Answer IconNeed help?

Do you have a question about the Zippity Huntersville ZP19036 and is the answer not in the manual?

Zippity Huntersville ZP19036 Specifications

General IconGeneral
BrandZippity
ModelHuntersville ZP19036
CategoryOutdoor Furnishing
LanguageEnglish

Summary

Huntersville Vinyl Screen Assembly Overview

Product Identification and Specifications

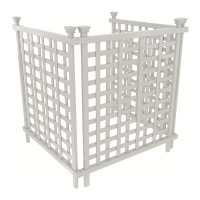
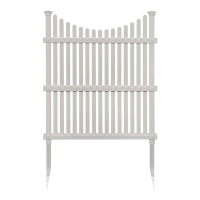
Identifies the Huntersville Vinyl Screen 2-Pack, its dimensions, and estimated assembly time.

Assembly Tips and Video Guide

Notes on vertical trimming and QR code for assembly video assistance.

General Information and Support

Important Assembly Precautions

Advice on checking parts, assembly area, and avoiding excessive force.

Missing Parts and Customer Service

Guidance for ordering replacement parts and customer service contact details.

Product Return Process

Information on how to initiate product returns and resolve issues.

Detailed Product Dimensions

Screen Dimensions Diagram

Visual representation of the screen with all critical dimensions clearly marked.

Step 1: Lay Out Materials

Component Inventory and Identification

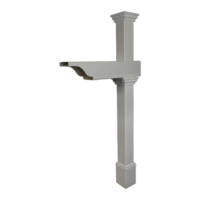
Lists all parts (A-K) with quantities, sizes, and materials required for assembly.

Step 2: Assemble Screen Frame

Step 2.1-2.2: Rail and Post Preparation

Instructions for fitting rail end caps and sliding rails onto posts.

Step 2.3: Securing the Frame

Details on aligning pre-drilled holes and fastening rails to posts with screws.

Step 3: Assemble Fence Panel

Step 3.1: Post Anchor Attachment

Steps to attach post anchors and secure the bottom rail to the posts.

Step 3.2: Picket Installation

Guidance on inserting numbered pickets through rails to lock them into place.

Step 4: Install Screen into Ground

Step 4.1: Screen Positioning

Moving the assembled screen to the final installation location.

Step 4.2: Initial Ground Insertion

Instructions for pushing the screen unit into the ground using post anchors.

Step 4.3: Hard Ground Installation

Hard Ground Installation Method

Procedures for loosening hard soil, adding water, and hammering posts.

Step 4: Install Screen into Ground (Continued)

Step 4.4: Leveling and Backfilling

Adjusting the screen's level and compacting excavated dirt after installation.

Step 4.5: Alternative Hard Ground Method

Method for very hard ground involving digging large holes for posts.

Step 5: Fasten Joiner Clips

Step 5.1: Joining Screens

How to use joiner clips and screws to connect adjacent or corner screens.

Step 6: Fasten Post Caps

Step 6.1: Attaching Post Caps

Instructions for pushing post caps onto the top of the posts to secure them.

Manufacturer Contact Information

Company Address and Phone

Provides Zippity's physical address and phone numbers for support.

Official Company Website

Link to the official Zippity outdoor products website.

Related product manuals