EasyManua.ls Logo

Zippity ZP19052 User Manual

Zippity ZP19052
9 pages
To Next Page IconTo Next Page
Page #1 background imageLoading...
Page #1 background image
WWW.ZIPPITY-OUTDOOR.COM
1
ASSEMBLY
INSTRUCTIONS
ZP19052
WWW.ZIPPITY-OUTDOOR.COM
VER. 020921
ZP19052
ASSEMBLY
INSTRUCTIONS
45 MIN
Approximate assembly me for 3 panels
Want to see a video on how to
assemble this product?
Scan the QR code
LIBERTY
LATTICE
AC SCREEN KIT

Question and Answer IconNeed help?

Do you have a question about the Zippity ZP19052 and is the answer not in the manual?

Zippity ZP19052 Specifications

General IconGeneral
BrandZippity
ModelZP19052
CategoryOutdoor Furnishing
LanguageEnglish

Summary

Liberty Lattice AC Screen Kit Assembly

Product Identification

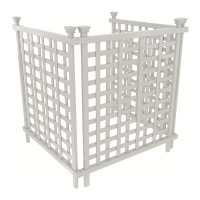
Identifies the Zippity Liberty Lattice AC Screen Kit, 42" H x 36" W.

Estimated Assembly Time

Indicates the approximate time required for assembly.

General Information and Support

Important Assembly Guidelines

Crucial advice for proper assembly and handling to avoid damage.

Parts and Assembly Assistance

Contact details for resolving missing parts or assembly issues.

Product Return Policy

Information on how to initiate a product return and resolve issues.

Product Dimensions and Specifications

Step 1: Lay Out Materials

Step 2: Assemble Horizontal Pickets

Step 2.1: Prepare Rails and End Caps

Instructions for preparing front panel rails with end caps.

Step 2.2: Position Posts

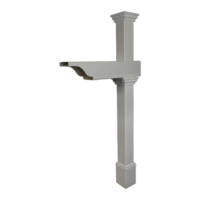
Guidance on positioning the two posts for picket insertion.

Step 2.3: Insert Horizontal Pickets

Procedure for inserting horizontal pickets into the post holes.

Step 3: Install Vertical Pickets

Step 3.1: Attach Bottom Rail and Secure Screws

Attaching the front bottom rail to posts and securing with screws.

Step 3.2: Insert Vertical Pickets

Inserting the vertical pickets into the front bottom rail.

Step 4: Complete the Panels

Step 4.1: Finish Front Panel Assembly

Completing the front panel by attaching the top rail and securing with screws.

Step 4.2: Assemble Side Panels

Repeating the process to assemble the two side screen panels.

Step 5: Connect the Panels

Step 5.1: Join Panels at Right Angles

Connecting the assembled side panels to the front panel using screws.

Step 6: Install Post Caps

Step 6.1: Attach Post Caps

Installing the post caps to complete the screen structure.

Related product manuals