• Fully charge the Jamstik before first powering on using any 2.0A or above USB-A
wall charger or a powered USB-A port on your computer.
• The indicator LED will light up orange while charging, and turn green when
charging is completed.
• For best MIDI performance and latest features/improvements, make sure to
keep your Jamstik MIDI Guitar’s firmware updated.
• Firmware can be updated with Jamstik Software found at jamstik.com/update
on desktop and mobile.
• It is recommended to update firmware on desktop over USB for best update
speed.
• To power on, hold the power button for 1 second. The LED indicator will pulse red at
startup, blink green when ready to pair, and appear solid green when connected.
• To power OFF, hold the power button for 1 second and release.
Charging & Powering Up
Firmware Update
Connect and Pair
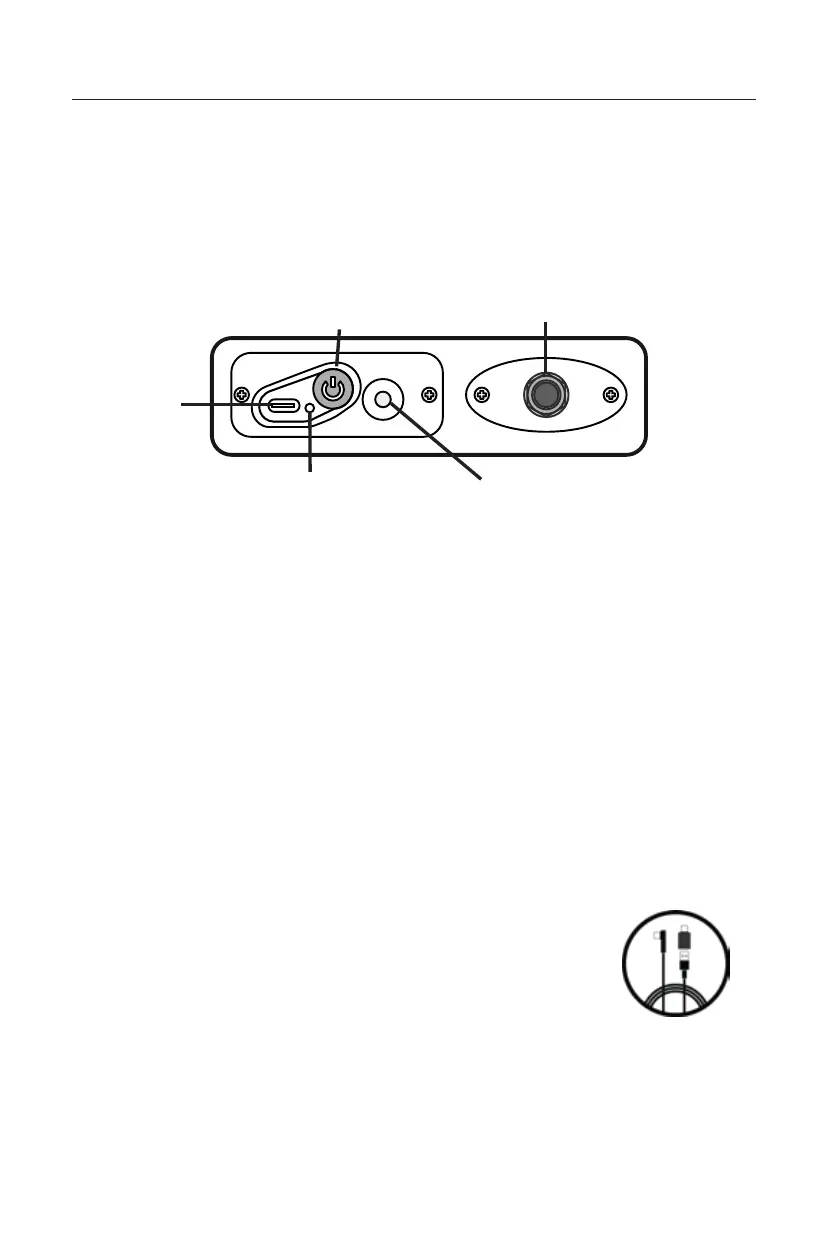
USB-C
Port
Power
1/4”
Analog Out
Charging
Indicator LED
3.5MM TRS MIDI Out
(Not an Audio/AUX Out)
• Connect using the included USB cable or a comparable data-enabled
cable.
• The Power Button will display a solid green state when connected.
• You may also connect over Bluetooth MIDI on Mac by turning on your Jamstik and
opening the Audio MIDI Setup Program, Selecting Window --> Show MIDI Studio in
the top bar, then selecting MIDI Studio --> Open Bluetooth Configuration in the top
bar, and finally clicking the Connect button next to your Jamstik.
• Bluetooth MIDI is not natively supported on Windows but may be possible with
additional third-party software/hardware.
Mac/PC MIDI over USB (Recommended)
Connectivity
4