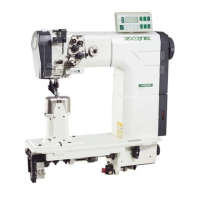
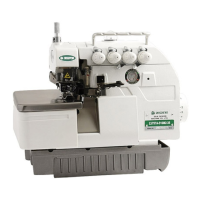
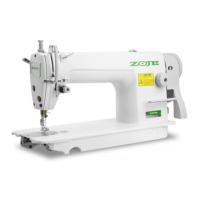
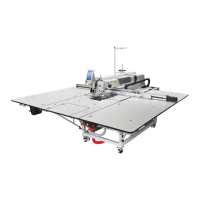
This document provides an instruction manual for the ZOJE A5300 and A5300-D3 sewing machines. It covers safety precautions, installation, operation, and maintenance.
Function Description
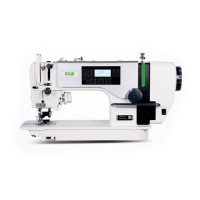
The ZOJE A5300 and A5300-D3 are industrial sewing machines designed for medium-weight materials. They are equipped with features for efficient and precise sewing, including automatic lubrication, adjustable stitch length, and thread trimming. The machines support both manual and knee-controlled presser foot lifting, and offer backstitch and reinforce sewing functions. The treadle allows for variable sewing speeds and thread trimming actuation. The device also includes a bobbin winding mechanism and adjustable thread tension for both bobbin and needle threads.
Important Technical Specifications
- Application: For medium-weight materials
- Max sewing speed: 4500 stitches/min
- Max stitch length: 5-7mm
- Needle type: DB×1 9#~18#
- Presser foot lift height:
- Hand lifter: 5.5mm (Max)
- Knee lifter: 13mm (Max)
- Lubricating system: Auto
- Lubrication oil: 10# White oil
- Motor power: 220V/550W
- Operating temperature range: 5-35 degrees Celsius
- Relative humidity range: 45% - 85% (non-condensing environment)
- Power supply voltage fluctuation: Less than ±10% of rated voltage
- Weight: Approximately 38Kg (sewing machine head)
- Upper thread length after trimming: 25-30mm (standard)
- Standard height of pressure adjusting screw: 32-34mm (approx. 4.5 kgf)
- Standard height of lifting presser foot by hand: 5.5mm
- Standard height of feed dog (medium-heavy machine): 0.8-1.0mm
- Standard height of feed dog (heavy duty machine): 1.1-1.3mm
- Clearance between hook point and needle: 0-0.05mm
- Clearance between trimming cam and ball: 0.6-0.8mm (initial), 0.5mm (after adjustment)
- Engagement between stationary trimmer and movable trimmer: 0.2-0.5mm
Usage Features
- Installation: The machine head is mounted on an oil tray, which is fixed to the sewing table. A plastic rear cover is installed. Proper grounding is required.
- Lubrication: The oil pan should be filled with 10# White oil up to the MAX mark. Refill when the oil level drops below the MIN mark. Splashing oil in the oil sight window indicates adequate lubrication.
- Needle Mounting: The needle is inserted into the needle hole with the indentation aligned to the right and the elongated slot aligned to the left.
- Bobbin Winding: Bobbin thread is wound onto the bobbin by fitting it onto the spool, threading it, and engaging the winding lever. The winding capacity and flatness of the wound thread can be adjusted.
- Threading: The needle thread is guided through specific points on the machine, starting from the thread stand, when the needle bar is at its highest position.
- Presser Foot Lifting: The presser foot can be lifted manually (approx. 5.5mm) or by knee control (up to 13mm).
- Stitch Length Adjustment: The stitch length is adjusted using the needle gauge knob.
- Back Feeding: The reverse feeding wrench is pressed to engage back feeding.
- Backstitch Device: A push-button allows for immediate backstitch, which continues as long as the button is held. A reinforce sewing button enables half-stitch reinforce sewing or continuous reinforce sewing.
- Illumination: An illuminating lamp with adjustable brightness is provided.
- Treadle Operation: The treadle has four operation levels: low sewing speed, high sewing speed, stop (needle in upper or down position), and thread trimming. An auto-lifter function raises the presser foot when the back part of the pedal is lightly depressed.
- Thread Tension Adjustment: Bobbin thread tension is adjusted by a rotating screw on the bobbin case. Needle thread tension is adjusted by turning a tension nut.
- Upper Thread Length after Trimming: The length of the upper thread left in the pinhole after trimming can be adjusted by a nut in the thread clamp.
- Take-up Lever Adjustment: The amount of thread taken up by the take-up lever can be adjusted by moving the right thread hook.
- Take-up Spring Adjustment: The tension and stroke of the take-up spring can be adjusted by screws in the thread clamp.
- Needle Bar Height Adjustment: The height of the needle bar is adjusted by unscrewing a connecting screw and moving the needle bar up or down to align specific marks with the lower bushing.
- Needle and Hook Synchronization: The synchronization is adjusted by rotating the hand wheel to bring the needle bar to its lowest position and then moving the hook to align its point with the needle, maintaining a small clearance.
- Needle and Feed Synchronization: The synchronization is adjusted by loosening set screws on the feed eccentric cam and rotating it to advance or retard the needle timing relative to material feeding.
- Feed Dog Height Adjustment: The height of the feed dog is adjusted by rotating the feed lifting crank after loosening a tightening screw.
- Feed Dog Lean Adjustment: The lean of the feed dog is adjusted by unscrewing a tightening screw in the teeth pedestal and adjusting the eccentric pin.
- Cutting Knife: The machine includes a cutting knife with an on/off switch. The cutting width can be changed by replacing the needle plate assembly.
Maintenance Features
- Daily Cleaning:
- Raise the presser foot.
- Remove the needle plate and clean dust from the feed dog and thread trimmer unit.
- Turn over the machine head.
- Remove the bobbin case and clean dust from the rotary hook. Check for damage to the rotary hook.
- Clean the bobbin and bobbin case.
- Reinstall the bobbin and bobbin case.
- Oil Mass Confirmation: Periodically check the oil amount supplied to the rotary hook using a special oil mass confirmation paper. Adjust the oil mass using the adjusting screw if necessary.
- Thread Trimmer Maintenance: The stationary trimmer can be sharpened if cutting performance deteriorates. Both movable and stationary trimmers can be removed and reinstalled.
- Thread-trimming Device Adjustment: The position of the thread-trimming cam and the positions of the movable and stationary trimmers can be adjusted.
- Cutter Adjustment: The cutter can be adjusted for synchronous or asynchronous operation.
- Part Replacement: The manual provides part numbers for different cutting widths (non-binding and binding configurations) to facilitate replacement.
Safety Precautions
- Always disconnect power and wait at least 5 minutes before opening the control box.
- Prevent liquids from entering the machine.
- Do not use in environments with strong electrical interference.
- Operate within the specified ambient temperature (5-35°C) and humidity (45-85%).
- Turn off power during thunderstorms.
- Do not connect non-USB memory devices to USB ports.
- Installation should be performed by trained technicians.
- Ensure the worktable is fixed if casters are used.
- Operate with both hands when moving the machine head.
- Wear protective glasses and gloves when handling lubricants.
- Never touch the needle or moving parts while the machine is powered on or operating.
- Keep fingers out of the take-up lever protection cover and needle guard bracket.
- Disconnect power before turning over the machine head, removing the hand cover, or leaving the machine.
- Do not remove or mount protection covers while the machine is operating.
- Do not use paint thinner to clean the machine head.
- Wear protective glasses to prevent injury from broken needles.
- Cut off power when threading, changing bobbin/needle, or cleaning.
- Fix worktable casters to prevent movement.
- Install protective devices before using the machine.
- Cut off power before cleaning.
- Only trained technicians should repair and maintain the machine.
- Entrust electrical wiring to professionals.
- Do not alter the sewing machine without authorization.
- Ensure proper grounding.
- Do not bend or fix cables too tightly.
- Do not touch running components when adjusting bobbin thread winding.
- Do not touch the hook or feeding mechanism components when checking oil.
- When adjusting the needle and feed synchronization, avoid turning the feed lifting eccentric cam too far in direction A to prevent needle breakage.
- Retard needle timing to prevent material slippage; advance it to improve thread tightening.
- When carrying the machine, hold the frame body tightly with two people.
- Place the machine on a plain site, clearing any obstructions.