6
SYSTEM COMPONENTS
Part Quantity
7” CRT B/W Monitor 1
Camera 1
Monitor support bracket 1
Support bracket mounting screw 4
Power cable 1
Manual 1
Angle adjustment screw 4
Camera cable 1
Monitor support
Bracket
Angle adjustment
screw
Support
mounting screw
Power Cable
Vibration pad
Camera Cable
Manual Camera
7
SYSTEM COMPONENTS
This monitor can be mounted in dash, hanging or seating in
any position, which ever is suitable to the driver to observe the
images. Take care not to block any necessary viewing area
when mounting.
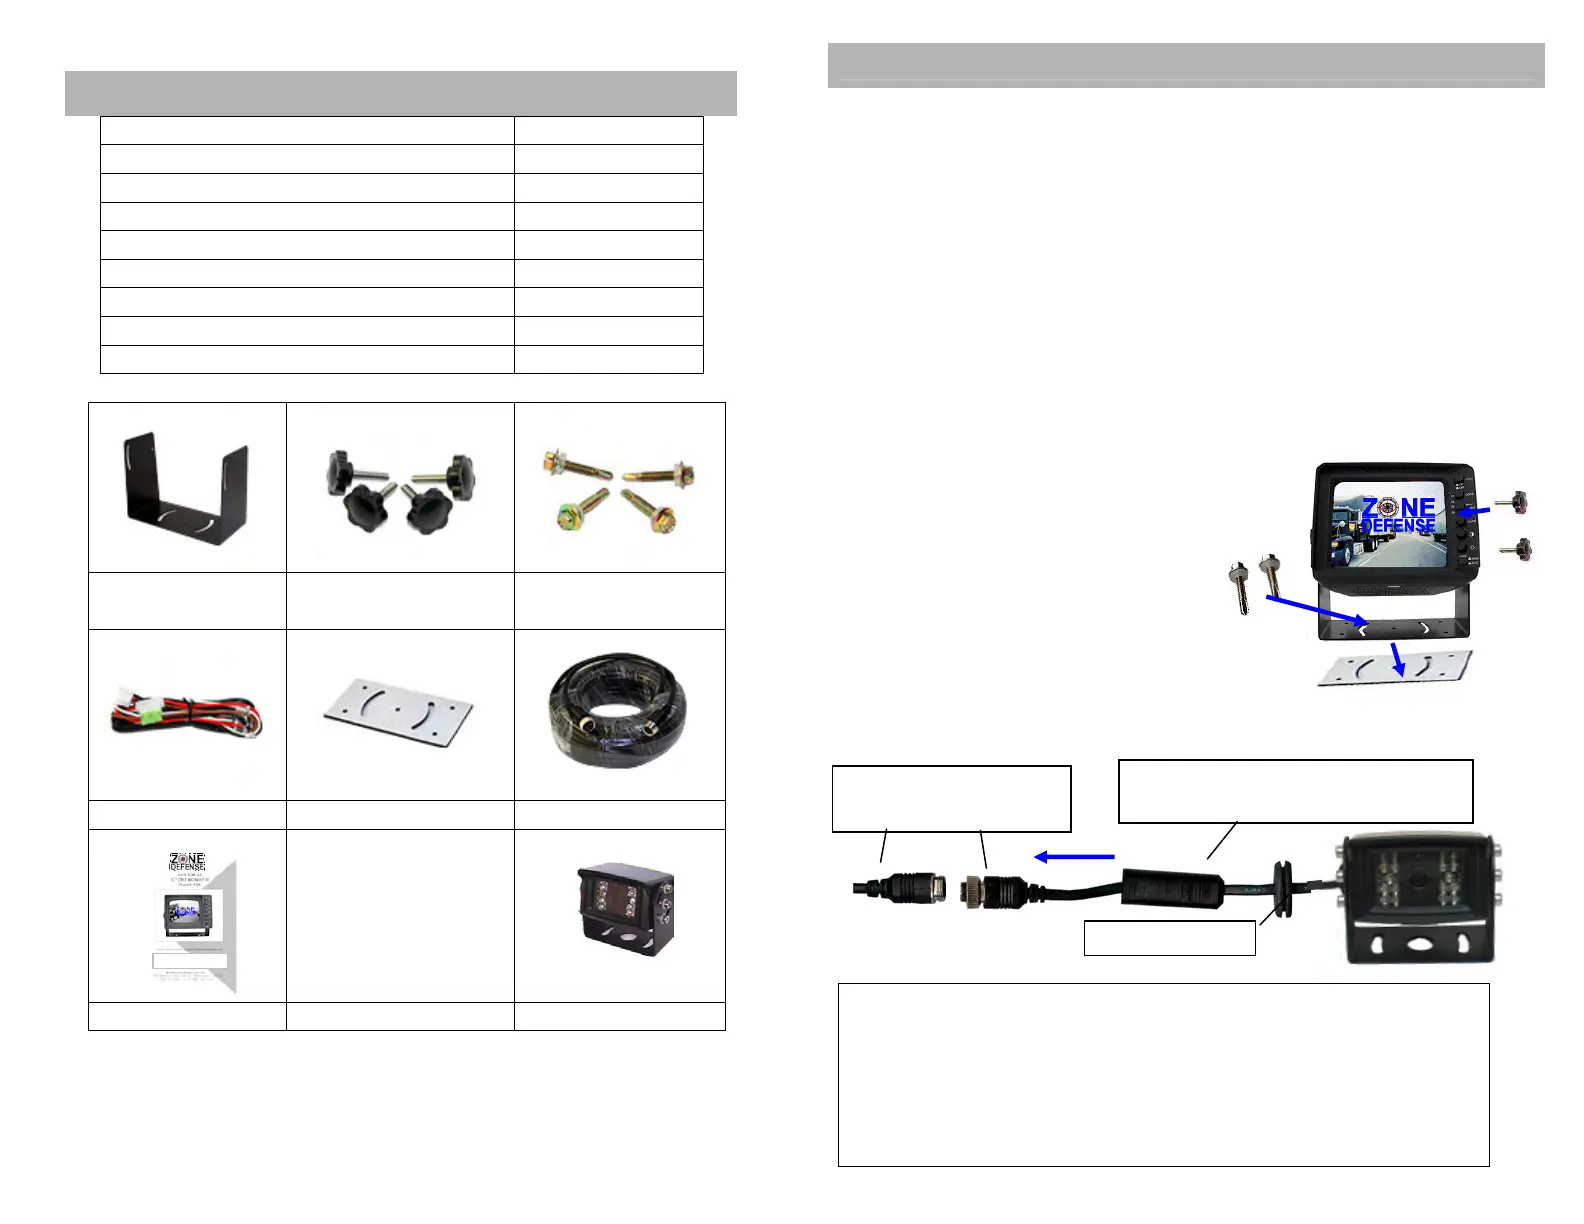
Mounting Monitor
1. After determining the monitor location, position the monitor
support bracket, mark the bolthole location and then drill the
holes. Be careful not to drill into any other surface that may be
hidden.
2. If supplied, use washers on mounting screws. Attach monitor
bracket. Check installation before mounting monitor.
3. Mount the monitor to the support bracket with supplied 4 angle
adjustment screws.
4. Connect one end of the power
cable (wire) to the proper
connections. Connect the other end
of the power cable (plug) to the
monitor; connect the monitor and
the camera with the system
connecting cable.
Camera Mounting
Waterproof Camera
Secondary Waterproof Sleeve
5/8-inch hole needed to pass connector through the
exterior wall. Be careful not to drill a hole so large that the
grommet will not seal. Before drilling make sure there are
no obstacles in the way in the drill bit. Check to make
sure wall thickness is suitable for weatherproofing
grommet. Use proper hardware to mount camera bracket.
 Loading...