1/2 Copyright©2012 ZyXEL Communications Corp. All Rights Reserved
For more information, please refer to the User's Guide at the www.zyxel.com.
IP Address: 192.168.1.2
User Name: admin
Password: 1234
SSID: ZyXEL
Wireless Security: Disabled
Default Login Details
INTERNET
2
1
POWER
12 VDC
ETHERNET
1
2
1
2
Open your web browser.
Starten Sie Ihren Webbrowser.
Abra su explorador de web.
Ouvrez votre navigateur web.
Aprire il browser.
Откройте ваш веб-браузер.
Öppna din webbläsare.
打开 web 浏 览 器 。
開啟您的網頁瀏覽器。
Log in and configure the wireless and wireless security
settings.
Führen Sie ein Login durch, und konfigurieren Sie die
Einstellungen für die Wireless-Funktion und die
Wireless-Sicherheit.
Inicie sesión y ajuste la configuración de seguridad con
cable e inalámbrica.
Connectez-vous et configurez les paramètres sans fil et
de sécurité sans fil.
Eseguire il login e configurare le impostazioni della rete
wireless e le impostazioni di sicurezza della rete wireless.
Войдите в систему и настройте параметры
беспроводной связи и безопасности.
Logga in och konfigurera inställningarna för trådlöst och
för trådlösa säkerhetsinställningar.
登录并配置无线设置及无线安全设置。
登入並進行無線及無線安全措施設定。
Connect to your computer for initial configuration or a
broadband modem/router for Internet access.
Schließen Sie das Gerät für die Erstkonfiguration an Ihren
Computer oder für den Internetzugriff an ein
Breitbandmodem/Router an.
Conecte su ordenador para la configuración inicial o un
módem/router de banda ancha para acceso a Internet.
Connectez à votre ordinateur pour la configuration initiale ou
à un modem/routeur haut débit pour l'accès à Internet.
Connettersi al computer per la configurazione iniziale o a un
modem/router a banda larga per accedere a Internet.
Подключите устройство к компьютеру для
первоначальной настройки или к широкополосному
модему/маршрутизатору для выхода в Интернет.
Anslut till din dator för initial konfiguration eller ett
bredbandsmodem/router för Internet-åtkomst.
连接到电脑来进行初始配置,或者连接到宽带调制解调器/
路由器来访问因特网。
連接至電腦以進行初始設定,或連接至寬頻數據機/路由器以存
取網際網路。
Connect to an appropriate power source. You do not need
to do this if you are using PoE to provide power to your
NWA via an 8-pin CAT 5 Ethernet cable.
Schließen Sie das Gerät an eine geeignete Stromquelle an.
Wenn Sie den NWA mit PoE über ein 8-poliges CAT 5
Ethernetkabel anschließen, ist der Anschluss an eine
Stromquelle nicht erforderlich.
Conecte a una fuente de corriente apropiada. No necesita
realizar esto si utiliza PoE para suministrar energía a su NWA a
través de un cable Ethernet CAT 5 de 8 contactos.
Connectez à une source d'alimentation appropriée. Cela n'est
pas nécessaire si vous utilisez PoE pour alimenter votre NWA
via un câble Ethernet CAT 5 à 8 broches.
Collegarsi a una fonte di alimentazione appropriata. Questa
procedura non è necessaria se si utilizza PoE per fornire
energia al NWA tramite un cavo Ethernet Cat 5 a 8 pin.
Подключите устройство к соответствующему источнику
питания. В этом нет необходимости, если для питания
устройства NWA вы используете технологию PoE через
8-контактный кабель Ethernet CAT 5.
Anslut till en lämplig strömkälla. Du behöver inte göra detta
om du använder PoE för att ge ström åt din NWA via en
8-stiftspin CAT 5 Ethernet-sladd.
连接到正常通电的电源。 如果是使用 PoE 来通过 8 针 CAT 5 以
太网线给 NWA 供电,则不需要这样做。
連接至適當的電源。 如果使用 PoE 透過 8 接腳 CAT 5 型乙太網
路纜線為 NWA 供電,則可省略此步驟。
Initial Configuration
Hardware Installation
Installation der Hardware | Установка оборудования
Instalación del hardware | Maskinvaruinstallation
Installation du matériel | 硬件安装
Installazione hardware | 硬體安裝
Erstkonfiguration | Первоначальная настройка
Configuración inicial | Initial konfiguration
Configuration initiale | 初始配置
Configurazione iniziale | 初始設定
Standard-Anmeldedaten | Данные для входа по умолчанию
Detalles de inicio de sesión predeterminados | Standarduppgifter för inloggning
Informations de connexion par défaut | 默认登录详细信息
Dettagli sull'accesso predefinito | 預設的登入詳細資訊
Quick Start Guide
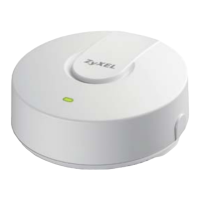
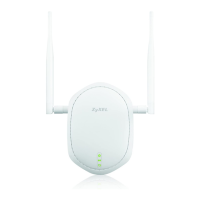
NWA1121-NI





 Loading...