16 17
• Try to aim for a maximum peak of around –6 dB, which corresponds to
around 0.5 on the waveform. You can always boost the level later with Effect
> Amplify... or Effect > Normalize... after you have completed editing.
5. Recording
Then, ignoring any instructions in the manufacturer's guide to select "stereo mix",
simply press the Record button
in Transport Toolbar to start recording from the
turntable.
6. Recording, editing and exporting
Once your USB turntable is set up and working properly, go to the Basic Recording,
Editing and Exporting section of Audacity’s Tutorial - Copying tapes, LPs or
MiniDiscs to CD for instructions on how to:
• make and edit your recording
• export it to an audio file
• import it to iTunes or Windows Media Player
• burn it to CD
Audacity’s reference links:
• Basic Recording, Editing and Exporting : https://manual.audacityteam.org/man/
basic_recording_editing_and_exporting.html
• Tutorial - Copying tapes, LPs or MiniDiscs to CD : https://manual.audacityteam.
org/man/tutorial_copying_tapes_lps_or_minidiscs_to_cd.html
Care
Turntable Body
• When the turntable body is dirty or dusty, first disconnect the AC adapter, and then
wipe off the dirt and dust with a soft, dry cloth.
• Do not use benzenes, thinners, etc.
• When storing the product for a long time, disconnect the AC adapter from the
outlet and wrap the product in plastic; do not allow it to become damp; the drive
belt should be removed to prevent unequal stretching.
Stylus Tip
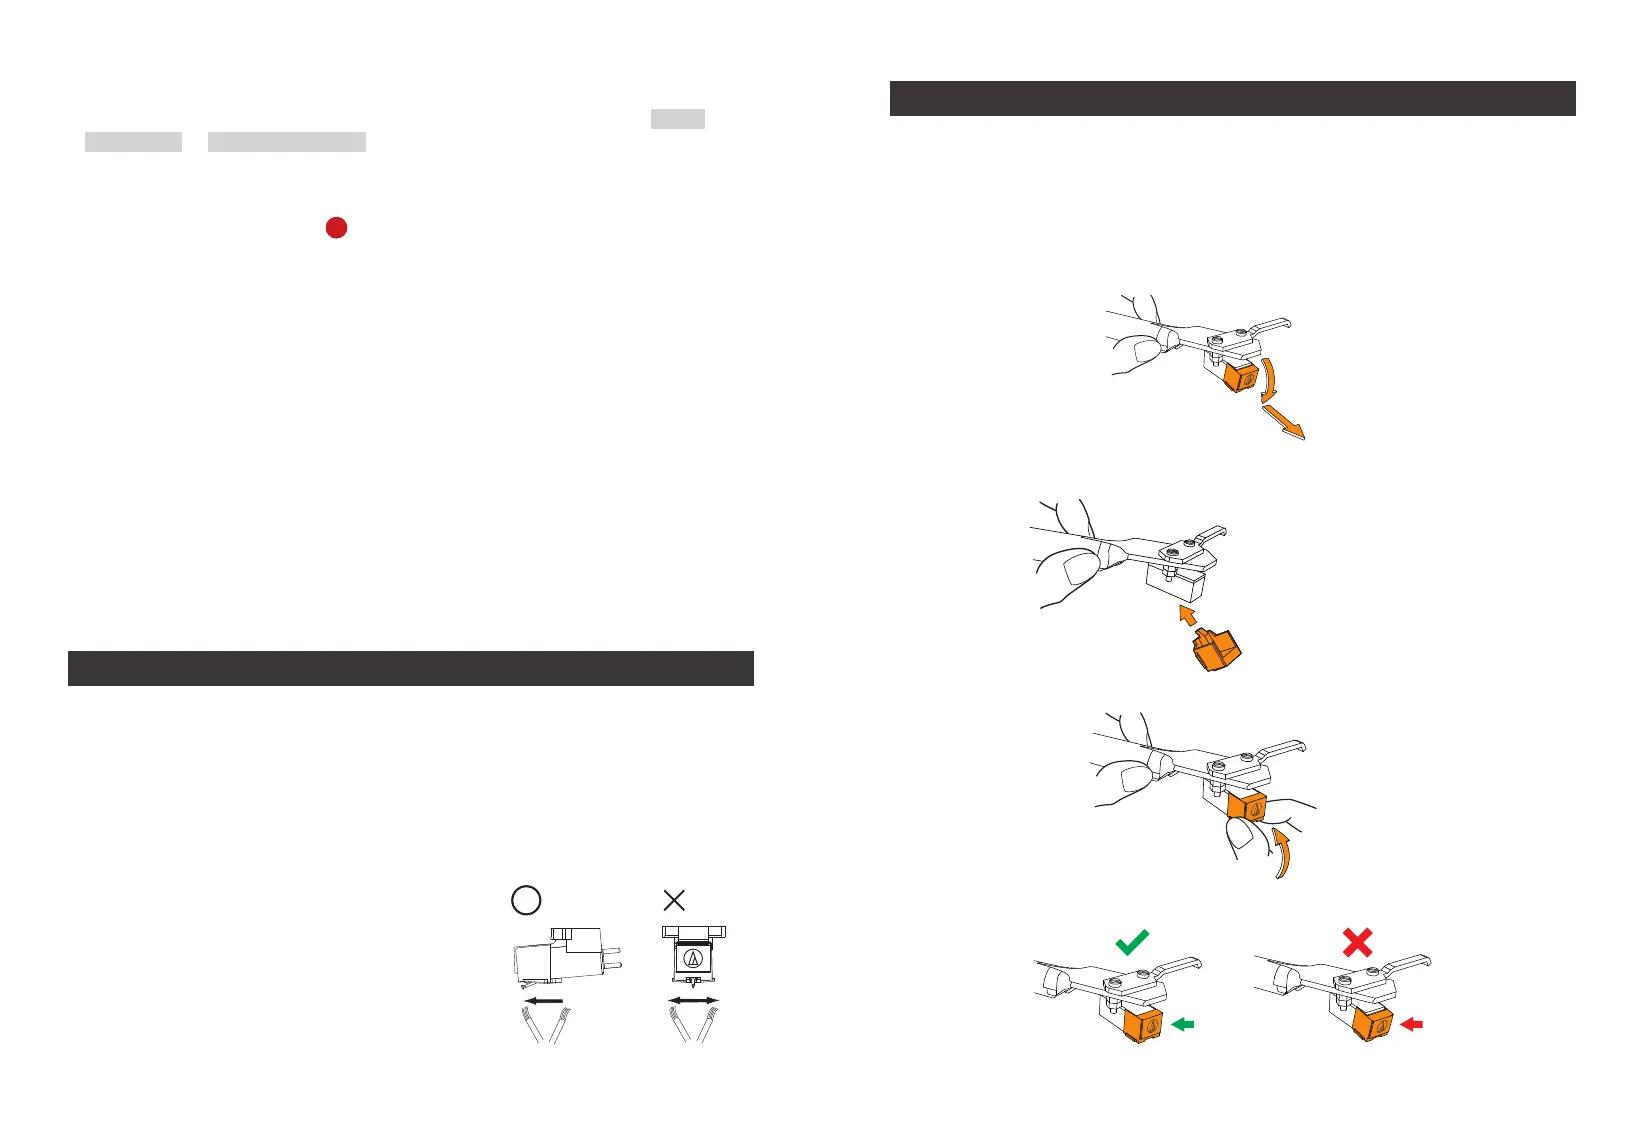
• If dirt and grime are stuck to the stylus tip, clean it
with a commercially sold brush.
• We recommend using a stylus cleaner (not
included) if the stylus tip is considerably dirty.
Clean the stylus tip by moving the brush from the
rear to the front of the stylus tip.
Replacing the Stylus
It's suggested to replace the stylus after 400 hours of use.
Removing the Stylus
• In addition to the deterioration of sound quality, records may also be damaged as
the cartridge’s stylus tip wears down.
• Be sure to disconnect the product’s AC adapter from the outlet.
• When replacing the stylus, hold the headshell and the cartridge body tightly.
Rotate the front of the stylus in a forward and down motion.
Installing a New Replacement Stylus
1. Mount the new replacement stylus to the cartridge.
Engage in body first
2. Lift the stylus up until you hear a click.
3. Make sure there is no gap between the headshell and the cartridge.
 Loading...