13
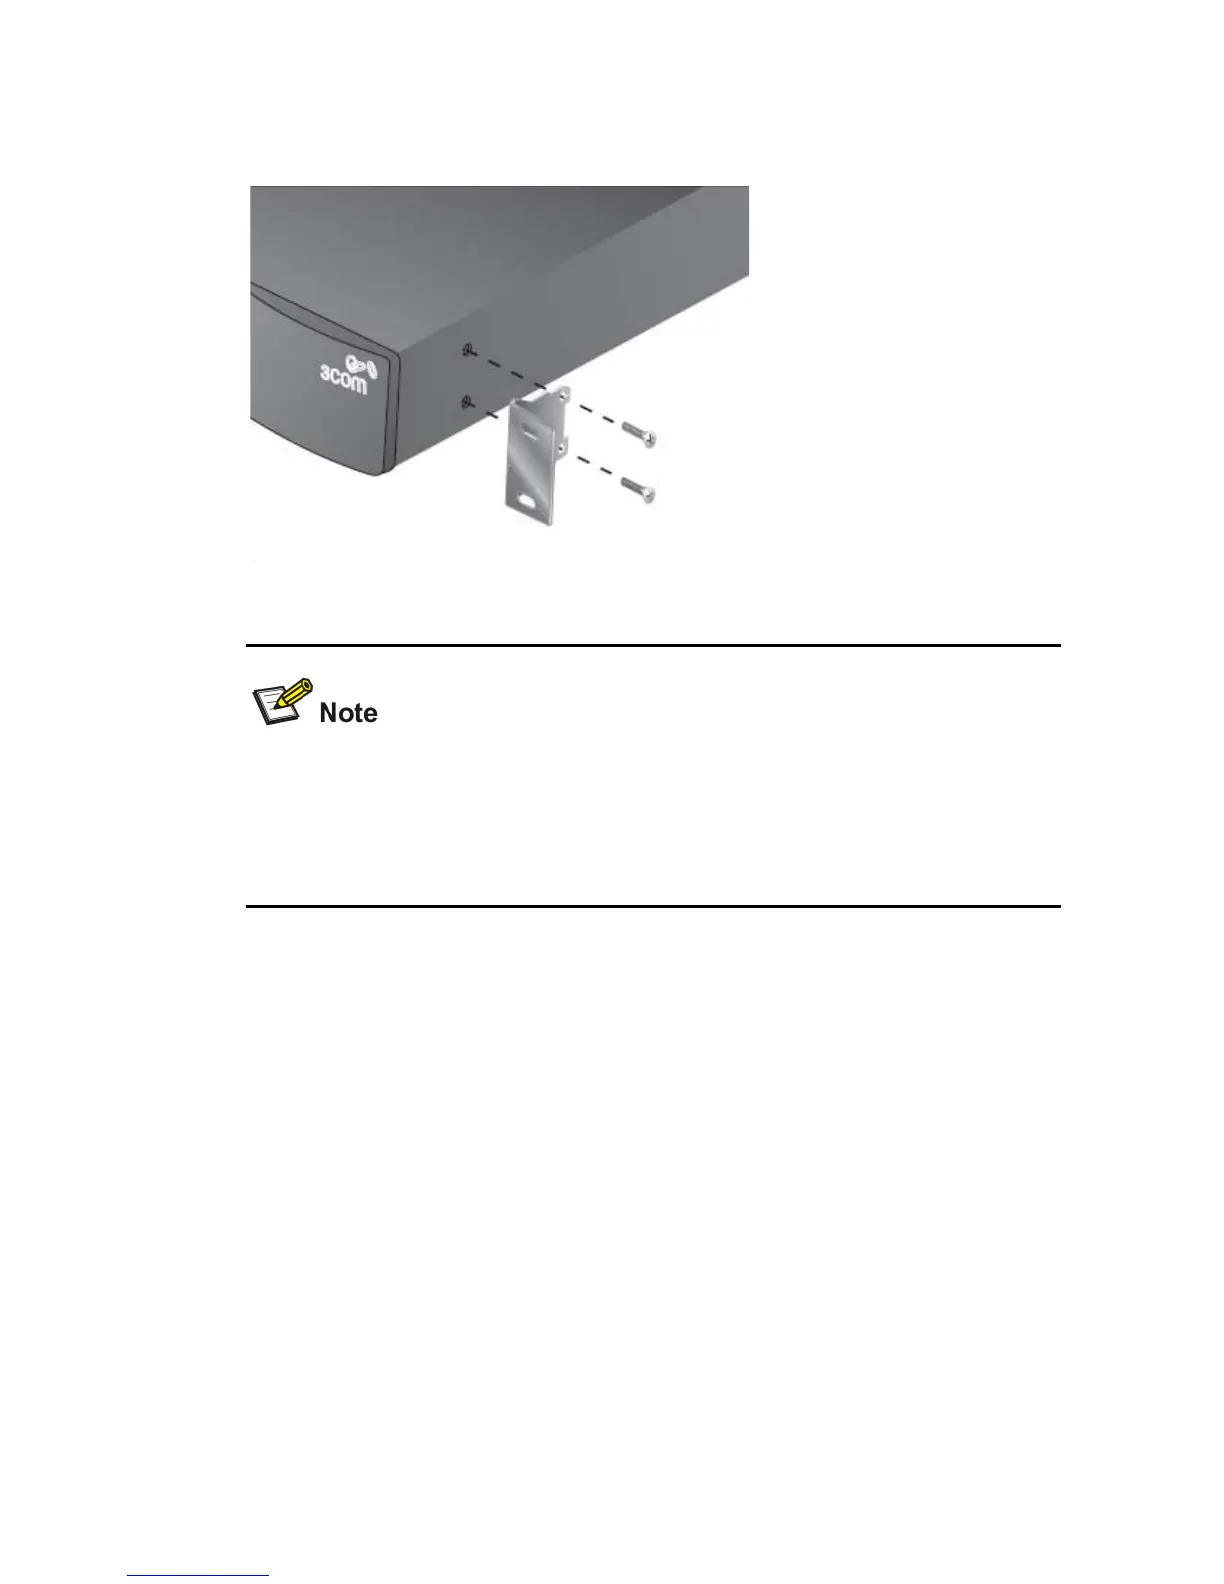
Figure 2-1 Fitting a front bracket for rack-mounting
You must use the screws supplied with the securing brackets.
Damage caused to the unit by using incorrect screws invalidates your
warranty.
4) Repeat steps 2 and 3 for the other side of the switch.
5) Insert the switch into the 19-inch rack and secure with suitable
screws. Ensure that ventilation holes are not obstructed.
6) Reconnect network cables.
Powering On
The following steps describe how to get the switch powered-on and
ready for operation.
1) Check the network connections and cables.
2) Connect the power supply cable to the appropriate power socket
located on the rear panel of the unit.