The traffic prioritization feature supported by the Switch
is compatible with the relevant sections of the IEEE
802.1D standard (incorporating IEEE 802.1p).
2 Activity/Link/Speed Status LEDs
The LED, labelled “Link/Activity,” shows the link and activity
status of the related ports:
3
Power LED
The Power LED shows the power status of the Switch:
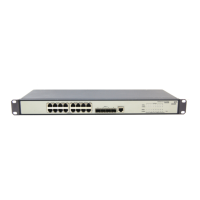
Rear Panel Connections
4 Power Supply
The Switch automatically adjusts to the supply voltage. Only use
the power cord that is supplied with the unit.
Positioning the Switch
When deciding where to position the Switch ensure:
It is accessible and cables can be connected easily.
Cabling is away from sources of electrical noise. These
include lift shafts, microwave ovens, and air conditioning
units. Electromagnetic fields can interfere with the signals on
copper cabling and introduce errors, therefore slowing down
your network.
Water or moisture cannot enter the case of the unit.
Air flow around the unit and through the vents in the side
of the case is not restricted (3Com recommends that you
provide a minimum of 25 mm (1 in.) clearance).
The air is as free from dust as possible.
Temperature operating limits are not likely to be exceeded. It
is recommended that the unit is installed in a clean, air
conditioned environment.
It is always a good practice to wear an anti-static wrist
strap when installing network equipment, connected to a
ground point. If one is not available, try to keep in
contact with a grounded rack and avoid touching the
unit's ports and connectors, if possible. Static discharge
can cause reliability problems in your equipment.
Rack Mounting or Free Standing
This unit can be mounted in a 19-inch equipment rack using the
Mounting Kit. Refer to “Mounting Kit Instructions” on page 4. It
can also be free standing. Do not place objects on top of the
unit or stack.
The unit is supplied with four self-adhesive rubber pads. If the
unit is to be part of a free standing stack, apply the pads to each
marked corner area on the underside of the unit. Place the unit
on top of the lower unit, ensuring that the pads locate with the
recesses of the lower unit.
Do not apply the pads if you intend to rack mount the
unit.
CAUTION: If installing the Switch in a free standing
stack of different sized units, the smaller units must be
installed above the larger ones. Do not build a free
standing stack of more than six units.
Montagesatz Anweisungen
Der Switch wird mit zwei Halterungen und vier Schrauben
geliefert. Diese werde für den Einbau in einen Baugruppenträger
benutzt. Bei der Montage der Baugruppe beachten Sie die
Anweisungen aus “Positioning the Switch”.
ACHTUNG: Entfernen Sie alle Kabel, bevor Sie
fortfahren. Entfernen Sie die selbstklebenden Polster
(Füße) von der Unterseite der Baugruppe, falls diese
bereits angebracht sind.
1 Plazieren Sie die Baugruppe aufrecht auf einer harten,
ebenen Fläche mit der Vorderseite zu Ihnen.
2 Ordnen Sie eine der Halterungen über den Löchern an der
Seite der Baugruppe an.
3 Stecken Sie zwei der mitgelieferten Schrauben in die Löcher
und drehen Sie diese mit einem geeigneten Schraubendreher
fest.
4 Widerholen Sie letzten beiden Schritte auf der anderen Seite
der Baugruppe.
5 Führen Sie die Baugruppe in den 19" (Zoll) Baugruppenträger
ein und sichern sie die Baugruppe mit geeigneten Schrauben.
(Nicht im Lieferumfang enthalten).
6 Schließen Sie alle Kabel wieder an.
Priority Level Traffic Type
0 Best Effort
1 Background
2 Standard (spare)
3 Excellent Effort (business critical)
4 Controlled Load (streaming multimedia)
5 Video (Interactive media), less than 100 milliseconds
latency and jitter.
6 Voice (Interactive voice), less than 10 milliseconds
latency and jitter.
7 Network Control Reserved traffic
Status Meaning
Green The link is operating at 1000 Mbps.
Yellow The link is operating at 10 or 100 Mbps.
Flashing Packets are being received or transmitted on the port.
Off The link has not been established, either nothing is connected
to the port, or there is a problem:
■ Check that the attached device is powered on.
■ Check that the cable is the correct type and is not faulty.
If these checks do not identify the cause of the problem, it
may be that the unit or the device connected to the port is
faulty. Contact your supplier for further advice.
Status Meaning
Green The unit is powered on and ready for use.
Off ■ The unit is not receiving power:
■ Check that the power cord is connected correctly.
■ If the unit still does not operate, contact your supplier.
INSTALLING THE SWITCH
!
!
3