TMA Grand Master 2.0 – User’s Guide 2 TMA Grand Master Hardware
6. Grips for service compartment door
7. Front power supply switch
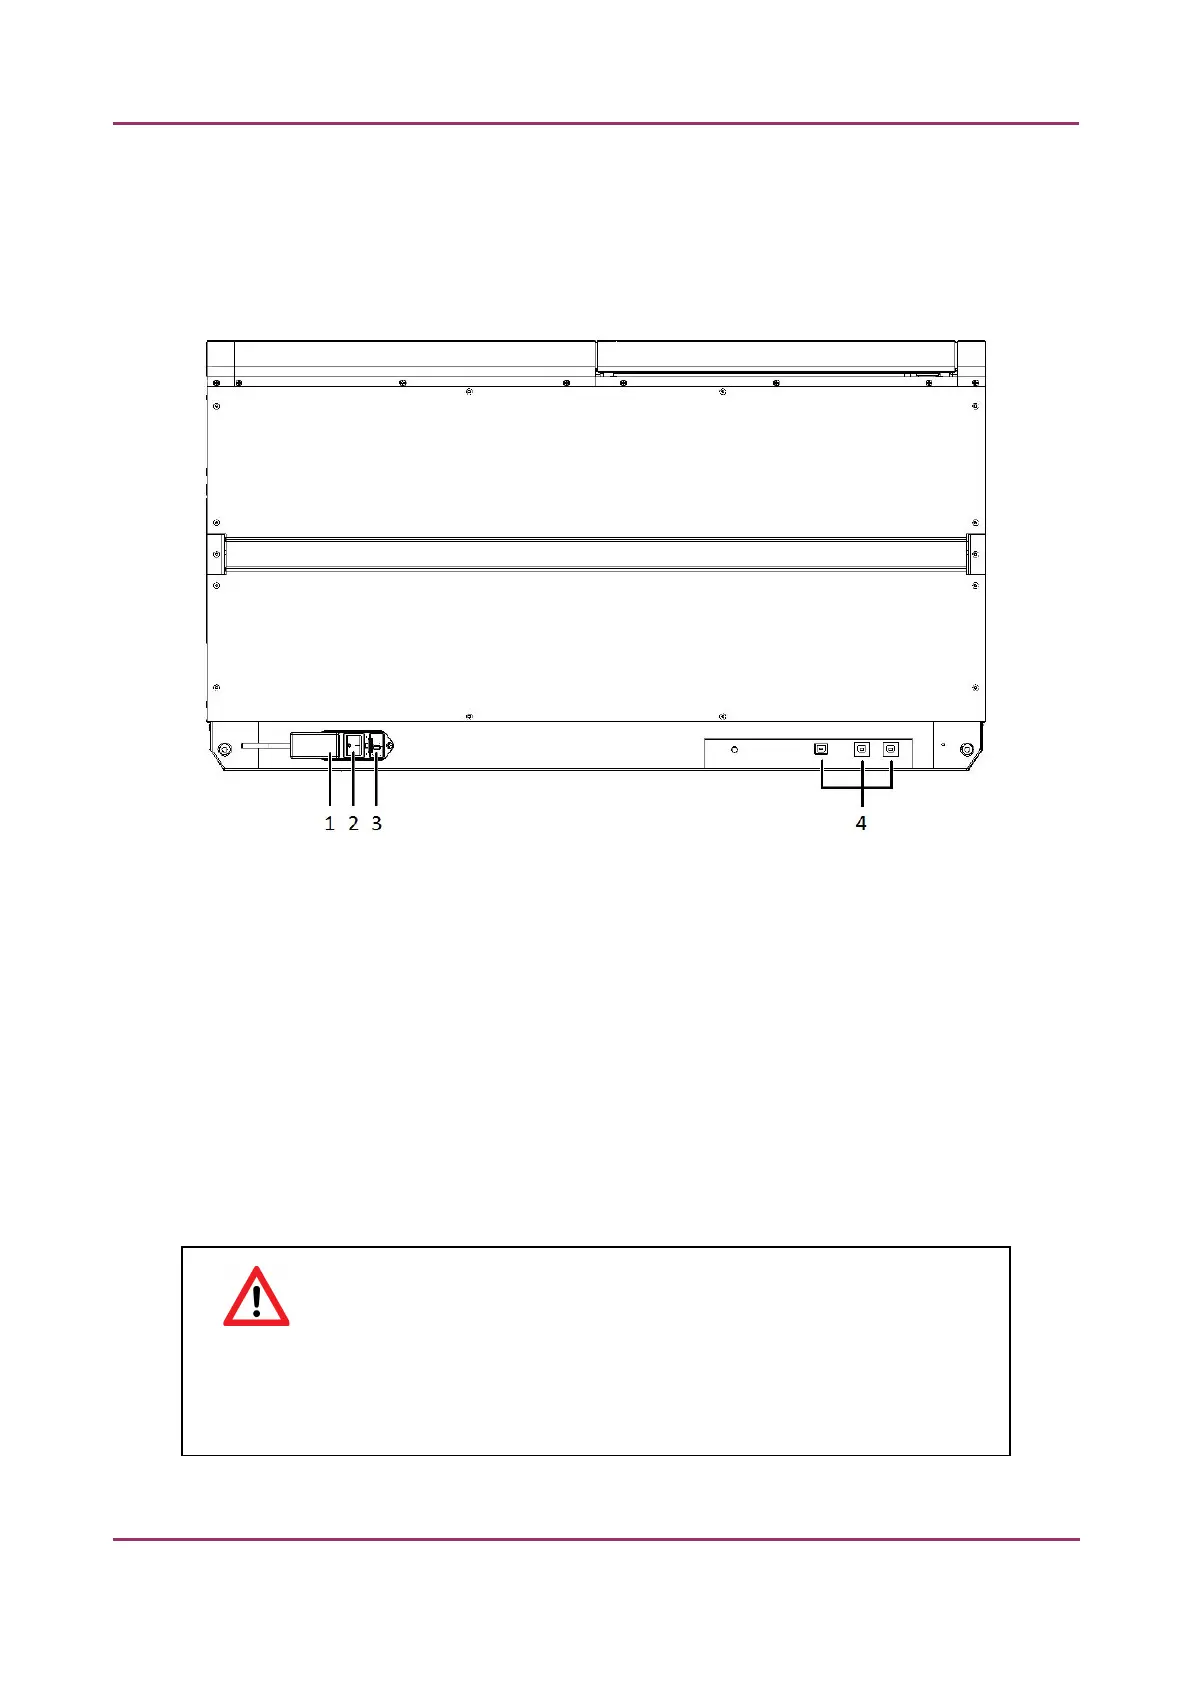
Back View
Figure 2 – TMA Grand Master back view
1. Terminal point for the power supply cord
2. Main power supply switch
3. Fuse compartment
4. USB ports to connect with the computer.
2.2 Cabling
For required cable connections, the supplied cables must be plugged in as shown in the figure above.
To connect the main unit with the computer any of the three USB ports can be used.
Warning!
All cable connections must be checked for firm seating. Defective cables must not be
connected to any part and must be replaced with cables in proper operating condition.
Contact 3DHISTECH support at support@3dhistech.com in such cases.
November 5, 2013 – Rev. 1 3DHISTECH Ltd. 11(72)
 Loading...