A. IMPORTANT WATER QUALITY ASSURANCE
REQUIREMENTS
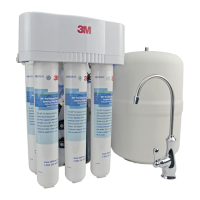
Reverse Osmosis drinking water filtration systems contain
treatment components that are critical for the effective reduction of
Total Dissolved Solids (TDS) as well as some inorganic chemical
contaminants. It is strongly recommended that the user test the water
periodically (every six (6) months minimum) to verify that the system is
performing satisfactorily. Routine maintenance is necessary in the form
of sediment, granulated carbon filter and membrane module, based on
the following guidelines:
• Sediment Replacement Filters, Granulated Carbon Replacement
Filters&CarbonBlockReplacementPost-Filters:Changeevery
twelve (12) months, at the rated capacity or sooner if a noticeable
reduction in flow rate occurs.
• ROMembrane Replacement Module: Change it as required based
on 90 Percent Rejection. The recommended maximum service
life is thirty-six (36) months, at the rated capacity or sooner if a
noticeable reduction in flow rate occurs.
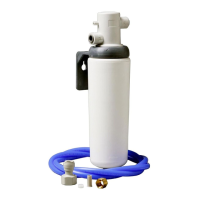
How Much Water Should the Tank Hold?
The amount of water the storage tank will hold is determined by the
air precharge and the feed water pressure. The RO system will fill the
tank until the pressure in the tank reaches two-thirds of the feed water
pressure. With an air precharge of 7-8 psi (48-55 kPa), the following
chart lists approximate storage capacities when the tank is full:
Feed Water Pressure Tank Capacity
80 psi (552 kPa) 2.2 gallons (8.3 liters)
60 psi (414 kPa) 2.1 gallons (7.9 liters)
40 psi (276 kPa) 1.5 gallons (5.7 liters)
B. REPLACING THE FILTERS
NOTE: It is essential that the filters be installed in the correct
location. Use the icon coded labels to match the filter cartridges with
their corresponding filter head.
The life of the filters generally depends on the local water conditions
(i.e., sediment, rust and/or chlorine levels) while the life of the post-filter
is generally determined by the length of service.
When to Replace the Sediment Replacement Filter
• Every twelve (12) months or sooner depending on local water conditions.
• Anoticeabledecreaseinwaterproductionisanindicationthatthe
filter requires changing.
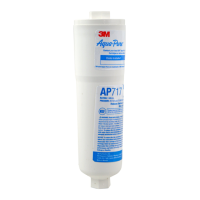
When to Replace the Granulated Carbon Replacement Filter
The granulated carbon replacement filter reduces free chlorine in the
feed water supply to protect the TFCM membrane from chlorine attack. To
find out the chlorine level in a water supply, call the public water supplier.
When to Replace the Carbon Block Replacement Post-Filter
• If the filter is being used to control tastes and odors, replace it every
twelve (12) months or sooner depending on local water conditions.
How to Replace the Filters (See Fig. 9 for filter identification)
1) Lift up on the faucet handle and close the cold water feed valve. Wait
five (5) minutes for the filtration assembly to completely depressurize.
2) Remove cover.
3) Twist the existing filter 1/4 turn to the left so that the ears on the
filter are able to disengage from the head. Firmly pull the filter from
the head. It may be necessary to twist the filter slightly from side
to side to help free it.
4) Remove the new replacement filter from its protective wrap.
(Double check to see that it is the correct replacement by
comparing the labels.)
5) Remove the protective sanitary cap from atop the replacement filter.
6) Ensure both o-rings are present on the replacement filter and are
seated into grooves; moisten o-rings with water. DO NOT use any
petroleum products to lubricate the o-rings.
7) Line up the filter ears, insert the filter and push it into the head until it
is fully seated. Twist the filter 1/4 turn to the right to lock it into place.
(See Fig 7)
8) Open the cold water feed valve, and carefully check for leaks.
9) RO System Flush Instructions
Sediment&GranulatedCarbonReplacementFilters—Closetank.
Lift the faucet handle and flush at least two (2) gallons of water
through system (approximately 10 minutes).
Carbon Block Post-Filter — Open tank. Lift the faucet handle
and flush at least two (2) gallons of water through post-filter
(approximately 30 minutes with tank empty or 5 minutes with
tank full). It may be necessary to continue flushing until water
becomes clear.
C. REPLACING THE RO MEMBRANE MODULE
The life of the RO membrane module depends on the local water
conditions and proper maintenance, e.g., regular module changes.
Undertypicalconditions,theROmembranemodulelifeisthirty-six(36)
months or sooner. Unlikethe replacement filters, the RO membrane
module life is not determined by the amount of water used because of
its self-cleaning feature.
How to Replace the RO Membrane Module
1) Lift up on the faucet handle and close the cold water feed valve.
Wait five (5) minutes for the filtration assembly to completely
depressurize.
2) Remove cover.
3) Make sure that there is some slack in the red SFC tubing
connected to the fitting at the bottom of the RO membrane
module. Twist the module 1/4 turn to the left (counterclockwise)
so that the tubing connection is accessible. (See Fig 7)
4) Remove existing red SFC tubing from faucet adapter and membrane
module by depressing the small collet and pulling the tubing away
from the fittings.
II. Operation & Maintenance Instructions
10
Failure to install, operate or maintain your filter system in accordance with these use instructions or
any other installation or use instructions accompanying this product may result in product failure and
property damage, including water leakage and will void warranty.
•Replacement of filters will result in the need to sanitize the filtration
system and/or the storage tank. Please refer to Section D “Sanitizing
the RO System” on page 11 for further instructions.
IMPORTANT NOTES
 Loading...