EasyManua.ls Logo

3M Filtrete 3M-10 - User Manual

3M Filtrete 3M-10
10 pages
Print Icon
To Next Page IconTo Next Page
Loading...
ENGLISH
Install Guide 3M-10
Question and Answer IconNeed help?

Do you have a question about the 3M Filtrete 3M-10 and is the answer not in the manual?

Summary

Installation Preparation and Safety

Thermostat Installation Safety Precautions

Essential safety warnings to prevent electrical shock and system damage during installation.

Optimal Thermostat Location Guidelines

Recommendations for placing the thermostat on an inside wall for accurate temperature sensing.

Physical Installation Procedure

Labeling Wires Before Removal

Crucial step to label wires from the old thermostat before disconnecting them to ensure correct wiring.

Mounting the New Thermostat Base

Steps for attaching the 3M-10 thermostat base to the wall, including drilling and anchor use.

Wiring Connections and Wire Labels

Safe Wire Connection Practices

Guidelines for stripping wires, connecting them to terminals, and preventing shorts.

Understanding Wire Labels and Terminals

Explanation of wire labels (R, W, G, Y, etc.) and their corresponding thermostat terminals.

Wiring Diagrams for Basic Systems

Wiring Diagrams for Non-Heat Pump

Wiring Diagrams for Heat Pump Systems

Wiring Diagrams and Product Features

Overview

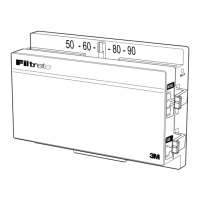
The 3M-10 Filtrete thermostat is a versatile digital control unit designed for a wide range of heating, ventilation, and air conditioning (HVAC) systems. It provides precise temperature management for your home, offering both heating and cooling functionalities. This guide outlines its installation, features, and basic operation.

Function Description

The 3M-10 thermostat serves as the central control for your HVAC system, allowing you to set and maintain desired indoor temperatures. It is compatible with most 24-volt gas, oil, or electric heating and air conditioning systems, including heat pump systems (with or without auxiliary heat), normal 2-stage systems, zoned hot-water systems, zoned forced air systems, and gas millivolt heating systems. It is important to note that this thermostat cannot be used with 120-volt heating systems.

The thermostat operates by sensing the ambient room temperature and activating your heating or cooling system to reach the temperature you have set. Its digital interface allows for accurate temperature adjustments. For cooling, it incorporates a 5-minute minimum off time, which is a crucial feature designed to protect your air conditioning system from potential damage that can occur from short cycling.

Usage Features

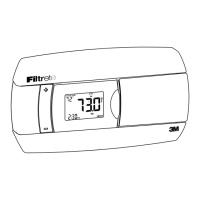
The 3M-10 thermostat is designed for straightforward operation. Temperature control is managed by setting a dial, which allows you to program your desired heat and cool temperatures. The unit does not contain mercury, making it an environmentally conscious choice.

For installation, the thermostat should be located on an inside wall, approximately 5 feet (1.5 meters) above the floor, in a room that is frequently used. Proper placement is critical for accurate temperature readings and efficient system operation. Avoid installing it in locations with unusual heating or cooling conditions, such as direct sunlight, near heat-emitting appliances (lamps, radios, televisions, radiators, fireplaces, hot water pipes in walls, or stoves), or in areas with drafts (from stairwells, doors, or windows) or poor air circulation (corners, alcoves, or behind open doors). It should also not be installed in damp areas, as this can lead to corrosion and shorten the thermostat's lifespan. The unit does not require leveling.

The thermostat features a MODE switch with settings for OFF, HEAT, and COOL, and a FAN switch with settings for AUTO and ON. These switches allow you to select the operating mode of your HVAC system and control the fan independently.

The 3M-10 can be powered in two ways:

  1. Batteries only: It requires two AA alkaline batteries for operation. These batteries are expected to last well over a year. If the batteries are not replaced when they run low (indicated by a low battery indicator on the right side of the unit), the thermostat will cease to function.
  2. C wire (common wire): If your HVAC system has a C wire available, the thermostat can draw continuous 24VAC power from it. When the C wire is used, batteries are not needed, and their lifespan can be extended significantly if used as a backup.

The installation process involves several steps:

  • Preparation: Before starting, disconnect the power supply to your furnace and air conditioner at the circuit breaker or appliance to prevent electrical shock and damage. You will need a #1 Phillips screwdriver (small) and a drill with a 3/16-inch (4.8mm) bit.
  • Removing the old thermostat: Carefully remove the cover of your old thermostat. Note the letters printed near the terminals and attach the provided labels to each wire one at a time. It is crucial to label all wires before disconnecting them, as there is no standard color code for these wires. Once labeled, remove the wires from the terminals and ensure they do not fall back into the wall (winding them around a pencil can help). Remove the old thermostat and fill any wall opening with fiberglass insulation to prevent drafts.
  • Mounting the 3M-10: Separate the front of the new unit from its back base. Hold the base against the wall, feeding the wires through the opening below the terminal block. Position the base for optimal appearance. Attach the base to the wall using the two screws provided. If mounting to drywall or using old mounting holes, use the plastic anchors provided, drilling a 3/16-inch (4.8mm) hole for each screw insert.
  • Wire Connections: The manual provides detailed wiring diagrams for various HVAC systems (2-wire, 3-wire, 4-wire non-heat pump, 5-wire non-heat pump, normal 2-stage heat, heat pump without auxiliary heat, and heat pump with auxiliary heat). You must identify your specific system type and follow the corresponding diagram. When connecting wires, strip insulation 3/8 inch (9.5mm) from the wire ends, connect labeled wires to the corresponding terminals, bend the wire slightly, insert it under the contact plate, and tighten the screw. Ensure wires do not touch each other or other parts of the unit and are routed through the hole in the back plate, below the terminal block, to prevent interference with the cover.
  • Gas-Electric Selection: A jumper on the circuit board needs to be set based on your heating system type. If you have electric heat or a heat pump, place the jumper in the "ELECT" position (thermostat controls the fan). If you have gas heat, place the jumper in the "GAS" position (furnace controls the fan).
  • Battery Installation: After wiring, switch the MODE to OFF and FAN to AUTO. Insert two AA alkaline batteries, observing the correct polarity.
  • Final Assembly: Once wiring is complete, attach the control unit to the wall unit by hooking the top of the body onto the base, swinging it down, and snapping it into place.

Maintenance Features

The 3M-10 thermostat requires minimal maintenance. The primary maintenance task involves replacing the batteries. It is recommended to replace the batteries once a year or when the low battery indicator appears on the right side of the unit. If the thermostat is powered by a C wire, battery replacement will be less frequent, as the batteries will primarily serve as a backup.

To verify correct installation and functionality, perform the following checks:

  • Fan Check: Switch the MODE to OFF and the FAN switch to ON. Verify that air is blowing from the vents. After the test, return the FAN switch to AUTO and the MODE switch to HEAT or COOL.
  • Heat Mode Check: Set the MODE switch to HEAT and the FAN switch to AUTO. Adjust the temperature control to raise the target temperature to 90°F. Wait 5 minutes and verify that heat is blowing from the system.
  • Cool Mode Check: Set the MODE switch to COOL. Adjust the temperature control to 5°F below the room temperature. Wait 5 minutes and verify that cool air is blowing from the system.

If these checks are successful, your unit is correctly installed. Remember that the Mode Switch must be in HEAT or COOL for the system to operate. The thermostat's robust design and simple interface contribute to its ease of use and long-term reliability.

3M Filtrete 3M-10 Specifications

General IconGeneral
Brand3M Filtrete
Model3M-10
Allergen ReductionYes
Electrostatic ChargeYes
TypeFilter

Related product manuals