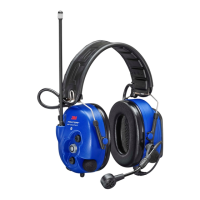
9
voice message. To turn the volume off, press the – button
(A:11) for two seconds. This is conrmed by the message
“radio volume off”. Press the + button (A:10) to switch this
function back on.
Note! No radio communication can be heard when the
volume is switched off.
Note! When the volume is switched off the other menus will
not be available.
3.5 Channel (radio frequency)
Press the + button (A:10) or – button (A:11) to select bet-
ween eight available channels. Each change is conrmed by
a voice message. See table H Radio channel frequencies.
3.6 VOX (voice-operated transmission)
VOX enables LiteCom to transmit automatically when sound
above a certain level reaches the microphone. This allows
radio transmission without pressing the PTT button (A:14).
Press the + button (A:10) or – button (A:11) to adjust the
sensitivity of voice operated transmission. Each change is
conrmed by a voice message. You can choose between ve
levels or switch this function off. When the level is low it is
easier to transmit. To switch this function off, press the – but-
ton (A:11) for two seconds. This is conrmed by the message
“VOX off”. The PTT button (A:14) must now be used to
transmit. Press the + button (A:10) to switch this function
back on. Alternatively switch voice-operated transmission on
or off by briey press the PTT button twice. A voice message
conrms the current VOX setting.
The radio has a Busy Channel Lock Out (BCLO) function that
prevents VOX operation if the channel is being used for other
transmission. An audible tone indicates that the channel is
already being used. Note! To activate the VOX function the
speech microphone (A:8) must be very close to your mouth,
1–3 mm (gure G). The user’s voice will be heard in the
headset when the radio is transmitting.
3.7 Squelch (hiss reduction)
“Squelch” means that background hiss in the earphones is
prevented when the incoming signal is below the set squelch
level. Press the + button (A:10) or – button (A:11) to adjust
the squelch level. Each change is conrmed by a voice
message. You can choose between ve levels or switch this
function off. A low squelch level may permit longer range.
To switch this function off, press the – button (A:11) for two
seconds. This is conrmed by the message “squelch off”.
Press the + button
(A:10) to switch this function back on.
3.8 Sub channel (selective squelch )
Sub channel allows multiple groups of users to use the same
channel without hearing other groups. When sub channel is
active, an inaudible code will be transmitted with speech, and
this code is used to ”open” the receiver of other users of the
group. This allows multiple groups of users to use the same
channel without hearing other groups. This product supports
Continuous Tone Coded Squelch System (CTCSS), which me-
ans there are 38 codes which have been assigned the num-
bers 1–38 (table I, CTCSS). All communication on a channel
can be heard if this function is switched off.
Note! When the sub channel function is switched on, all other
incoming radio communication will be blocked. Press the +
button (A:10) or – button (A:11) to select the sub channel.
Each change is conrmed by a voice message. You can
choose between 38 tones or switch this function off. To switch
this function off press the – (A:11) button when sub channel 1
is selected, or press the + (A:10) button when channel 38 is
selected. This is conrmed by the message “sub channel off”.
Press the + button (A:10) to switch this function back on.
3.9 PTT (Push-to-talk)
Press and hold the PTT button (A:14) to transmit manually
using the radio. PTT transmission works at any time, regard-
less of BCLO (Busy Channel Lock Out, see 3.6 VOX).
3.10 Reset to factory defaults
To restore the default settings the unit must rst be switched
off. Then press and hold the + (A:10) and – (A:11) buttons
at the same time while also pressing the (A:9) On/Off/Mode
button. This is conrmed by the voice message “restore
factory defaults”.
4. IMPORTANT USER INFORMATION
Caution! The noise reduction may be lower when eyeglas-
ses, goggles or respirator straps are worn between the
sealing surface of the earmuff cushions and the sides of the
wearer’s head. For best noise reduction, select eyeglasses or
goggles that have thin, at temples or straps which will mini-
mize interference with the seal of the earmuff cushions. Pull
long hair back to the extent possible and remove other items
that may degrade the earmuff seal such as pencils, hats,
jewelry or earbuds. Do not bend and reshape the headband
as this will cause a loose t and allow sound leakage.
Warning! These hearing protectors help reduce exposure to
hazardous noise and other loud sounds. Misuse or failure to
wear hearing protectors at all times when exposed to hazar-
dous noise may result in hearing loss or injury. This product
contains metallic components that may increase electrical
hazards. For proper use, see supervisor, Fitting Instructions,
or call 3M Technical Service (In U.S.A. call 1-800-243-4630.
In Canada, call 1-800-267-4414)
5. MAINTENANCE (gure J)
5.1 Removing/replacing ear cushions
(J:1) Slide your ngers under the edge of the ear cushion and
pull straight out.
(J:2) Insert a new ear cushion by pressing until it snaps into
place.
5.2 Care and Cleaning Instructions
• Follow recommended care and cleaning instructions in
order to maintain best noise reduction and function.
• Wash outside of earmuffs only. Use mild soap and water.
Do not immerse in water. Remove cushions or liners which
have become damp and allow them to dry before reinstalling.
• Do not clean with solvents such as alcohol or acetone, or
EN

 Loading...