15
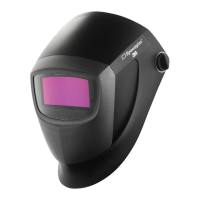
c. To replace the battery, on the side of the welding lter, locate the small cutout. Pry the battery holder
out with a ngernail or small screw driver. Replace with a new CR2450N disc style battery and
reinsert the battery holder (Fig. 12). All of the indicator lights on the welding lter should illuminate to
give a visual conrmation of power.
1.
2.
d. Reinstall the welding lter into the welding shell by rst aligning the tabs on top, resting the welding
lter in place, and nally sliding the locking mechanisms down into the lock position with an audible
“click” (Fig. 13).
Fig. 12
Fig. 13

 Loading...