Installation
March 2014 – Revision 2.0
Page 14 of 74
3M™ Drive-Thru Systems Model G5 and Model XT-1
Installation Manual
3M
TM
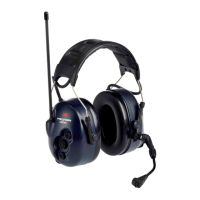
Drive-Thru Headset Charging Station, G5:
Headset Charging Station, G5 uses the same power adapter as the basestation.
Perform the following steps to install and use the Headset Charging Station, G5
• Select a placement location, either
A flat, dry surface such as a desktop or shelf.
An easy-to-reach wall location if you have the optional wall-mount
bracket.
• The power cord should be in place where it cannot be pinched or bent
• Install the wall-mount bracket on the wall, if applicable.
• Place the charger on the wall-mount bracket or surface.
• Connect the power supply transformer between the wall receptacle and
the charger.
• Insert a G5 Headset (with a G5 battery in it) into the Headset bay on the
charger.
Alternatively, you may insert the G5 battery to be charged into a slot on
battery bay of the charger.
• The LED lights on the battery will light up indicating the level of
charge. Each LED indicates a charge of 25%. When all LEDS are lit
green, the battery is fully charged.
• When charging is complete, the batteries are ready for use.

 Loading...