Installation
March 2014 – Revision 2.0
Page 16 of 74
3M™ Drive-Thru Systems Model G5 and Model XT-1
Installation Manual
Notes:
A fully discharged (dead) battery can take as long as 3 ½ hours to recharge.
Fully charged batteries should be stored whenever they are not in use.
Leaving them on the charger does not harm them or waste energy.
Install the Order Point Speaker and Microphone Assemblies
Use the recommended speaker and microphone systems listed below and follow
the included instructions:
• 3M™ Microphone Assembly. Part # 78-6911-4935-1
• 3M™ Speaker Assembly, Duplex, 5 inch. Part # 78-6911-4411-3
For information on wiring the speaker and microphone to the base station, see
“Base Station to Component Wiring,” page 24.
Note: Solder and insulate, using heat shrinkable crimp caps, all connections
including loop, microphone and speaker.
It is recommended that the microphone and speaker be acoustically separated by
treating the speaker post with the 3M Acoustic Kit. For more information refer
to “3M™ Acoustic Kit Installation Guide” in the appendix section on page 65
Install the Vehicle Detector(s)
Follow the instructions provided with the vehicle detectors for installing the
detector loop(s), speakers, and microphones.
For information on wiring and configuring the vehicle detector(s) to the base
station see “Base Station to Component Wiring,” page 24.
For information on installing the vehicle detector circuit boards in the base
station, see “Installing Accessory Boards in the Base Station” on page 30
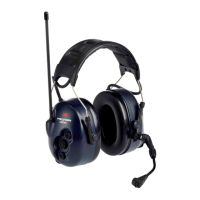
Assemble the 3M™ Drive Thru Headset G5
The components that make up a 3M™ Drive Thru Headset G5 are packaged and shipped
as individual parts:
3M™ Control Pod, G5 (includes a pack of ID Tags)
3M™ Carrier, G5 (includes a pack of ID Tags) and
3M™ Battery, G5
Use the instructions below to assemble these parts to make a fully functional headset.
Installing ID Tags
In 3M
TM
drive-thru systems with Reminder and Alert features in V5 release software
installed, you can (by installing ID tags on each headset ) easily
- Assign and identify headsets to crew members
- Attend to hygiene concerns
Each Control Pod and Carrier shipped has a bag enclosed with 8 different colored tags
that can be interchanged by the staff. The Control Pod and Carrier come pre-installed
with Black ID Tags. The colors included in the bag are:
Red, Green, Blue, Yellow, Purple, Black, White, Orange
Follow the procedure below to install ID Tags:
• Remove the existing ID Tag from the Control Pod and Carrier as shown below
• Replace this Tag with one of your choice from the bag of ID Tags

 Loading...