4.0 Getting to Know your A2B
If after reading this section you still have questions, ask your A2B specialist dealer to explain any functions or characteristics that
are unclear to you before your first ride.
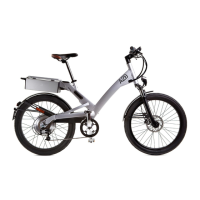
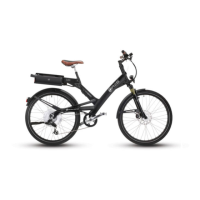
4.1 An A2B overview
The A2B is equipped with a force sensor.
As soon as you begin to pedal you will
discover that the motor starts up and
assists you - making cycling an effortless
pleasure. In addition to this pedalling
assistance you'll find next to the left grip a
starting aid which accelerates the motor -
regardless of your pedalling power - up to
20 km/h.
4.2 Your first trip
1. Put your helmet on and choose a quiet
location away from cars, obstacles or other
hazards.
2. Make certain the battery is charged and
connected.
3. Activate the system with the electronic
key (see 4.3).
4. Do NOT sit down on the A2B while it is
still on its kickstand. You will damage the
kickstand and possibly the frame.
5. Mount your A2B and find a comfortable
sitting position.
6. Step on the pedals to start the motor
assistance.
7. Test the brakes at slow speed. The left
brake lever operates the front brake, the
right brake lever operates the rear brake.
Pulling the brake lever too tightly may block
the wheel, causing you to lose control of
the bicycle and fall down.
Please remember that a motor cut-out
is integrated in the right brake lever. The
electric power supply to the motor is cut
off the moment you activate the right brake
lever. Therefore, do not keep the right brake
lever operated when you want the motor to
run.
8. Try the handling and response of your
A2B. Familiarise yourself with how the
suspension responds when you operate the
brakes and when you shift your weight.