12 RHD250 to 4000 (Contrac) ELECTRICAL ROTARY ACTUATOR | SEI/RHD250/4000-EN REV. A
… 4 Maintenance
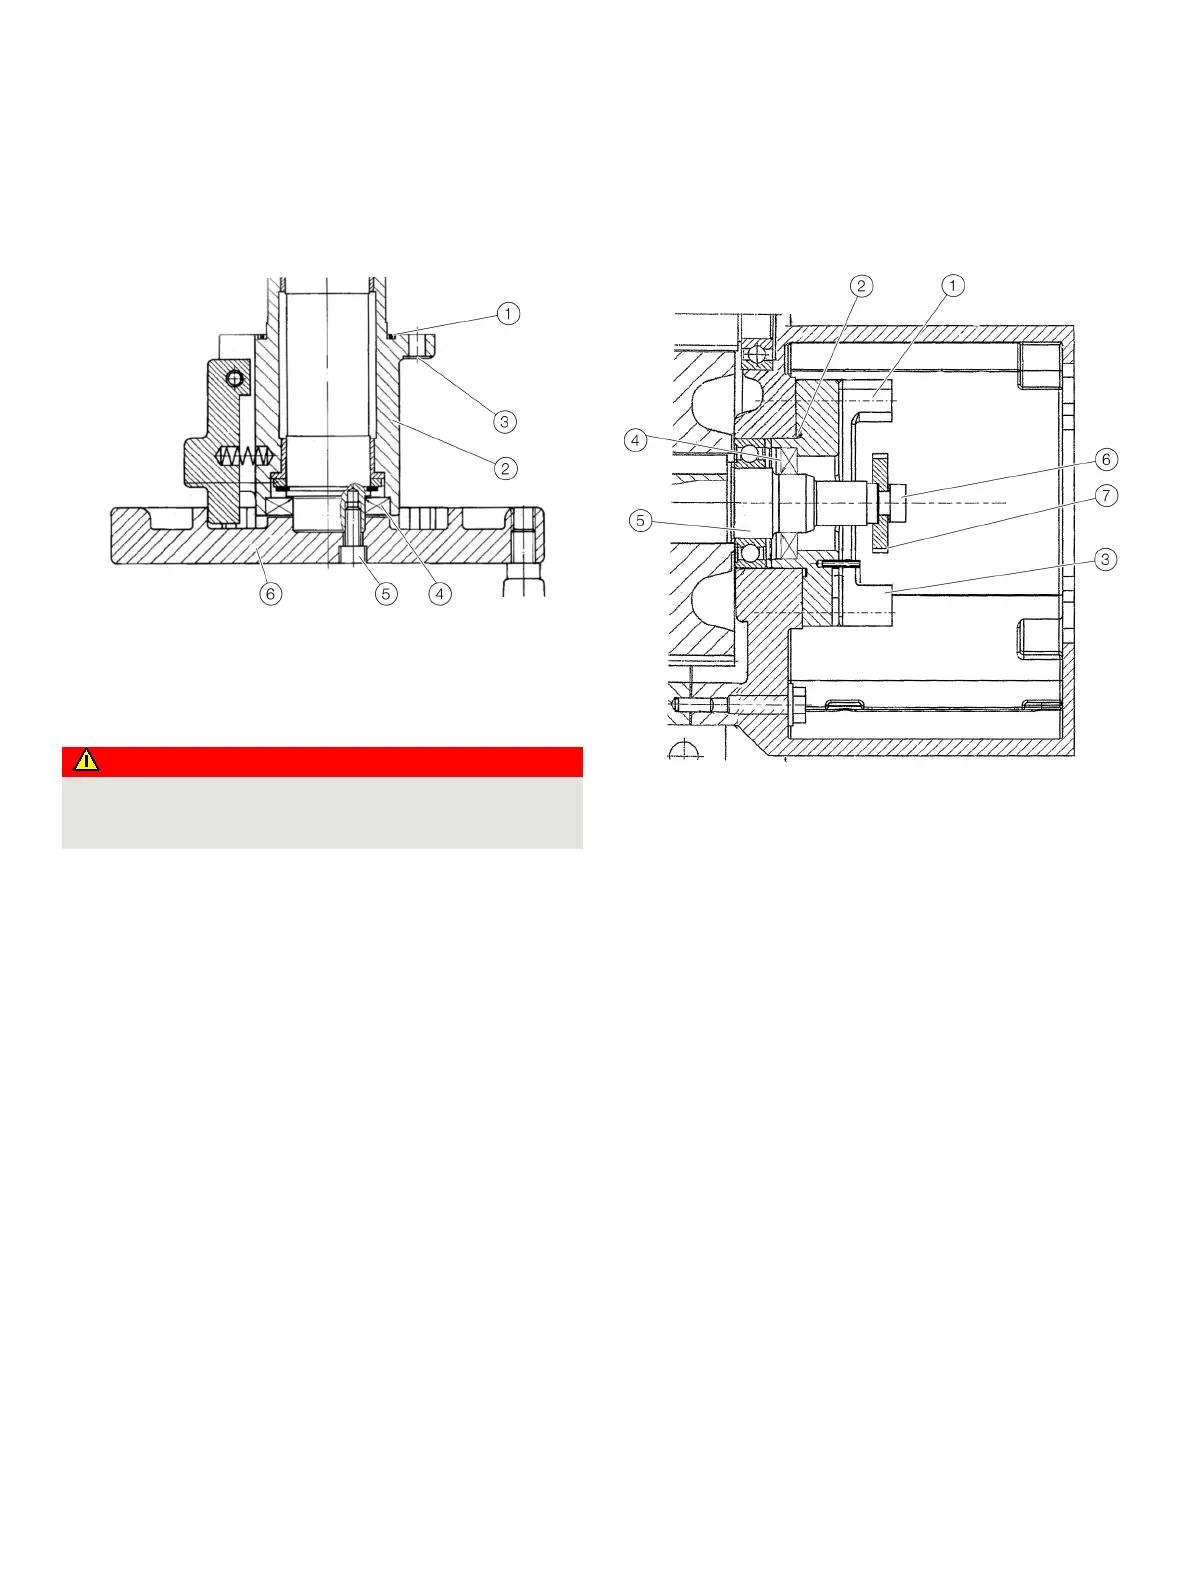
Sealing ring of hand wheel drive / hand
wheel shaft
O-ring
Housing flange
Flange screws
Sealing ring
Screws
Hand wheel
Figure 9: Handwheel
Danger to life due to unexpected movement of the actuator!
Restoring process forces may move the actuator when you
In order to change the handwheel O-ring
1 of the drive proceed
as follows:
1. Make sure that the oil level is below the O-ring
1.
2. Drain the oil if necessary (see Oil change on page 6 for
details).
3. Turn flange screws
3 out.
4. Pull entire hand wheel drive assembly out of the gearing
engagement.
5. Replace the O-ring
1.
6. If additionally the shaft sealing ring
4 needs to be replaced,
turn the wheel fastening screws
5 out and put the hand
wheel
6 aside.
7. Take the shaft sealing ring
4 out.
8. Grease the new the shaft sealing ring
4 slightly with oil and
put it into the groove; consider the exemplary hints and
illustration of Sealing ring of output drive shaft on page 11.
9. Fasten the hand wheel
6 and re-install the entire assembly;
tightening torque for the screws
3 = 20 Nm (15 ft-lbs).
Sealing of the position sensor drive
RHD250...RHD800
Flange fastening screw
O-ring
Flange
Sealing ring
Shaft
Hexagon screw
Pinion
Figure 10: Position sensor drive
In order to change the O-ring
2 and the sealing ring 4, firstly
remove the position sensor Dismounting on page 27 and
proceed as follows:
1. Make sure that the oil level is below the O-ring
2.
2. Drain the oil if necessary (Mounting position on page 6 for
details).
3. Loosen the hexagon screw
6 and pull apart the pinion 7.
4. Undo flange fastening screws
1.
5. Pull the flange
3 with sealing ring 4 carefully from the
shaft
5 and put it aside.
6. Replace the O-ring
2.
7. Pull the old sealing ring
4 out of the groove.
8. Grease the new sealing ring slightly with oil and put it in.
9. Clean the shaft and the contact surfaces of the flange.
10. Carefully push the flange
3 with O-ring 2 and sealing
ring
4 on the shaft; take care that the shaft end does not
damage the sealing ring.
11. fasten the flange
3 and thighten the screws 1 crosswise
with 8.3 Nm (6.12 ft-lbs).
12. fasten the pinion
7 and tighten the hexagon screw 6 with
42 Nm (31 ft-lbs).
 Loading...