EN 6 Installation
3.1 Installation
The electrical, ventilation and execution
technical installation has to be executed
by a certified fitter in accordance with the
current national and local regulations. For
custom made versions of the extractor,
please consult the enclosed installation
instructions.
We do not accept any responsibility if
the extractor is not installed, fitted and
used in accordance with the current
regulations and stated instructions.
3.2 Fitting
First determine the cut out in the ceiling in
view of the cooking hob; reinforce this cut
out with a recessed beam frame. The
beam itself should be at least 36mm thick.
If fitted with a top connection it is
preferred to have the beams parallel with
the short sides because of the protection
cap of the position indicator.
If combined with the optional flat duct
system, the beams have to be parallel
with the duct direction. If the beams are
parallel with the long side, an extra cut out
has to be made in the front beam
approximately next to the position
indicator.
Chapter 3
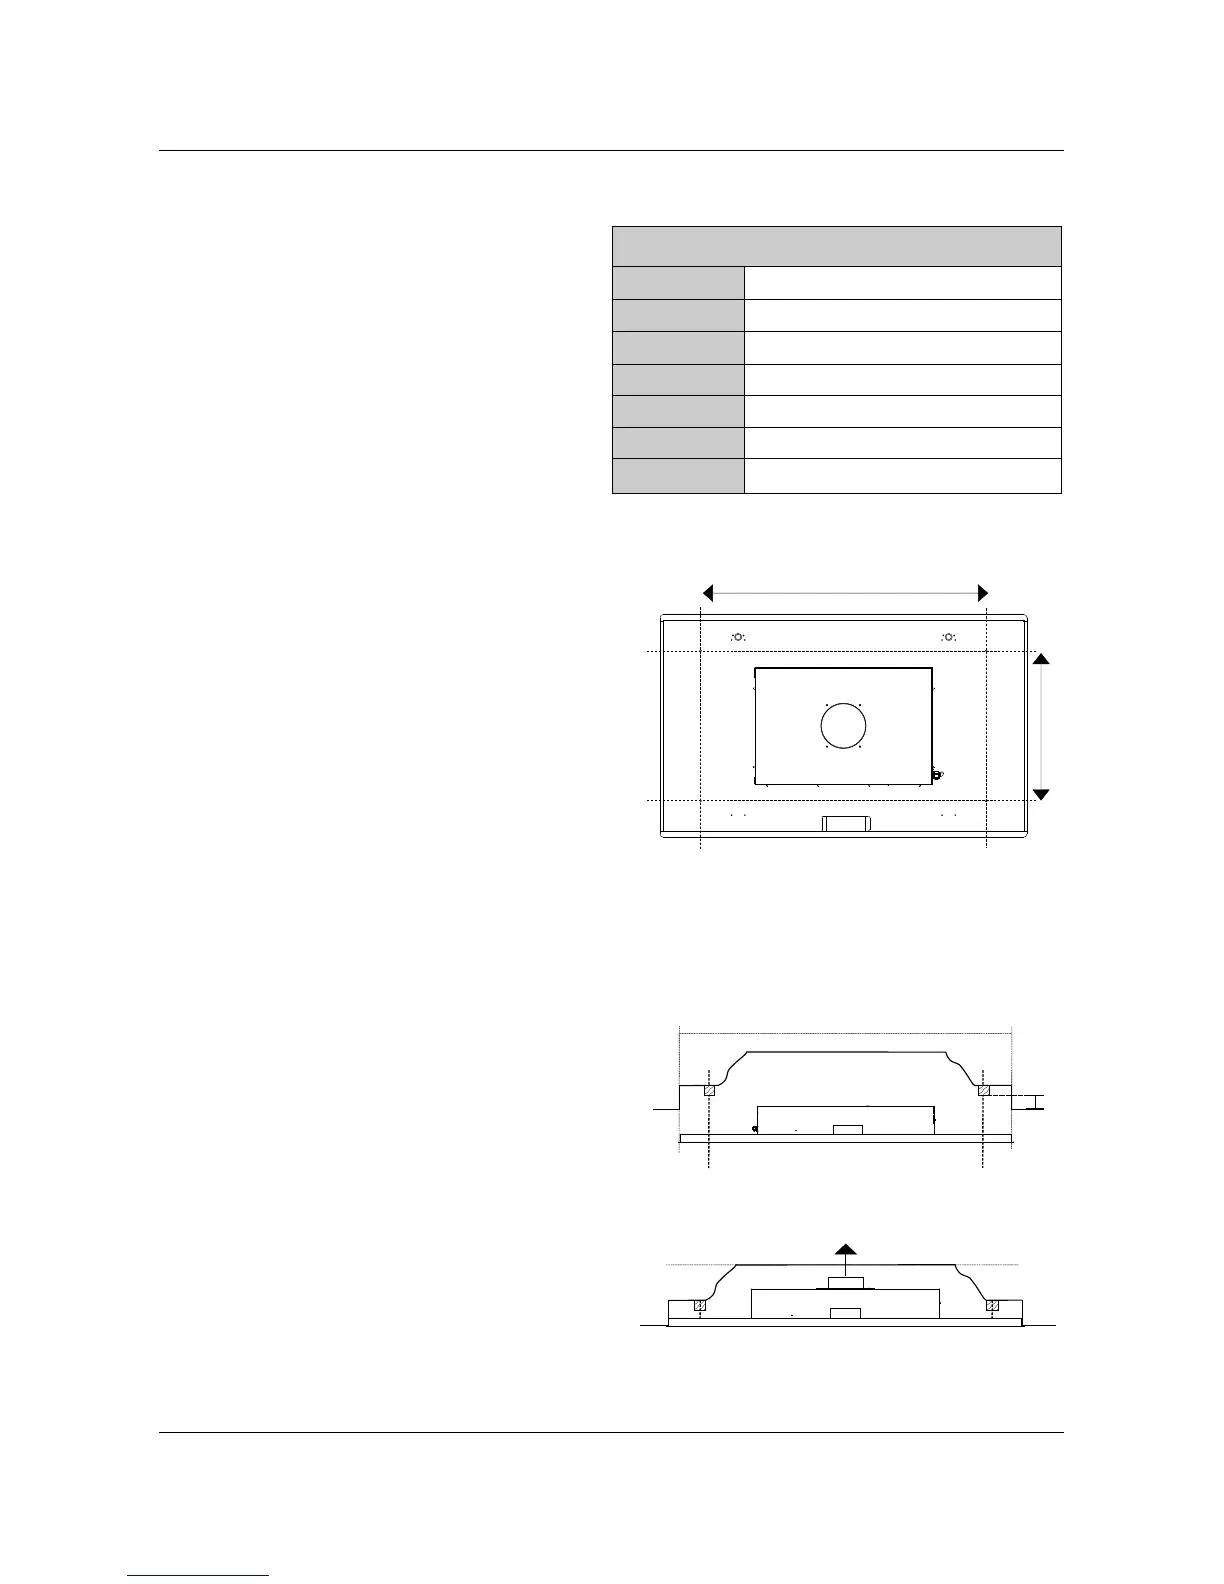
Y
X
above termination
Z
Cut out measure around +5mm
of underbox excl. flange
dimension [mm] X Y Z
800x500 750 430 >36
1200x500 950 430 >36
1200x700 950 500 >36
1500x500 1250 430 >36
1500x700 1250 500 >36
1500x700* 542-315-542 600 >36
1800x700* 693-315-693 600 >36
* double panels
Remove the connection cable on the book screws and a liquid thread locker.
NEERIM extractor unit and connect it to a Connect the lamp connectors. Place the
power socket which has to be fitted inside safety chains.
the space where the extractor is to be built
in.
If a minilift is used during the fitting,
remove the perimeter extraction panel.
Unhook the little safety chains on the front
side and disconnect the light plugs on the
rear side with the hinges.
Loosen the book screws in the hinge
construction on the rear side. Attention:
these are locked with a liquid thread locker
(such as Loctite®).
Mount the extractor as close as possible
to the ceiling.
To reduce resistance, keep the ducting
traject as short as possible and fit it in a
smooth run with as few bents as possible.
Always use a duct as large as possible,
never smaller then the connector on the
external motor or extractor itself.
Connect the connector cable again with
the extractor. Connect the 7-core cable
with the external motor. Place the
extractor in the cut out in the ceiling.
Fit the extractor to the beams with the
supplied screws.
Replace the perimeter extraction panel as
it was removed. Fit the panel with the
EN 7 Installation
(01)
 Loading...