Page 6 of 16 Copyright © Access-IS 2018
2.3 Mounting
The ADR100 is an OEM device designed for integration into self-service kiosks. The device has
been designed for indoor and outdoor use, under all lighting conditions and weather – overcast,
bright sun, rain.
Warning: The quality of the UV image can be adversely affected in high brightness conditions due
to UV light emitted from the sun being transmitted through the scanned document.
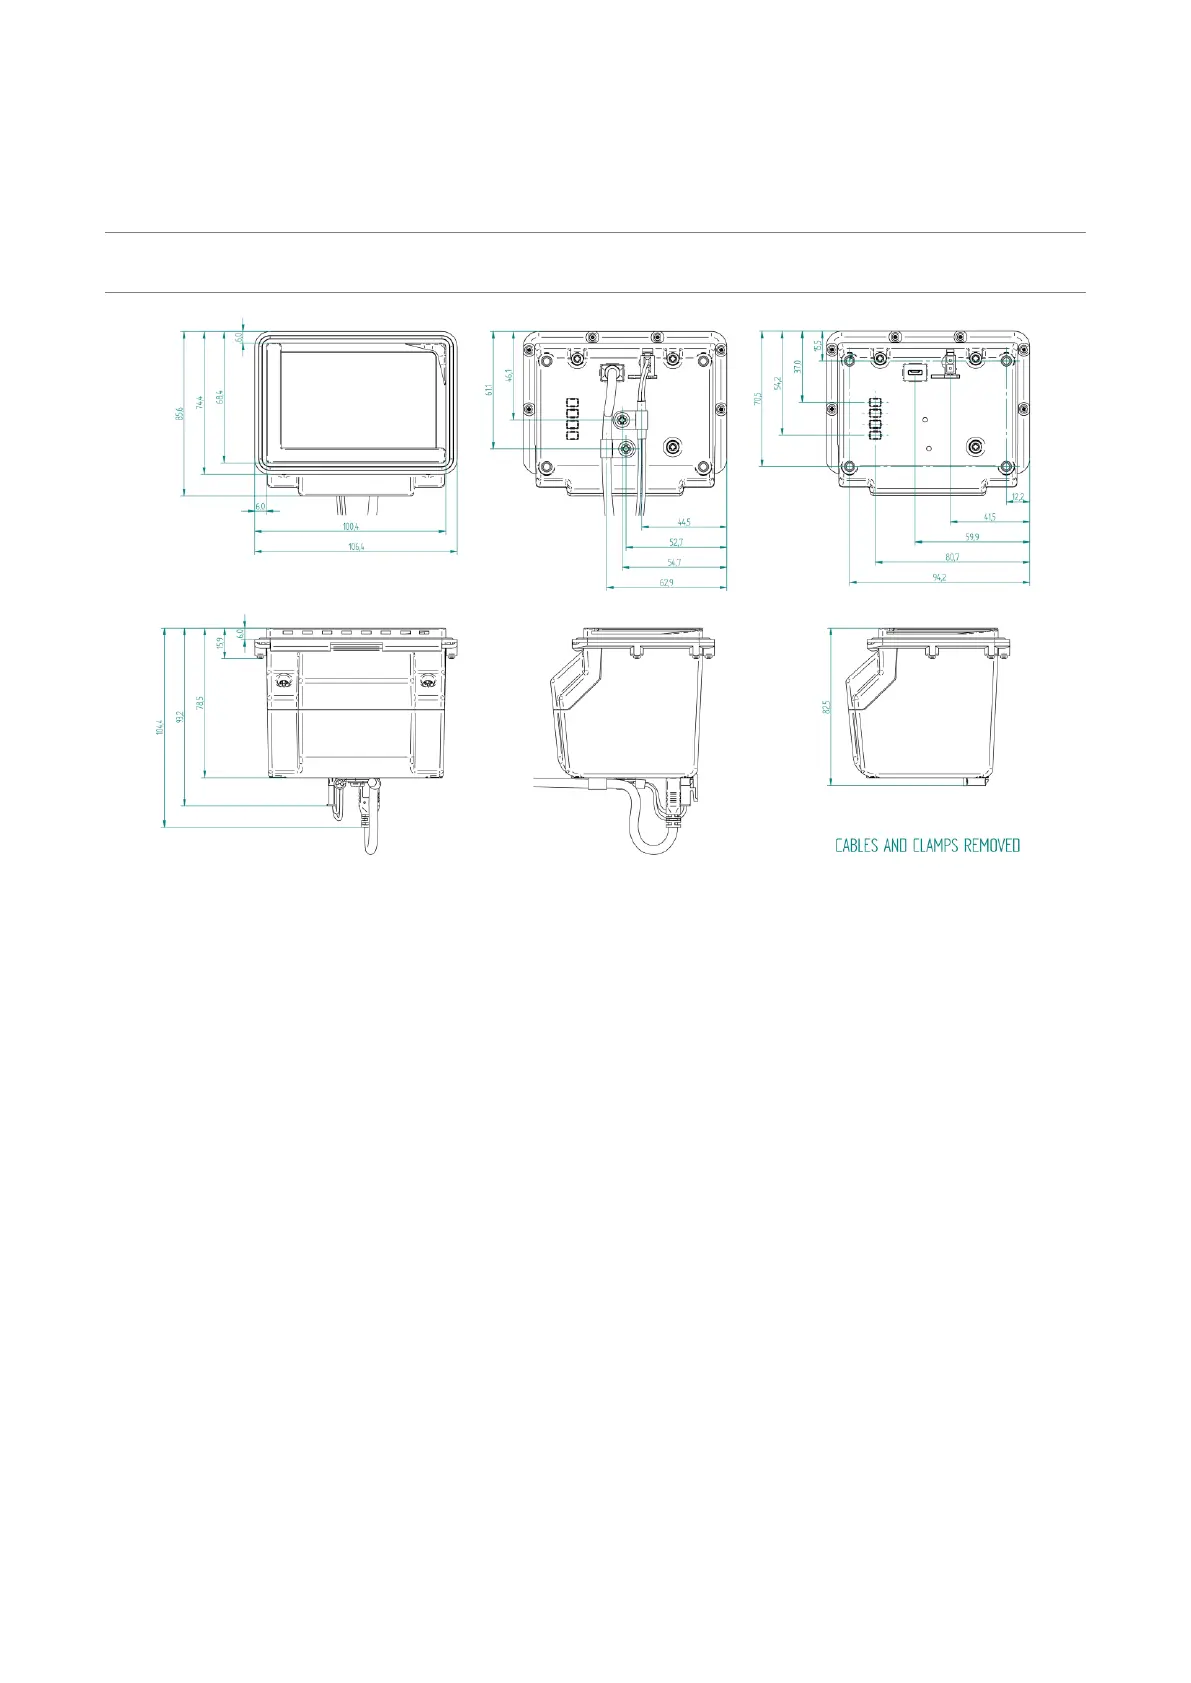
Figure 2: ADR100 dimensions (in millimetres)
2.3.1 Mounting points
When mounting the ADR100, use four M4 screws (not provided) to mount the unit. From the base of
the ADR100 (bottom of the plastic housing), the minimum insertion depth is 3 mm. The maximum
insertion depth is 6 mm.
2.4 Testing the device
Once you have connected the device and installed the software (see Access-IS Document Reader
Software (on page 9)), you can test the device. To do this, place an ID document on the glass
platen and check that it is detected and captured by the ADR100.
When using a document with an ICAO-compliant MRZ and the ADR100's IR option is fitted, the
document reader software should display a visual snapshot of the document's data, including
images. If the device fails to respond when connected to the host, refer to the Troubleshooting
section of this document.