2
INSTALLATION INSTRUCTIONS:
(NOTE: For additional installation assistance visit us at www.vanishcover.com)
Unpack cover components.
Clean truck box if dirty.
COMPONENTS:
1 driver side rail
1 passenger side rail
6 clamps
1 left and 1 right tension adjuster with nuts & bolts
1 pre-rolled up cover
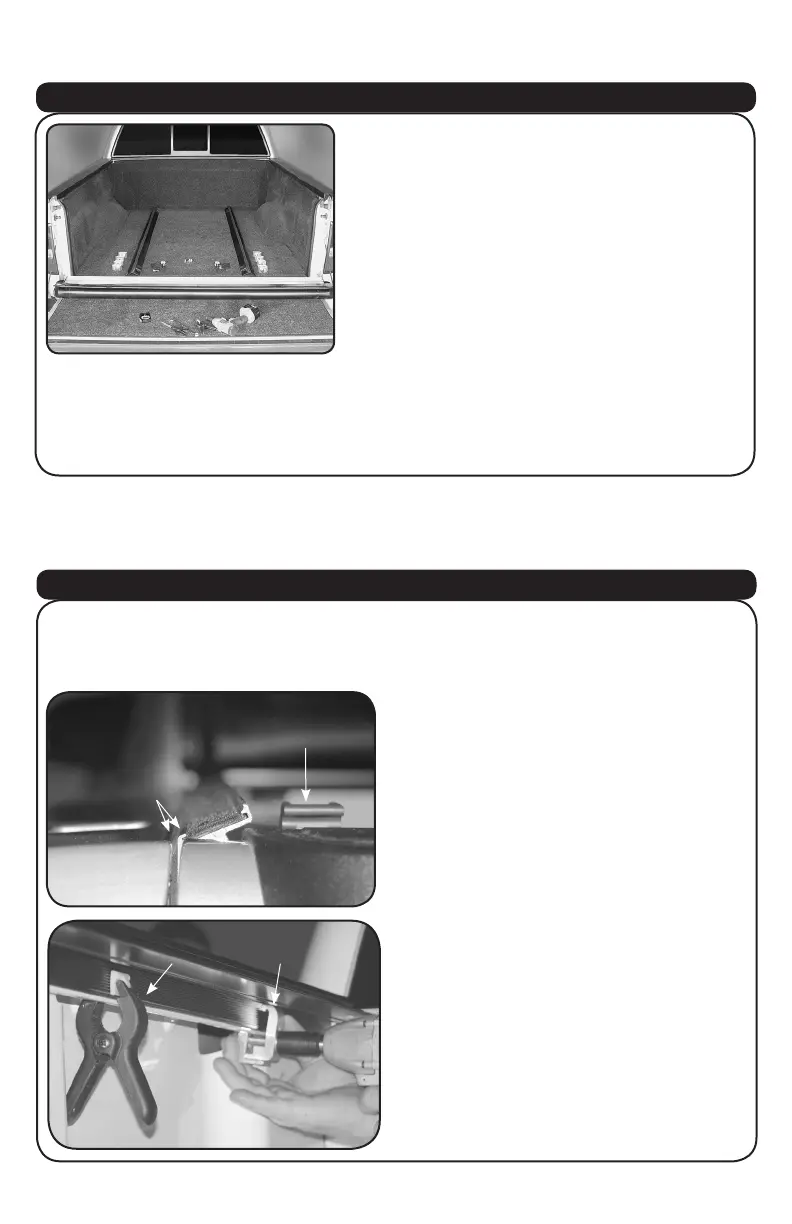
A. Align weatherstrip edge of side rail
against inside lip of box and push rail
forward until it stops against front
of box - nylon strike goes to rear.
See photo at left to determine how high up to
mount rail.
1. INSTALLING COVER SIDE RAILS
End with
nylon bracket
goes to rear
First clamp
at front
B. Hold rail in place with spring clamp
and close tailgate to check height. Then
place 1st clamp as close to front as pos-
sible and use a 1/2” wrench to tighten.
Tip: Before using wrench on
clamp, make sure clamp teeth
engage grooves on rail, turn nut
nger tight and then use wrench.
Temporary
spring clamp
Align outside edge
of cover rail as
shown with top of
box rail at front,
center and rear
TOOLS NEEDED:
1 - 1/2” wrench (for rail clamps) 1 - Tape measure or ruler
2 - 9/16” wrenches Protective eyewear
1 - Spring clamp (to hold rails in place while clamping) optional
PREPARATION
Note: Some installs require drilling/bolting. See extra insert instruc-
tions included with kit for rail attachment. Then proceed to #3 of these
instructions.
NOTE ON BED LINERS: With an under-the-rail drop in bed liner, installation is
possible with minimal trim cutting of bed liner at front corner of box and back by
tailgate to allow side rail to install properly. Considerable trim cutting is required
with an over-the-rail drop in bed liner.