DISASSEMBLY INSTRUCTIONS
PUMP REPAIR KITS
Ace hydraulic pump repair kits include the mechanical seal and volute O-ring. Pumps manufactured
after January 1996 use the volute O-ring and have a groove machined in the volute. Older pumps
require a gasket volute seal. Note: Do not use both the O-ring and gasket.
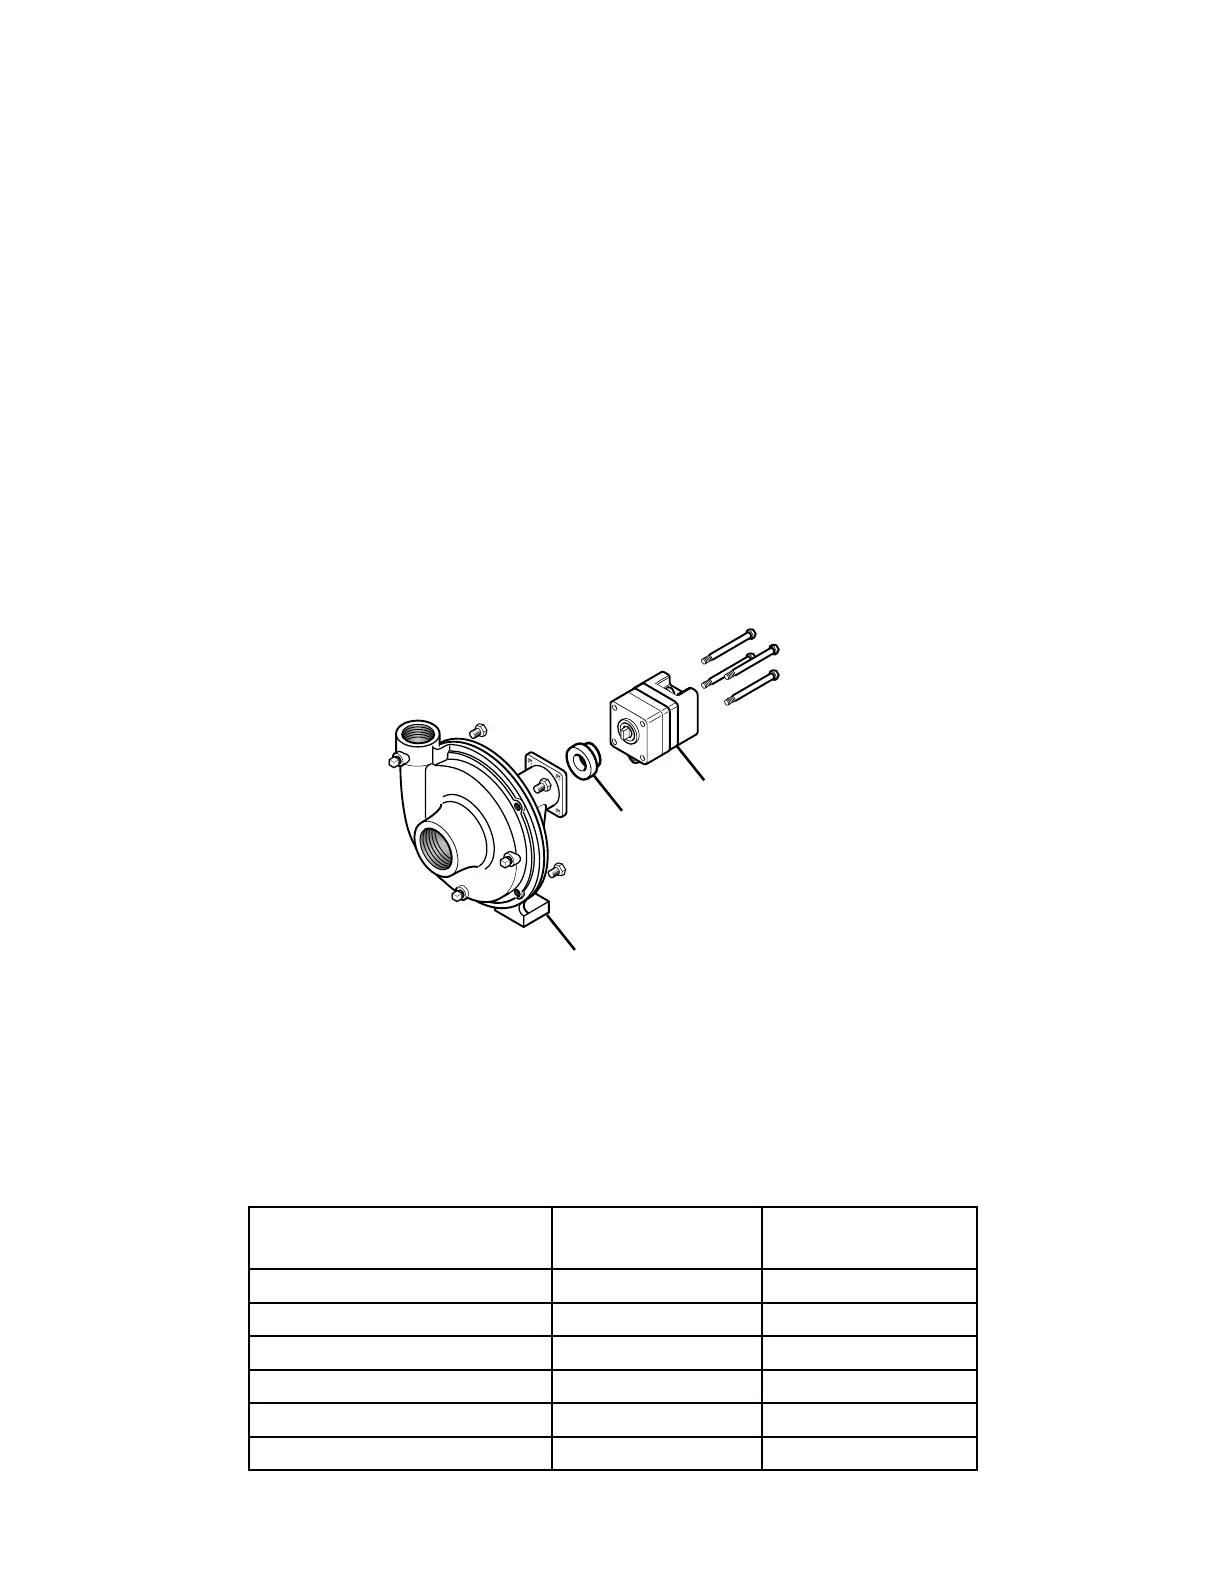
1. Remove four 5/16” socket head cap screws from rear of motor.
2. Remove motor and seal support spacer.
3. Remove rear internal bearing snap ring.
4. Remove four 3/8” X 3/4” hex head cap screws from mounting frame.
5. Remove volute.
6. Remove 3/8” lock nut from shaft. Insert a at le into impeller vane to hold stationary.
Caution: Excess torque may cause damage to plastic impellers.
7. Press shaft out of impeller using one 5/16” socket head cap screw from step #1.
8. Remove impeller, key, and rotating seal member.
9. Press shaft/bearing assembly out of frame.
10. Remove stationary seal member by prying out with a screwdriver or pressing out from motor
end of pump housing.
11. Remove O-ring from shaft groove.
Note: If you are only replacing the pump seal: 1) press the shaft/bearing assembly into the
frame, 2) reinstall the rear internal bearing snap ring, and 3) skip to Assembly Step #8.
12. Press bearings off of shaft.
13. Remove forward internal bearing snap ring.
Pump
Motor
Seal Support Spacer
Disassembly Steps 1-5
6
Pump Model
Standard Seal
BAC-7V
Severe Duty Seal
BAC-7SC
FMC-75-HYD Series RK-GE-75 RK-GESC-75
FMC-HYD Series RK-FMC RK-FMCSC
FMC-150-HYD Series RK-FMC-150 RK-FMCSC-150
FMC-150F-HYD Series RK-FMC-150 RK-FMCSC-150
FMC-150SP-HYD Series RK-FMC-150 RK-FMCSC-150
FMC-200-HYD Series RK-FMC RK-FMCSC
Service videos are available on our website at www.AcePumps.com
 Loading...