V
vdavisJul 25, 2025
How to solve power on issue in Acer Laptop?
- VvcohenJul 26, 2025
To solve the power on issue on your Acer Laptop, check or swap the AC adapter or Battery.
How to solve power on issue in Acer Laptop?
To solve the power on issue on your Acer Laptop, check or swap the AC adapter or Battery.
Why is my Acer Aspire 5820T Laptop randomly losing BIOS settings?
If your Acer Laptop is experiencing a random loss of BIOS settings, and if the computer is more than one year old, replace the CMOS battery. Run a complete virus scan using up-to-date software. If the computer is experiencing HDD or ODD BIOS information loss, disconnect and reconnect the power and data cables between devices. If HDD information is missing from the BIOS, the drive may be defective and should be replaced. As a last resort, replace the Motherboard.
What to do if my Acer Aspire 5820T Laptop has no display?
If your Acer Laptop is not displaying anything on the screen, try the following: * Replace LCD * Reconnect the internal display * Drain any stored power by removing the power cable and battery and holding down the power button for 10 seconds * Connect an external monitor to the computer * Reseat the memory modules
Why does my Acer Laptop keep shutting down intermittently?
If your Acer Laptop shuts down intermittently, make sure the power cable is properly connected to both the computer and the electrical outlet. Also, remove any extension cables or surge protectors between the computer and the outlet, and plug the computer directly into a known good electrical outlet. Remove any external and non-essential hardware and recently installed software.
How to fix abnormal video display on Acer Aspire 5820T Laptop?
If you are experiencing abnormal video display on your Acer Laptop, try the following: * Reboot the computer. * If permanent vertical/horizontal lines or dark spots display in the same location, or if extensive pixel damage is present, replace the LCD. * Adjust the brightness to its highest level. * Check that the display resolution is correctly configured. * Roll back the video driver to the previous version. * Remove and reinstall the video driver.
What to do if HDD not operating correctly on Acer Aspire 5820T Laptop?
If your Acer Laptop's HDD is not operating correctly, try disconnecting all external devices. Run a complete virus scan using up-to-date software. You can also run the Windows 7 Startup Repair Utility or Windows Check Disk by entering chkdsk /r from a command prompt.
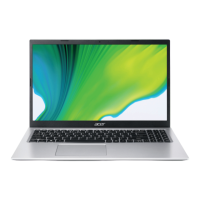
| RAM | Up to 8 GB DDR3 |
|---|---|
| Storage | Up to 640 GB HDD |
| Battery | 6-cell Li-ion |
| LAN | Gigabit Ethernet |
| Webcam | Acer Crystal Eye webcam |
| Processor | Intel Core i3 / i5 |
| Display | 15.6" HD (1366 x 768) LED-backlit |
| Graphics | Intel HD Graphics |
| Operating System | Windows 7 |
| Optical Drive | DVD Super Multi DL |
| Wireless | 802.11b/g/n |
| Ports | HDMI, VGA |
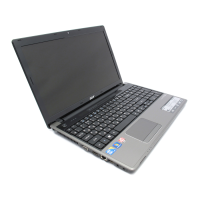
Summarizes the computer's key features and capabilities.
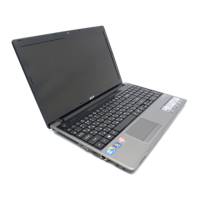
Identifies components and features visible on the notebook's top surface.
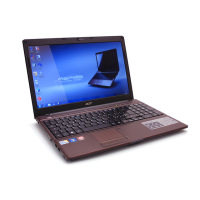
Details components located on the notebook's closed front panel.
Identifies components and ports on the notebook's right side.
Details components and access points on the notebook's base.
Explains the function of lock keys and the embedded numeric keypad.
Details Windows-specific keyboard shortcuts using the Windows key.
Details CPU specifications, cache, speed, and package type.
Covers chipset, PCI Express, USB, and other core logic features.
Specifies memory size, socket count, type, and speed.
Details graphics chipset, features, and LCD display resolutions.
Lists HDD vendor, capacity, interface, and performance specifications.
Provides details on BIOS vendor, version, and ROM type.
Specifies LCD panel size, resolution, brightness, contrast, and viewing angles.
Details Bluetooth controller type, features, and compliance.
Lists audio controller and amplifier features and compatibility.
Describes LAN chipset, package, and features like Gigabit Ethernet.
Details keyboard type, key count, and features.
Specifies battery vendor, type, capacity, cell count, and configuration.
Explains the BIOS Setup Utility, its purpose, and how to access it.
Describes how to navigate BIOS utility menus and change parameters.
Displays a summary of the computer's hardware information.
Allows setting system time, date, and boot options.
Contains parameters for system safeguard and protection, including passwords.
Provides instructions for setting, removing, and changing BIOS passwords.
Allows users to decide the order of boot devices for the operating system.
Allows saving or discarding changes and quitting the BIOS Utility.
Provides steps to update BIOS using a DOS flash utility.
Details the procedure for updating BIOS using the WinFlash utility.
Step-by-step guide to unlock an HDD password using a DOS utility.
Explains how to reset BIOS passwords using a DOS command.
Allows changing boot order without accessing BIOS settings.
Explains the DMI tool for copying BIOS information to eeprom for hardware management.
Describes how to write MAC information to eeprom using a LAN MAC utility.
Lists the necessary tools for computer disassembly.
Outlines essential steps to perform before starting the disassembly procedure.
Divides the disassembly into external components, main unit, and LCD module.
Details the process for disassembling external components.
Provides step-by-step instructions for removing the battery pack.
Outlines the process for disassembling the main unit of the computer.
Provides detailed instructions for removing the keyboard, emphasizing care.
Details how to unlock and disconnect various FFCs to remove the upper cover.
Provides step-by-step instructions for disassembling the LCD module.
Details how to lay the microphone cable and adhere the microphone.
Provides steps for adhering the antenna and laying the cables for the right antenna.
Details how to place the LCD panel and left hinge, and secure with screws.
Details how to place bezel hinge covers and press down the bezel to engage locking clips.
Provides instructions for placing the CPU into the socket and securing it with the locking screw.
Details steps for replacing the thermal module, including grease application and screw tightening.
Explains how to slide the main board into the lower case and secure it with screws.
Explains how to connect the FFC and secure the keyboard by inserting the bottom edge and pushing latches.
Details how to slide the battery into position and close the locking latch.
Offers a procedure to guide through troubleshooting common computer issues.
Provides troubleshooting steps if the system does not power on.
Offers troubleshooting steps if the display does not work.
Provides steps to correct abnormal video display issues.
Offers solutions for intermittent loss of BIOS information.
Provides troubleshooting steps for LCD failures.
Offers troubleshooting steps for built-in keyboard failures.
Provides troubleshooting steps for TouchPad failures.
Offers troubleshooting steps for internal speaker failures.
Provides troubleshooting steps for internal microphone failures.
Offers troubleshooting steps if the HDD is not operating correctly.
Provides troubleshooting steps for USB port failures.
Discusses causes and troubleshooting for intermittent system hangs.
Provides procedures to isolate failing FRUs when diagnostic problems are unclear.
Illustrates the top view of the mainboard, labeling connectors and jumpers.
Illustrates the bottom view of the mainboard, labeling connectors and sockets.
Explains the BIOS Recovery Boot Block and its function for restoring firmware.
Provides a step-by-step guide for BIOS recovery using a USB storage device.
Provides exploded diagrams for the main assembly and LCD assembly with part numbers.
Shows an exploded view of the LCD assembly with part numbers for its components.
Lists FRUs by category, part name, and Acer part number.
Lists screw categories, descriptions, and Acer part numbers.
Lists system models, RO, country, Acer part number, and description for various configurations.
Lists compatible AC adapters with their specifications.
Lists compatible batteries with their specifications.
Lists compatible CPUs with their specifications.
Lists compatible HDDs with their specifications.
Lists compatible LCD panels with their specifications.