This document provides a quick start guide for a projector, detailing its installation, interface connectors, and basic operation.
Function Description
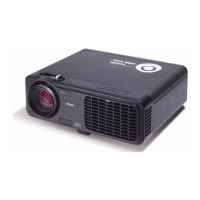
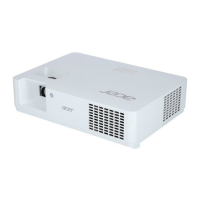
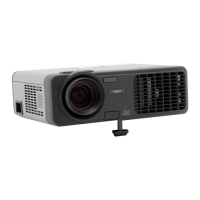
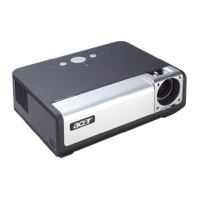
The device is a projector designed for displaying content from various sources onto a larger surface. It supports connections from computers, DVD players, set-top boxes, and HDTV receivers, making it versatile for both professional presentations and home entertainment. The guide outlines the steps for connecting the projector to a computer, powering it on, and powering it off. It also illustrates the different types of cables and connectors used for various input sources.
Important Technical Specifications
The manual lists several types of cables and connectors that are compatible with the projector, indicating its input capabilities:
- Power Cord (1): For supplying electrical power to the projector.
- VGA Cable (2): Used for connecting the projector to a computer for video output. The guide specifies connecting one end to the "VGA In" connector on the projector and the other to the VGA connector on the computer.
- Composite Video Cable (3): For connecting devices like DVD players or set-top boxes that output composite video signals.
- USB Cable (4): Likely for connecting to a computer for control or data transfer, or possibly for displaying content directly from a USB storage device.
- VGA to Component/HDTV Adapter (5): This suggests the projector can accept component video signals, often used for higher-quality video from DVD players, set-top boxes, or HDTV receivers. The diagram shows this adapter connecting to the projector's VGA input, indicating a versatile input port.
- S-Video Cable (6): For connecting devices with S-Video output, offering a step up in quality from composite video.
- Audio Cable Jack/Jack (7): For transmitting audio signals, likely from a source device to the projector's internal speakers or an external audio system.
- DVI Cable (8) (Optional Accessory): Indicates support for Digital Visual Interface, providing a high-quality digital video connection. The manual distinguishes between "without DVI model" and "with DVI model" in its diagrams, implying that DVI capability might be an optional feature or vary by model.
- 5V DC Output Jack (9) (Optional): This jack, labeled "DC Output 5V=2A Max.", is specifically for an attached Dongle Device. This suggests the projector can power an external accessory, possibly a wireless display dongle or a smart stick, enhancing its functionality.
The diagrams illustrate the various ports on the projector itself, including VGA In, DVI, USB, S-Video, Composite Video (yellow, red, white RCA jacks), and audio jacks. The "INTERFACE CONNECTOR" section visually details the appearance of these cables and their corresponding ports on the projector.
Usage Features
The manual outlines key usage features for connecting to a computer and operating the projector:
Connecting to a Computer:
- Power Off: Users must ensure both the projector and the computer are turned off before making connections to prevent potential damage or connection issues.
- VGA Connection: A VGA cable connects the computer's VGA output to the projector's "VGA In" port. The instructions emphasize tightening the screws on the VGA connector for a secure connection.
- Power Connection: The projector's power cord connects to an AC power socket on the projector and then to an electrical outlet.
Powering On the Projector:
- Lens Cap Removal: The lens cap must be removed before operation to allow the projection light to pass through.
- Power Sequence: The projector should be turned on before the computer. This sequence is often recommended to ensure proper signal detection by the projector.
- Image Adjustment: Users are instructed to adjust the position, focus, and zoom of the projected image to achieve the desired display quality and size.
- Presentation Start: After setup, the user can proceed to run their presentation.
Powering Off the Projector:
- Power Button: The power button needs to be pressed twice to initiate the shutdown sequence. This double-press mechanism is a common safety feature to prevent accidental shutdowns.
- Cool-down Period: It is crucial not to remove the AC power cord from the outlet until the projector's fan has shut down. This indicates that the projector has completed its cooling cycle, which is vital for extending the lamp life and preventing damage from overheating.
The visual aids in the manual, such as the numbered diagrams showing cable connections for "without DVI model" and "with DVI model," help users understand the different setup configurations. The "INTERFACE CONNECTOR" section provides clear images of the various cable ends and the corresponding ports on the projector, aiding in correct identification and connection.
Maintenance Features
While the manual does not explicitly list "maintenance features," it implicitly provides crucial maintenance advice through its power-off instructions:
- Proper Shutdown Sequence: The instruction to "Do not remote AC power cord from outlet until the projector fan shut down" is a critical maintenance step. Projectors generate significant heat, and the fan's operation during shutdown is essential for cooling down the lamp and internal components. Interrupting this cooling cycle can drastically reduce the lifespan of the lamp and other sensitive electronics, leading to premature failure. This highlights the importance of allowing the projector to complete its internal cooling process before disconnecting power.
The overall design of the quick start guide focuses on ease of use and proper initial setup, which indirectly contributes to the longevity and proper functioning of the device.