EasyManua.ls Logo

Acer RC271U User Manual

Acer RC271U
6 pages
To Next Page IconTo Next Page
Page #1 background imageLoading...
Page #1 background image
English
Acer LCD Monitor Quick Start Guide (QSG)
Important safety instructions
Please read the following instructions carefully.
1 To clean the LCD monitor screen:
• Turn off the LCD monitor and unplug the power cord.
• Spray a non-solvent cleaning solution onto a rag and clean the screen gently.
• NEVER SPRAY OR POUR ANY LIQUID DIRECTLY ONTO THE SCREEN OR CASE.
• PLEASE DO NOT USE ANY AMMONIA OR ALCOHOL-BASED CLEANERS ON THE LCD DISPLAY SCREEN OR CASE.
Acer will not be liable for damage resulting from use of any ammonia or alcohol-based cleaners.
2 Do not place the LCD monitor near a window. Exposing the monitor to rain, moisture or sunlight can severely damage it.
3 Do not apply pressure to the LCD screen. Excessive pressure may cause permanent damage to the display.
4 Do not remove the cover or attempt to service this unit yourself. An authorized technician should perform servicing of any nature.
5 Store the LCD monitor in a room with a temperature of -20° to 60° C (-4° to140° F). Storing the LCD monitor outside this range may
result in permanent damage.
6 Immediately unplug your monitor and call an authorized technician if any of the following circumstances occur:
• Monitor-to-PC signal cable is frayed or damaged.
• Liquid spills onto the LCD monitor or the monitor is exposed to rain.
• The LCD monitor or case is damaged.
7 Make sure to use a wall mount bracket which has at least 7 cm distance from the wall.
Package contents
LCD monitor
Quick start
guide
AC
Adapter
AC Power
cord
HDMI
cable
(Optional)
DVI-DL (Dual Link)
cable (Optional)
Audio cable
(Optional)
DP cable
(Optional)
USER GUIDE
RC1 Series
RC271U
Attaching the monitor to the base
1 Carefully remove the monitor from its packaging.
2 Take only screen out from package and put on a clean and stable surface with screen face down.
3
Secure the monitor base with neck by turning the silver screws (at the bottom of the base).
4. Connect the stand to the screen
Connecting your monitor to a computer
1 Turn off your computer and unplug your computer’s power cord.
2 Connect the signal cable to the DVI-D (optional) and/or HDMI (optional) and/or DP (optional) input socket of the monitor, and the
DVI-D (optional) and/or HDMI (optional) and/or DP (optional) output socket of the graphics card on the computer.Then tighten the
thumbscrews on the signal cable connector.
3 Connect one end of the adapter to the monitor and the other end to a properly grounded, AC outlet.
4 Plug the power cords of your computer and your monitor into a nearby electrical outlet.
5 Connect the audio cable (Optional).
Connect an audio cable to the audio port of the monitor.
Note: Audio output is only for audio output model. Please check user
manual for more instruction.
DP
DVI-IN
HDMI DC IN
HDMI
DVI-IN
DP
AUDIO IN
HDMI
HDMI
Question and Answer IconNeed help?

Do you have a question about the Acer RC271U and is the answer not in the manual?

Acer RC271U Specifications

General IconGeneral
3DNo
Screen shapeFlat
Display diagonal27 \
Display technologyLED
Native aspect ratio16:9
Maximum refresh rate60 Hz
Contrast ratio (dynamic)100000000:1
Contrast ratio (typical)-
Display number of colors16.78 million colors
Display brightness (typical)350 cd/m²
Supported graphics resolutions2560 x 1440
Tilt angle range-5 - 15 °
RMS rated power4 W
Number of speakers2
USB hub version3.2 Gen 2 (3.1 Gen 2)
Number of upstream ports3
Product colorBlack
Power consumption (standby)0.45 W
Power consumption (typical)23.7 W
Weight and Dimensions IconWeight and Dimensions
Depth (with stand)201 mm
Height (with stand)445 mm
Weight (with stand)3800 g
Depth (without stand)37.1 mm
Width (without stand)614 mm
Height (without stand)364 mm
Weight (without stand)3400 g

Summary

Important Safety Instructions

Cleaning the LCD Monitor Screen

Instructions for safely cleaning the monitor screen using a soft cloth and non-solvent solution.

Monitor Placement and Environmental Considerations

Avoid placing monitor near windows, prevent excessive pressure, store within temperature range, and ensure wall mount clearance.

Servicing and Damage Procedures

Do not service yourself; contact authorized technician for frayed cables, liquid spills, or damage.

Package Contents Overview

Monitor Installation and Connection

Attaching the Monitor to the Base

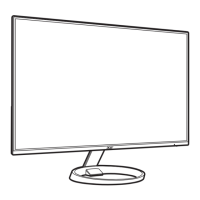
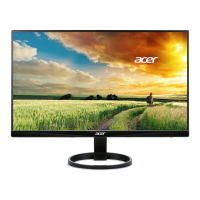
Step-by-step guide on how to safely attach the monitor screen to its base.

Connecting the Monitor to a Computer

Instructions for connecting the monitor to your computer using signal and power cables.

Panel Controls and Functions

Power Button and Indicator

Turns the monitor on/off. Blue light indicates power on, blinking blue for standby/power saving.

OSD Function Key

Navigates the On-Screen Display menu and functions.

Input Select Button

Selects the input source or navigates the Input select function.

Volume Adjustment

Adjusts the audio volume and navigates volume settings in the OSD.

Brightness Adjustment

Adjusts screen brightness and navigates brightness settings or returns to previous menu.

Mode Control

Triggers Game mode control or exits the current OSD menu.

Regulatory and Safety Notices

FCC Notices and Compliance

Device compliance with FCC rules for Class B digital devices and measures to correct interference.

CE Declaration of Conformity

Statement of compliance with EU directives including EMC, LVD, and RoHS.

Canadian Users Notice

Compliance statement for Canadian ICES-003 standards.

Disposal of Waste Equipment

Instructions for proper recycling of electrical and electronic equipment in the EU.

Energy Star Program Information

Related product manuals