Do you have a question about the Acer V206HQL and is the answer not in the manual?
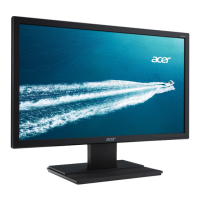
Controls monitor power on/off. Blue indicates power on, amber indicates standby/power saving mode.
Toggles OSD options or adjusts volume when OSD is inactive.
Press to view OSD. Press again to enter a selection in the OSD.
Exits OSD or auto-optimizes display position, focus, and clock.
Acts as exit key for OSD menu or selects scenario mode when OSD is inactive.
Device tested and found to comply with Class B digital device limits per FCC rules.
Acer declares compliance with EU directives for LCD monitors regarding EMC, Low Voltage, and ecodesign.
Recommends using shielded cables for all connections to maintain EMC compliance.
Only certified peripherals may be attached to maintain Class B limits compliance.
Information for Canadian users regarding ICES-3(B)/NMB-3(B) compliance.
This document serves as a Quick Start Guide (QSG) for an Acer LCD Monitor, providing essential information for its setup, operation, and maintenance.
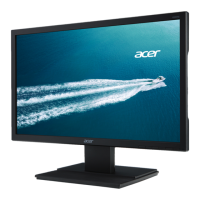
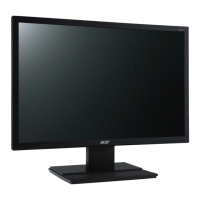
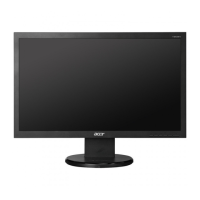
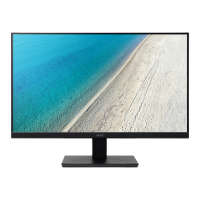
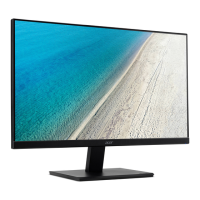
The Acer LCD Monitor is designed to display visual output from a computer. It features a TFT Color LCD panel, offering a clear and vibrant viewing experience. The monitor supports both analog (VGA) and digital (DVI-D) input signals, making it compatible with a wide range of computer systems. For models with audio input, it includes integrated speakers, providing a complete multimedia experience without the need for external audio devices. The monitor is equipped with various external controls, including a power button, Minus/Plus buttons for navigation and volume adjustment, a Menu button for OSD functions, an Auto button for display optimization, and an Empowering Key for quick scenario mode selection or exiting the OSD. These controls allow users to easily adjust display settings such as contrast, brightness, color temperature, and OSD position. The monitor is designed for desktop use, with a detachable foot stand that allows for tilt adjustments to optimize viewing angles.
Setting up the Acer LCD Monitor is a straightforward process. First, the monitor base needs to be attached to the monitor itself, a simple action confirmed by a clicking sound. Once assembled, the monitor can be connected to a computer. Users should ensure their computer is turned off and unplugged before making connections. The monitor supports both VGA and DVI-D connections; users should connect the appropriate signal cable from their computer's graphics card to the monitor's input socket and tighten any thumbscrews. For models with audio capabilities, an optional audio cable can be connected from the computer's line-out port to the monitor's AUDIO IN socket. Finally, the monitor's power cable is inserted into the power port at the back of the monitor, and both the monitor and computer power cords are plugged into electrical outlets.
Once powered on, the monitor's blue indicator light signifies active operation, while an amber light indicates standby or power-saving mode. The external controls provide intuitive access to various display settings. The Minus/Plus buttons are used to navigate through OSD options or adjust volume when the OSD is inactive. The Menu button opens the On-Screen Display (OSD) menu, allowing users to fine-tune settings like contrast, brightness, ACM (Adaptive Contrast Management), focus, clock, horizontal and vertical position, and color temperature presets (Warm/Cool). The Auto button is particularly useful for analog input, as it automatically optimizes the display's position, focus, and clock settings. The Empowering Key offers quick access to scenario modes or acts as an exit key within the OSD menu. The monitor also supports Plug & Play functionality (VESA DDC2I/DDC2B), simplifying setup and configuration with compatible computers.
Proper maintenance is crucial for extending the lifespan of the Acer LCD Monitor. The guide emphasizes several important safety instructions and cleaning procedures. To clean the LCD monitor screen, users should first turn off the monitor and unplug its power cord. A non-solvent cleaning solution should be sprayed onto a rag, not directly onto the screen, and then used to gently clean the display. It is critical not to apply excessive pressure to the LCD screen, as this can cause permanent damage.
Environmental considerations are also highlighted. The monitor should not be placed near a window, as exposure to rain, moisture, or direct sunlight can severely damage it. The device is designed to operate within a temperature range of 5° to 35°C and should be stored between -20° to 60°C. Storing the monitor outside this range can lead to permanent damage.
Users are explicitly warned against attempting to remove the cover or service the unit themselves; any servicing should be performed by an authorized technician. In case of specific issues, such as a frayed or damaged signal cable, liquid spills on the monitor, or physical damage to the monitor or its case, users are instructed to immediately unplug the monitor and contact an authorized technician.
The monitor is designed with regulatory compliance in mind, adhering to various safety and environmental standards, including FCC, CE, and RoHS directives. This ensures the product is safe for use and environmentally responsible. The guide also provides information on the proper disposal of waste equipment in the European Union, indicating that the product should not be disposed of with general household waste but rather taken to a designated collection point for recycling. This commitment to responsible disposal helps conserve natural resources and protect human health and the environment.
| Screen Size | 19.5 inches |
|---|---|
| Resolution | 1366 x 768 |
| Panel Type | TN |
| Aspect Ratio | 16:9 |
| Brightness | 200 cd/m² |
| Response Time | 5 ms |
| Viewing Angle | 90° (H) / 65° (V) |
| Ports | VGA |