This document is a user guide for an Acer LCD Monitor, providing essential information for its safe and comfortable use, setup, and troubleshooting.
Function Description
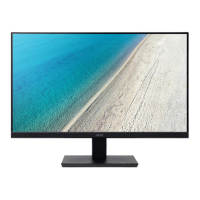
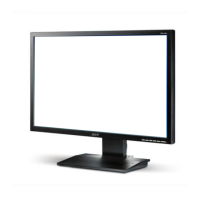
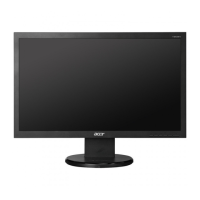
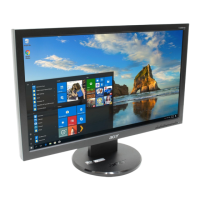
The Acer LCD Monitor is designed for video and visual display of information from electronic devices. It serves as a primary output device for computers, allowing users to view desktop environments, applications, and multimedia content. The monitor supports various display modes and resolutions, ensuring compatibility with a wide range of systems. It is equipped with multiple input options, including VGA and HDMI, to connect to different sources. The monitor also features power-saving modes to reduce energy consumption when not actively in use.
Usage Features
The monitor offers several features to enhance user experience and comfort:
- Accessibility: The power outlet for the monitor is designed to be easily accessible, allowing for quick disconnection of power when needed.
- Safe Listening: For models with audio capabilities, the guide provides instructions on safe listening practices, such as gradually increasing volume, limiting high-volume listening, and avoiding turning up the volume to block out noisy surroundings.
- LCD Pixel Statement: The monitor is manufactured with high-precision techniques, and while minor pixel blemishes (missing or constantly lit pixels) may occur, they are considered normal and do not affect the recorded image or constitute a malfunction.
- Power Management: The monitor is shipped with power management enabled, activating a Sleep mode after 5 minutes of user inactivity and waking up when the mouse is moved or a keyboard key is pressed.
- Comfortable Use: The guide offers tips for comfortable computer use, addressing potential issues like eyestrain, headaches, and musculoskeletal disorders. It recommends adjusting the monitor's viewing angle, using a footrest, and maintaining proper sitting height. Users are advised to avoid prolonged fixed postures, slouching, and to take regular breaks for stretching and walking.
- Vision Care: To reduce eyestrain, users are encouraged to rest their eyes frequently, take regular breaks by looking away from the monitor, and blink often. The display should be kept clean, and the head positioned so eyes point downward when looking at the middle of the display. Brightness and contrast can be adjusted for comfortable readability. Glare and reflections can be minimized by positioning the display away from light sources, using drapes or blinds, employing a task light, changing the viewing angle, or using glare-reduction filters or display visors.
- Good Work Habits: The guide promotes developing good work habits, including taking short, regular breaks, performing stretching exercises, breathing fresh air, and maintaining a healthy body through regular exercise.
- Unpacking and Setup: The monitor comes with essential items such as a quick start guide, VGA cable (optional), AC adapter, HDMI cable (optional), and AC power cord. Users are instructed to check for all items and save packing materials for future transport.
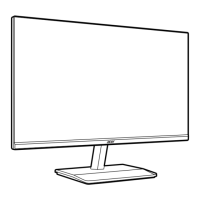
- Base Attachment: The monitor base can be easily attached by placing the monitor face-down on a stable, cloth-covered surface to prevent scratching.
- Screen Position Adjustment: The monitor's tilt can be adjusted by holding its edges, allowing for movement up to 20 degrees and down to 5 degrees to optimize the viewing position.
- Connecting Cables: Users are guided to connect the signal cable (VGA or HDMI) to both the monitor and the computer's graphics card, tightening thumbscrews for a secure connection. For models with USB Type B input, a USB Type B cable can be connected for fast charging (5V/1.5A) or general connectivity. The power cable is then connected to the monitor's power port, and the power adapter and cord are plugged into a grounded AC outlet.
- Power Saving Modes: The monitor enters a "Power Saving" mode, indicated by an amber power LED, when it receives a control signal from the display controller. It recovers from this state in approximately 3 seconds upon detecting a control signal or activation of the keyboard or mouse.
- Display Data Channel (DDC): The monitor supports DDC, which allows its settings to be controlled via software on the PC.
- Panel Controls: The monitor features external controls for power, OSD function, input selection, brightness adjustment, and game mode control (for HDMI). The power button indicates status with blue (on) or blinking blue (standby/power saving) light.
- Shortcut Menu (OSD): The On-Screen Display (OSD) menu allows users to adjust picture quality, OSD position, and general settings. Hot keys provide quick access to modes (sRGB, Reading, Darkroom, User, Standard, ECO, Graphics, Movie), brightness control, and input switching.
- Picture Settings: The Picture menu allows adjustment of Brightness, Contrast, Black Boost, Blue Light, ACM (Adaptive Contrast Management), Super Sharpness, Auto Config, H. Position, V. Position, Focus, and Clock. Blue Light filtering can be adjusted to protect eyes, with 50% being the optimal setting for TÜV Rheinland's "Low Blue Light Content" standard. ACM dynamically adjusts contrast based on screen content. Super Sharpness enhances image clarity by boosting pixel density.
- Color Settings: The Color menu offers adjustments for Gamma, Color Temperature (Cool, Normal, Warm, Bluelight, User), Modes (scenario modes), sRGB (for color matching with peripherals), Grayscale Mode, 6-axis Hue, and 6-axis Saturate.
- Audio Settings (Audio Models Only): For models with audio, the Audio menu allows adjustment of Volume and Mute on/off.
- Performance Settings: The Performance menu includes Over Drive (Off, Normal, Extreme) for response time, AdaptiveSync (on/off) for dynamic refresh rate adjustment, and Refresh Rate Num to display the panel's current refresh rate.
- OSD Settings: The OSD menu allows setting the OSD language, OSD Timeout (delay before turning off the menu), Transparency (0% to 80%), and OSD Lock (on/off). OSD Lock prevents accidental changes to settings, displaying an "OSD Locked" message and changing the LED light from blue to orange. To unlock, any key (except power) must be pressed for more than 3 seconds.
- System Settings: The System menu provides options for Input source (VGA IN, HDMI), Auto Source (auto search for signal source), Wide Mode (Aspect, Full), Hot Key Assignment (customizing functions for shortcut keys), DDC/CI (enabling software control of monitor settings), HDMI Black Level, Quick Start Mode (speeding up boot time), and Power-off USB charge (enabling/disabling USB port electrification in DC off/saving mode).
- Save Settings (User Mode Only): In User mode, three user-defined profiles are available to save preferred settings, which can be recalled later.
- Touch Function (Windows 10): For models with touch functionality, it works automatically under Windows 10 without additional software installation, supporting single or multi-finger touch. To activate, the display must be connected to the computer with the provided USB Type-B cable.
Maintenance Features
- Cleaning: The guide provides specific instructions for cleaning the monitor. Users should always unplug the monitor before cleaning and use a soft cloth to wipe the screen and cabinet front and sides.
- Product Servicing: Users are advised not to attempt to service the product themselves due to the risk of dangerous voltage points. All servicing should be referred to qualified service personnel. The monitor should be unplugged from the wall outlet and serviced if the power cord or plug is damaged, liquid is spilled, the product is exposed to rain or water, it has been dropped or the case is damaged, it exhibits a distinct change in performance, or it does not operate normally after following operating instructions.
- IT Equipment Recycling Information: Acer is committed to environmental protection and recycling. Users are encouraged to recycle electronic devices instead of discarding them in trash to minimize pollution. Information on recycling and WEEE regulations is provided via specific website links.