21
ACTSmart Mounting Instructions for Flush-Mount Unit
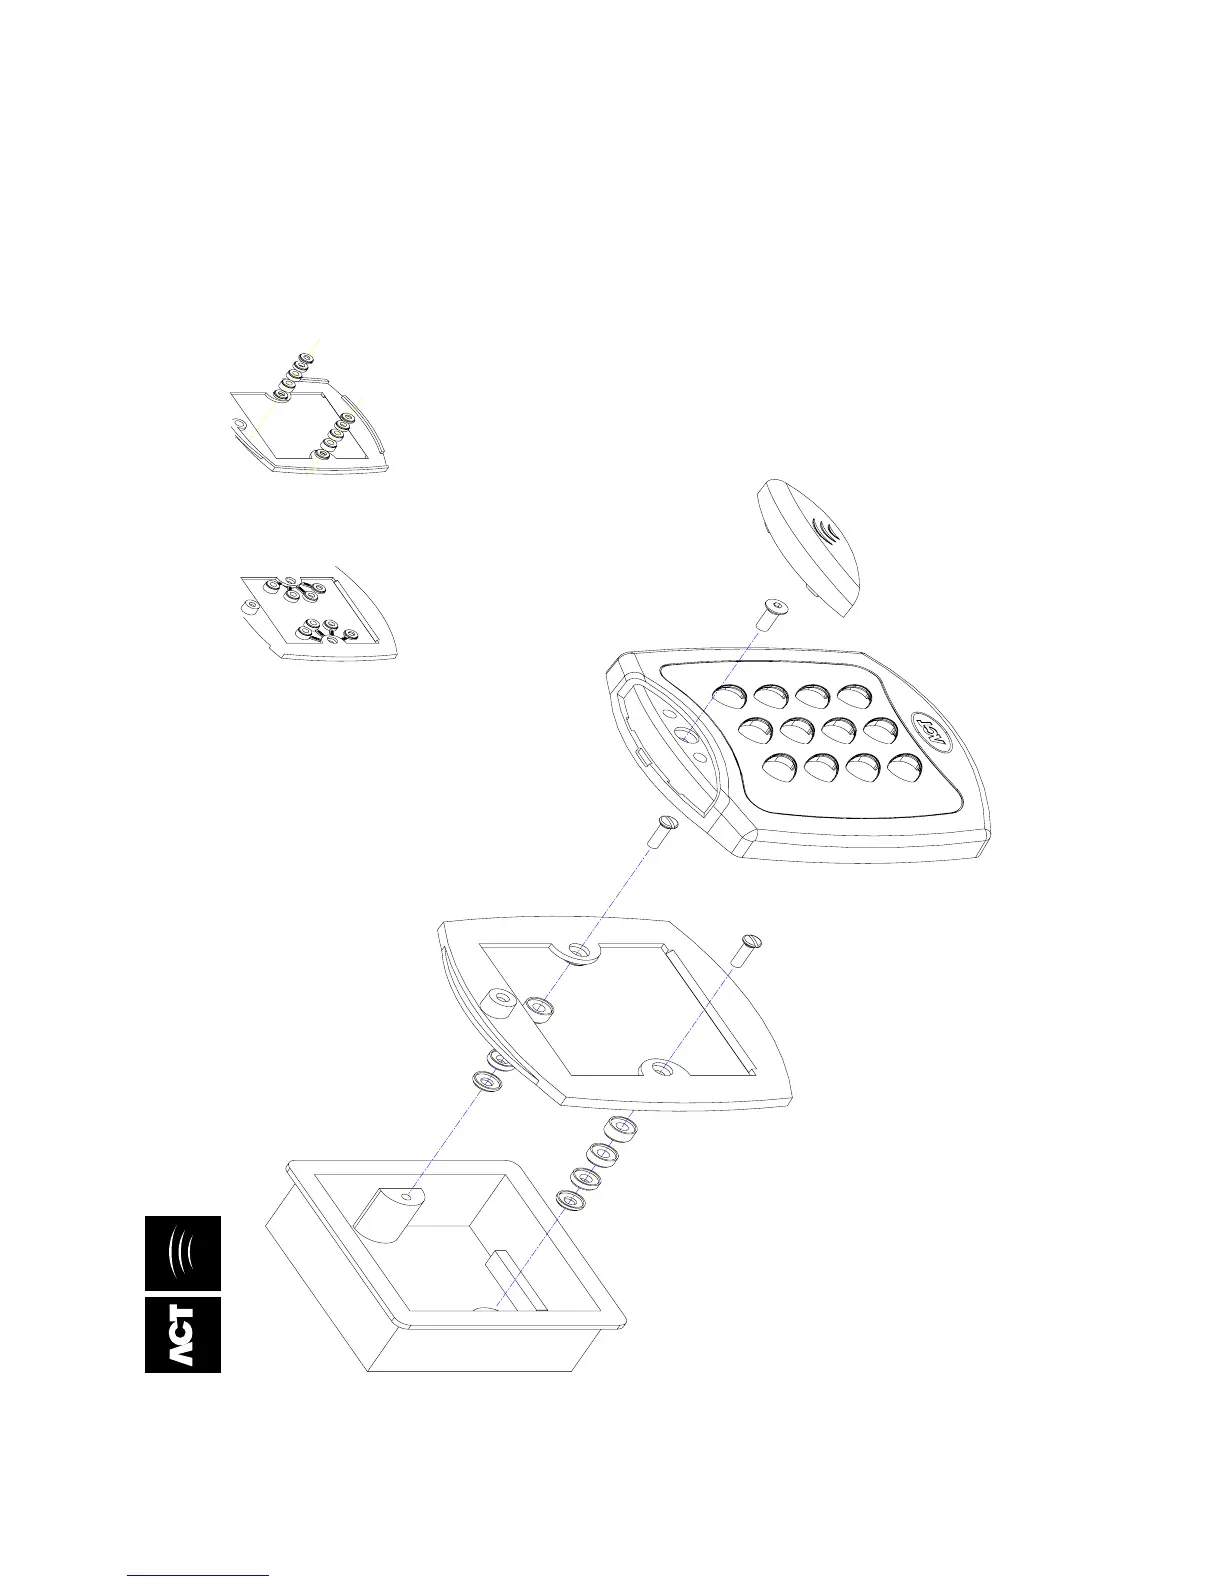
Magnet in mounting plate,
which keeps tamper switch
closed inside ACTSmart.
SCREWS
Mounting plate is attached to the pattress box
using the screws supplied.
ENSURE the correct spacers have been used to
bridge the gap between the mounting plate and
the fixing wings of the pattress box to avoid the
mounting plate being distorted.
Spacers break away
from main component
when required by
installer for use.
View showing mounting plate
before spacers are broken.
View showing
spacers stacking.
Note:
Determine the distance between the pattress box
and the mounting plate, using the spacers which are
labelled 1mm to 4mm. This allows the installer to
make the required spacer length 1 to 10mm by
stacking each spacer together.
Security screw supplied with the unit.
Place the cap onto the unit
and push firmly into place.
Access Control Technology, Unit 8, Tallaght Business Park, Whitestown, Dublin 24, Ireland.
Tel: 353-1-4622585 Fax: 353-1-4622587 Web: http://www.accesscontrol.ie E-mail: sales@accesscontrol.ie
Place the Reader / Keypad onto the surface mount
collar and clip down into place. Use the security screw
supplied to attach the unit to the surface mount collar.