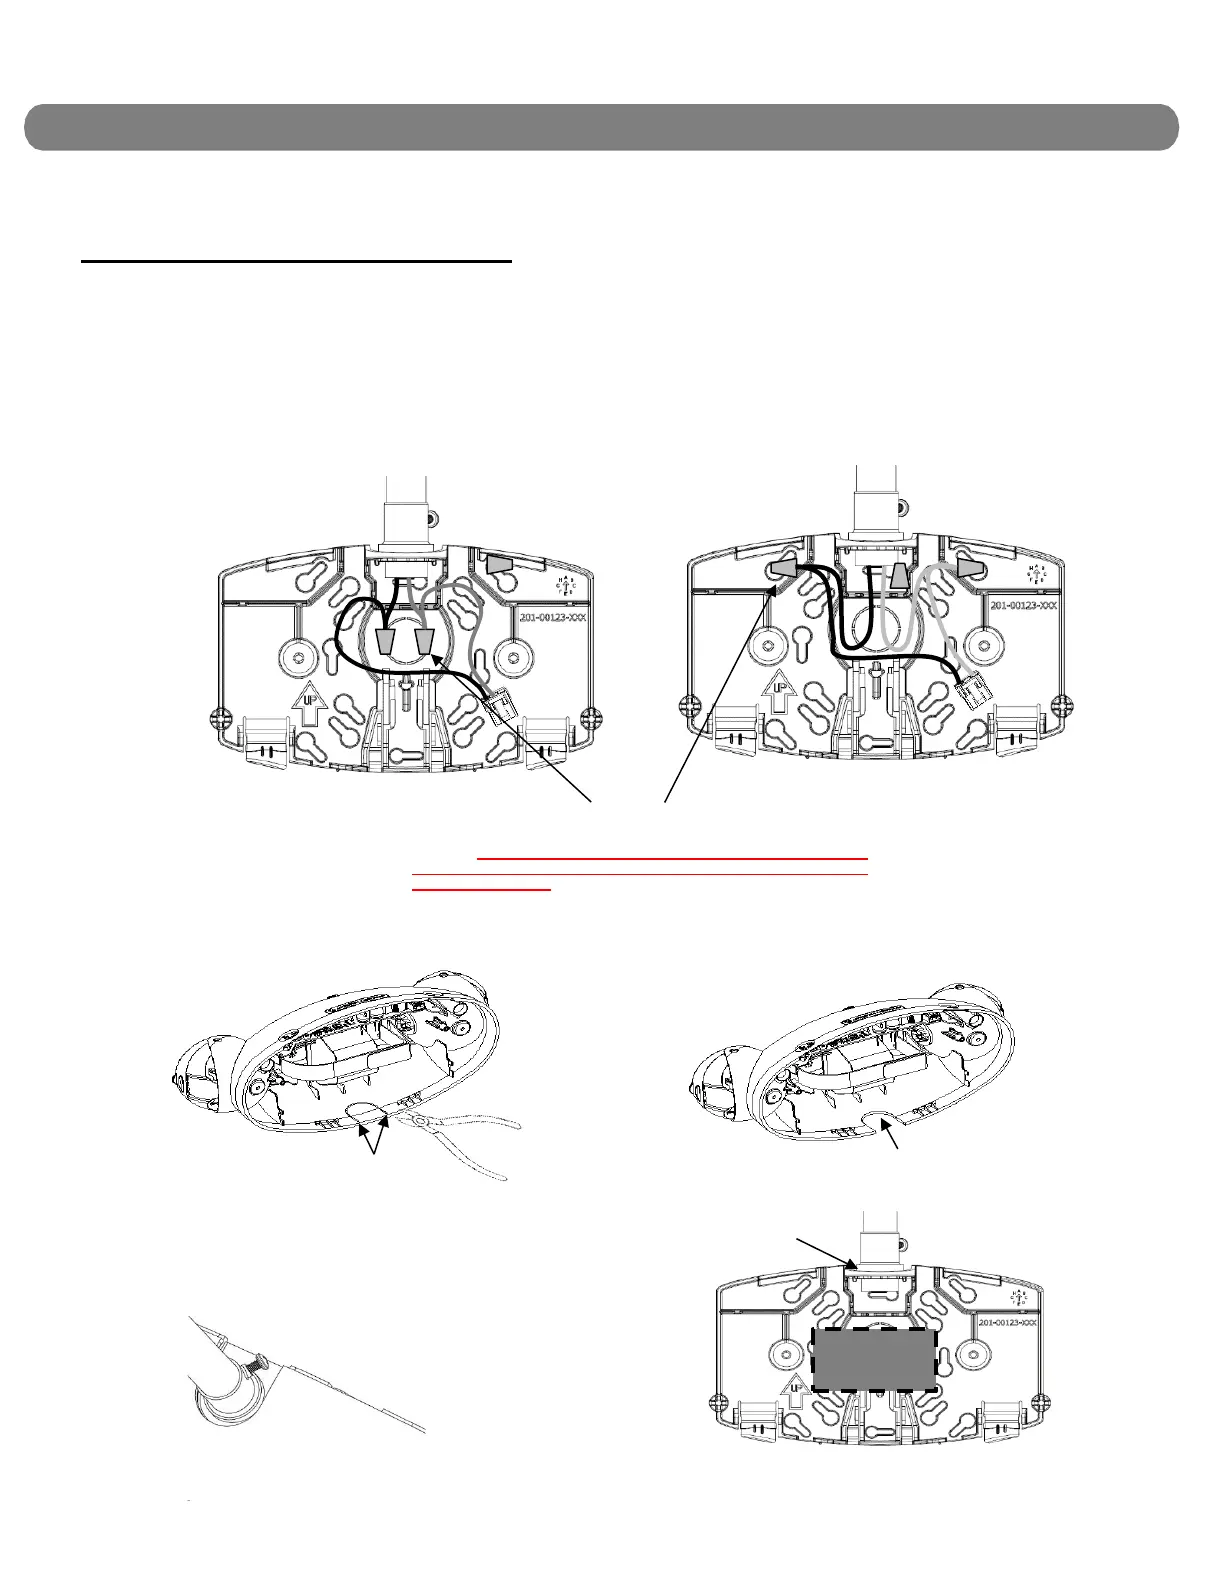
CONDUIT SURFACE MOUNTING
NOTE: to avoid interference with components in the housing, use the most compact wire connectors appropriate to the wire gauge.
1. At upper center of the mounting plate, remove the conduit connection knockout. Also remove at least three keyhole
knockouts. Attach conduit and secure mounting plate to the wall surface using fasteners with a minimum pullout rating of 30
Ibs. each.
2. See Wiring Diagram, page 5. Make code-approved wire connections to the branch circuit and lamps (if applicable). Dress
wires into slots so that the connectors are secured as shown in Figure 2 or Figure 3.
3. Remove U-shaped knockout from top center of housing. Hint: Use a pair of wire cutters first to start a cut in the thick
portion at each side of the knockout, then finish breaking it out with pliers.
Orient conduit fitting so
all portions of it clear the
edge of the knockout
Secure wire connectors near the centre or near the upper
latches. AVOID grouping wires and wire nuts in the area of
the PCB and the battery as this may limit engagement of
connector to PCB.
INSTALLATION and WIRING (CONTINUED)
Use washer(s), like (Grainger #4DAX6),
between conduit fitting and rear housing, if
conduit fitting interferes with battery. The
purpose of the washer is to have as few
threads inside of the housing as possible.