50 | | 51
VEHICLE CONTROLSVEHICLE CONTROLS
TABLE OF
CONTENTS
INDEX
VISUAL INDEX
VOICE COMMAND
INDEX
SAFETY
INFORMATION
CLIENT
INFORMATION
INSTRUMENT
PANEL
SPECIFICATIONS
VEHICLE
CONTROLS
MAINTENANCE
AUDIO AND
CONNECTIVITY
HANDLING THE
UNEXPECTED
BLUETOOTH®
HANDSFREELINK®
DRIVING
ACURALINK®
NAVIGATION
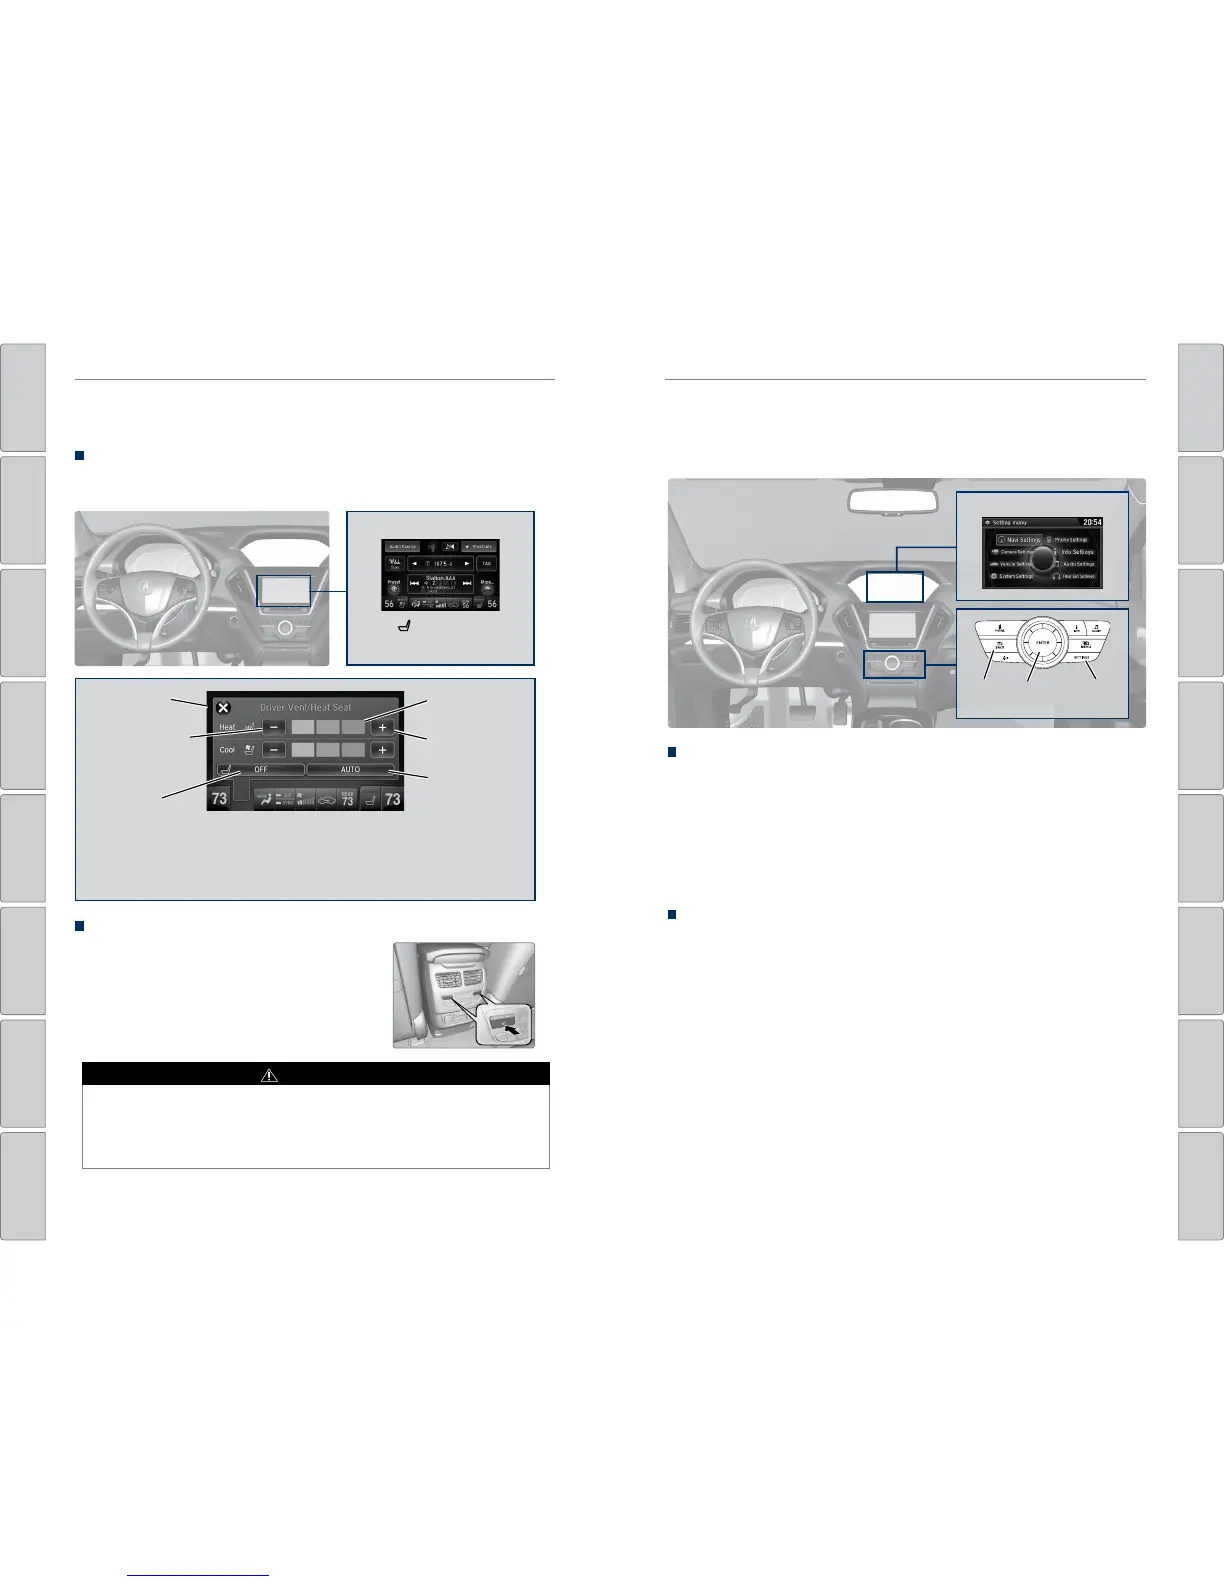
Seat Heaters and Ventilation*
Quickly warm or ventilate the seats when the vehicle is on.
Front Seat Heaters or Ventilation
Use the On-Demand Multi-Use Display (ODMD) touchscreen to operate the
front seat heaters or ventilation.
Select LO, MID, or
HI level.
+: Increase heating
or ventilation levels.
AUTO: The
system selects
the best setting
based on ambient
temperature.
OFF: Turn the
system off.
-: Decrease heating
or ventilation levels.
Close the menu
ODMD screen
Select to enter the seat
heating or ventilation screen.
*if equipped
Second-Row Outer Seat Heaters*
Press the seat heater button on the back of the
center console to cycle through settings: HI, MID,
LO, and OFF. Indicators appear for each setting.
Heat-induced burns are possible when using seat heaters.
Persons with a diminished ability to sense temperature (e.g., persons with
diabetes, lower-limb nerve damage, or paralysis) or with sensitive skin should
not use the seat heaters.
WARNING
When the vehicle is turned off, the heating or ventilation setting returns to off at
the next vehicle start. If AUTO is selected, the setting remains in AUTO.
*if equipped
Customized Features
You can easily customize many features of your vehicle. The customized settings
are recalled every time you unlock the driver’s door with the remote (Driver 1 or
Driver 2). Settings are unique to each remote.
How to Change a Setting
The vehicle must be in Park (P) to select Vehicle Settings. Use the interface dial to
make and enter selections.
1. Press SETTINGS.
2. Select an option (System, Vehicle, Camera, Audio, Phone, Info, or Navi*).
3. Select a setting option, and make your preferred changes.
4. Press BACK to exit out of the menus.
Setting the Clock
On vehicles without navigation, use the interface dial to adjust the time in the
clock display. On vehicles with navigation, the time is automatically set using
GPS signals.
1. Press SETTINGS.
2. Select System Settings.
3. Select Clock Adjustment.
4. Rotate the interface dial to change the hour value. Press the interface dial to
select minutes, and rotate to change the value. Press the interface dial to exit
the screen.
5. Press BACK to exit out of the menus.
Settings screen
BACK
button
Interface
dial
SETTINGS
button

 Loading...