Do you have a question about the ADI AR-147 and is the answer not in the manual?
Important safety instructions to prevent electric shock, fire, and injury during operation.
Instructions on how to safely clean the transceiver's exterior surfaces.
Detailed technical specifications for various transceiver models including frequency range, power, and sensitivity.
List of accessories that should be included with the transceiver package.
Step-by-step guide for installing the mounting bracket for the transceiver in a vehicle.
Cautions and procedures for connecting the power cable for mobile installations, including battery connections.
Requirements for a regulated DC power supply for fixed station operation.
Guidance on selecting and connecting antennas for optimal transceiver performance.
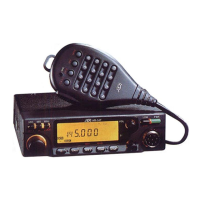
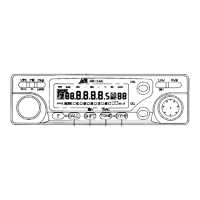
Detailed explanation of the purpose and operation of each front panel control and key.
Procedure for initial reception setup, including power, volume, and squelch adjustments.
Selecting frequencies using the VFO mode.
Selecting stored frequencies from memory channels.
Selecting the designated call channel frequency.
How to change the frequency step size for tuning and scanning operations.
Fundamental transmit procedures, including selecting power levels and checking frequency occupancy.
How to set and use the Time-out Timer to limit continuous transmission duration.
Data that can be stored in memory channels, including frequencies, tones, and codes.
Default transceiver settings shown in a factory state chart.
Procedures for resetting the transceiver's memory or VFO settings to factory defaults.
Special uses for memory channels like DUAL-WATCH and Programmable Band Scan limits.
Steps for storing new data into memory channels and recalling stored information.
Recalling stored frequencies and parameters from memory channels.
Copying memory or call channel data to the VFO for modification.
Procedure for erasing stored data from a memory channel.
Available scan options: Band scan, Programmable band scan, and Memory channel scan.
Configuration for time-operated scan (pause scan) and carrier-operated scan (busy scan).
Procedure for performing a band scan across the entire frequency range.
How to set scan limits using memory channels for programmable band scanning.
Scanning through memory channels that have data entered and are not locked out.
Temporarily skipping unwanted memory channels during a scan.
Enabling and using the dual-watch feature to monitor two frequencies simultaneously.
Setting up dual-watch to monitor the dial frequency and memory channel 1.
Configuring dual-watch with other memory channels or the call frequency.
Monitoring dual frequencies during a sequential memory scan.
Understanding and setting transmitter offsets for repeater communication.
Using the automatic repeater offset function for simplified repeater access.
Using the reverse function to check repeater input frequencies.
Using sub-audible tones (CTCSS/DCS) and repeater access tones.
Selecting the desired repeater access tone frequency.
Selecting and setting CTCSS (Continuous Tone-Controlled Squelch System) tones.
Selecting DCS codes and understanding the DCS code table.
Adjusting DCS polarity to ensure correct signal decoding.
Enabling CTCSS/DCS squelch functions for selective reception.
Scanning for CTCSS tones and DCS codes on received signals.
Selecting and storing C.SQ codes using VFO mode or DTMF keypad.
Detailed steps for selecting C.SQ codes.
Activating and using the PAG (Paging) and C.SQ functions.
Using PAG/C.SQ with repeaters, including transmission delay.
Storing and using individual, group, and station codes for paging.
Procedure for entering and setting paging codes into memory.
Procedure to call all stations in a group using the paging function.
Procedure to call a specific station using the paging function.
How the transceiver enters standby mode for incoming paging calls.
Locking out paging memories to prevent accidental transmission or reception.
Displaying received DTMF signals on the LCD.
Entering and setting the DTMF code decoding mode to view incoming DTMF signals.
Saving decoded DTMF codes to EEPROM for future use.
Using DTMF Autodialer memories for remote control or telephone numbers.
Redialing the last transmitted DTMF sequence.
Entering frequencies directly using the DTMF microphone keypad.
Enabling and configuring the Automatic Power Off feature to save battery.
Adjusting the front panel display illumination intensity.
Turning the audible beep feedback for key presses on and off.
Activating and deactivating panel and microphone key lock functions.
Switching the display between frequency and channel number formats.
Enabling AM reception for specific frequency bands (AR-147 option).
A comprehensive list of functions accessed via front panel key combinations.
Factory alignment, warranty, and general service guidelines.
Guidelines for returning equipment for repair and providing necessary information.
Table of symptoms, probable causes, and solutions for common operational issues.
Step-by-step instructions for installing the optional DTMF unit.
Terms and conditions of the one-year limited warranty for defects in material and workmanship.
| Brand | ADI |
|---|---|
| Model | AR-147 |
| Category | Transceiver |
| Language | English |