151
ADOBE PHOTOSHOP ELEMENTS
User Guide
To apply a gradient fill:
1 To fill part of the image, select the desired area.
Otherwise, the gradient fill is applied to the entire
active layer.
2 Select the gradient tool ( ).
3 In the options bar, click the desired gradient
type (linear, radial, angular, reflected, or
diamond).
4 Choose a gradient fill from the pop-up palette
in the options bar. To learn more about using pop-
up palettes, see “Using pop-up palettes” on
page 35.
5 Specify a blending mode and opacity for the
paint. (See “Setting options for painting and
editing tools” on page 147.)
6 To reverse the order of colors in the gradient fill,
select Reverse.
7 To create a smoother blend with less banding,
select Dither.
8 To use a transparency mask for the gradient fill,
select Transparency. (See “Specifying the gradient
transparency” on page 153.)
9 Position the pointer in the image where you
want to set the starting point of the gradient, and
drag to define the ending point. To constrain the
line angle to a multiple of 45°, hold down Shift as
you drag.
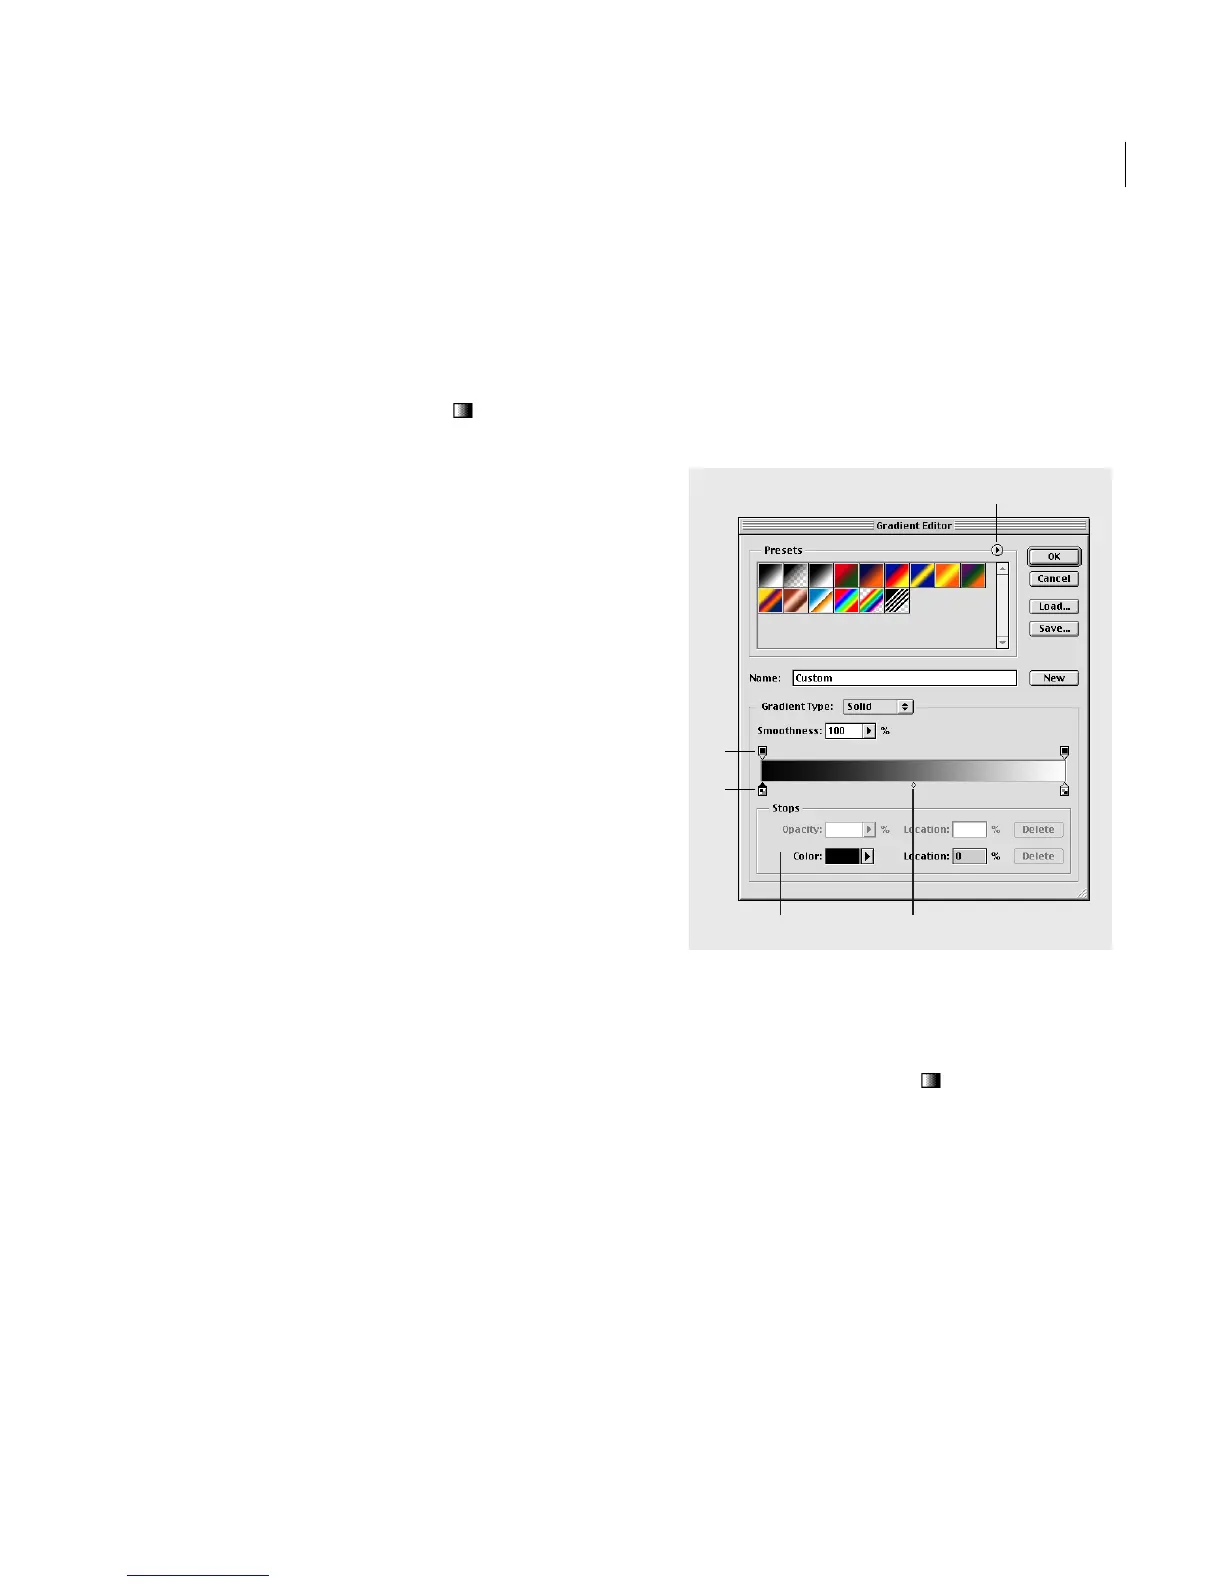
Creating or editing gradient fills
The Gradient Editor dialog box lets you define a
new gradient by modifying a copy of an existing
gradient. You can also edit fills by adding interme-
diate colors to a gradient, or creating a blend
between more than two colors.
A. Palette menu B. Opacity stop C. Color stop D. Adjust val-
ues or delete the selected opacity or color stop E. Midpoint
To create a gradient:
1 Select the gradient tool ( ).
2 To display the Gradient Editor dialog box, do
one of the following:
• Click the Edit button next to the gradient
sample.
• Click the gradient sample in the options bar.
C
B
A
D
E