Do you have a question about the ADT ADC-V523 and is the answer not in the manual?
Set up ADT Interactive using a web browser and login credentials.
Download and install the ADT Interactive Security app on your mobile device.
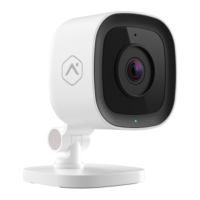
Specifications and identification details for the indoor Wi-Fi camera (ADC-V523).
Specifications and identification details for the outdoor Wi-Fi camera (ADC-V723).
Connect the camera to your network using the WPS button on your router.
Connect the camera to your network wirelessly using AP mode.
Add the camera to your ADT Interactive account via the mobile application.
Add the camera to your ADT Interactive account using the web browser.
Tips for positioning indoor cameras in common areas for optimal viewing.
Tips for positioning outdoor cameras, considering entrances, exits, and visibility.
Steps to calibrate video analytics for custom alerts and context.
Solutions for camera not working and connectivity issues.
How to check camera power status via LED lights.
Considerations for changing internet provider or Wi-Fi credentials.
Information on multi-device access and user limits for ADT Interactive.
Tips for setting recording rules and managing monthly upload limits.
Explanation of the purpose and benefits of Video Analytics.
Guide to understanding LED colors and patterns for camera status.
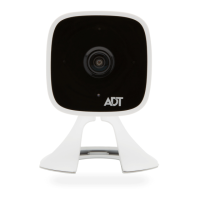
The ADT Wi-Fi Camera is a security device designed for both indoor and outdoor surveillance, offering users a comprehensive solution for monitoring their property. This guide provides detailed instructions for setting up, connecting, positioning, and configuring the camera, ensuring a smooth DIY installation process for those who choose it. The camera integrates seamlessly with the ADT Interactive account and mobile app, allowing for remote access and management of security features.
The primary function of the ADT Wi-Fi Camera is to provide real-time video surveillance of your home or business. It captures high-resolution video, which can be viewed live through the ADT Interactive app or web browser. A key feature is its ability to record video clips, which are then stored and accessible via your ADT Interactive account. The camera is equipped with advanced Video Analytics capabilities, allowing it to intelligently detect and distinguish between people, vehicles, and animals. This smart detection helps in filtering out irrelevant alerts and focusing on events that matter most to the user.
For indoor use, the camera is designed to be positioned in common areas such as main entrances or living rooms, with a focus on areas where valuables are kept. It helps monitor key entrances and windows, enhancing overall home security. For outdoor applications, the camera extends surveillance to the exterior of the property, covering entrances, exits, and blind spots. Its visibility can also act as a deterrent to potential intruders.
The camera's connectivity relies on your property's Wi-Fi network. It supports two main connection methods: Wi-Fi Protected Setup (WPS) Mode and Access Point (AP) Mode, offering flexibility in how it integrates with your existing network infrastructure. Once connected to Wi-Fi, the camera needs to be enrolled onto your ADT Interactive account, which can be done either through the mobile app or the web browser. This enrollment process links the camera to your personal security system, enabling all its smart features.
Video Analytics is a crucial component of the camera's functionality. It allows users to set up customized rules, such as tripwire and zone alerts, for specific areas within the camera's field of view. This means you can define particular zones where you want to detect activity, and the camera will send alerts based on these predefined rules. For instance, you can set an alert for a person entering your driveway, an animal jumping on a sofa, or a child leaving the yard. The system provides enhanced notifications with thumbnail images, giving you a quick visual context of the detected event.
The ADT Wi-Fi Camera is designed for user-friendly operation, starting with its installation. The guide breaks down the setup into clear, actionable steps.
Account and App Setup: Before physically connecting the camera, users are guided to set up their ADT Interactive account and mobile app. This involves logging into the ADT Interactive Login page via a web browser using provided credentials. Once logged in, users can set up additional user codes and logins for family members or friends, managing access to the security system. The mobile app, available on Google Play and Apple App Store, allows users to navigate a dashboard, explore features, and enable push notifications for real-time alerts.
Connecting to Wi-Fi: The camera offers two methods for Wi-Fi connection.
Enrolling the Camera: Once connected to Wi-Fi, the camera needs to be enrolled onto the ADT Interactive account. This can be done via the mobile app or the web browser.
Positioning the Camera: Optimal placement is crucial for effective surveillance.
Testing Field of View: Before committing to a fixed spot, users are advised to test the camera's field of view using the ADT Interactive app in real-time. This involves loosely mounting the camera, connecting it to power, and checking the live video stream to ensure nothing blocks the view and it's not pointing into bright light. This step helps in customizing settings and recording rules before final installation.
Configuring Video Analytics: This feature requires calibration to function accurately. The calibration process involves taking five still images of a person in different locations visible to the camera. This can be done via the ADT Interactive app or web browser.
The ADT Wi-Fi Camera is designed for minimal maintenance, but certain aspects are important for continuous optimal performance.
Power and Connectivity Checks: If the camera is not working, the first step is to check the power connection and ensure the camera's LED light is on. This confirms the camera is receiving power. Secondly, verify the Wi-Fi connection by checking if other devices on the same network can access the internet. If the internet provider or Wi-Fi credentials (SSID and password) have changed, the camera will lose connectivity. In such cases, users will need to re-install the cameras onto the new Wi-Fi connection by repeating the initial setup steps.
Video Analytics Recalibration: It is crucial to recalibrate the Wi-Fi camera each time it is moved to a different location. This ensures that the Video Analytics feature remains accurate and effective in the new environment, providing precise detection and alerts.
Managing Recording Rules and Upload Limits: Users can manage their monthly upload limit for recorded clips via the ADT Interactive Web browser. This allows them to monitor usage and adjust recording rules to maximize the availability of video clips. If users find themselves exceeding their monthly limit, they are advised to check their recording rules to ensure they are only capturing necessary events and to avoid setting rules that capture similar or redundant events. ADT also provides support for users who consistently go over their monthly limit. The system will highlight usage in red if the limit is reached or exceeded, providing a clear visual indicator.
LED Reference Guide: The camera includes an LED light that serves as a status indicator, aiding in troubleshooting.
By following these guidelines, users can effectively manage and maintain their ADT Wi-Fi Camera system, ensuring continuous and reliable security surveillance for their property.
| Night Vision | Yes |
|---|---|
| Audio | Two-way audio |
| Connectivity | Wi-Fi |
| Storage | Cloud storage |
| IR Range | Up to 30 feet |
| Wireless | Yes |
| Ingress Protection | IP65 |
| Weather Resistance | Yes |
| Motion Detection | Yes |
| Resolution | 1080p |
| Image Sensor | CMOS |
| Operating Temperature | -4°F to 122°F |