,QVWDOODWLRQ
Installing an ADT-UZC-256 Module
2-24 Unimode 400 Installation PN 50710:A 10/22/97
,QVWDOOLQJDQ$'78=&0RGXOH
2YHUYLHZ
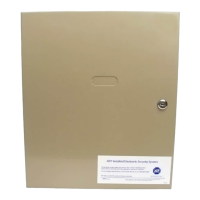
You can mount the ADT-UZC-256 into an ADT-CAB-X3 or an ADT-CAB-400AA.
This section shows how to install the ADT-UZC-256 both ways. For information on
configuring the ADT-UZC-256 module, refer to Section 5, “Applications.”
$'7&$%; ,QVWDOODWLRQ
The ADT-UZC-256 mounts beneath the third and fourth modules on the CHS-4
chassis, to the right of the CPU. Install the module as follows:
1. Thread the supplied three hex standoffs to the mounting studs on the CHS-4
chassis (Figure 2-27).
)LJXUH 0RXQWLQJ DQ $'78=& WR D &+6
2. Place the module onto the CHS-4 as shown in Figure 2-27; then, insert and tighten
the mounting screws.
$'7&$%$$
,QVWDOODWLRQ
You can also mount the module to the upper right corner of the ADT-CAB-400AA
Series cabinet as follows:
1. Place the module into the ADT-CAB-400AA as shown in Figure 2-28.
)LJXUH 0RXQWLQJ WKH $'78=& LQWR DQ $'7&$%$$ &DELQHW
2. Attach the module to the ADT-CAB-400AA with the self-tapping screws.
+H[ VWDQGRII WKUHH SODFHV
0RXQWLQJ VFUHZV WKUHH SODFHV
$'78=&
0RGXOH
&+6 &KDVVLV
,QVHUWLQJ Q\ORQ VWDQGRII DQG
VHOIWDSSLQJ VFUHZ
&+60RGXOH
,QVHUWLQJ Q\ORQ VWDQGRII
DQG VHOIWDSSLQJ VFUHZ
$'78=& 0RGXOH
6HOIWDSSLQJ VFUHZ
WKUHH SODFHV
$'7&$ %$$
0RGXOH
$'7&$ %$$
&DELQHW
 Loading...