SNMP in the NetVanta 1570 Configuring SNMP Using the GUI
6AMCCG0018-29A 23
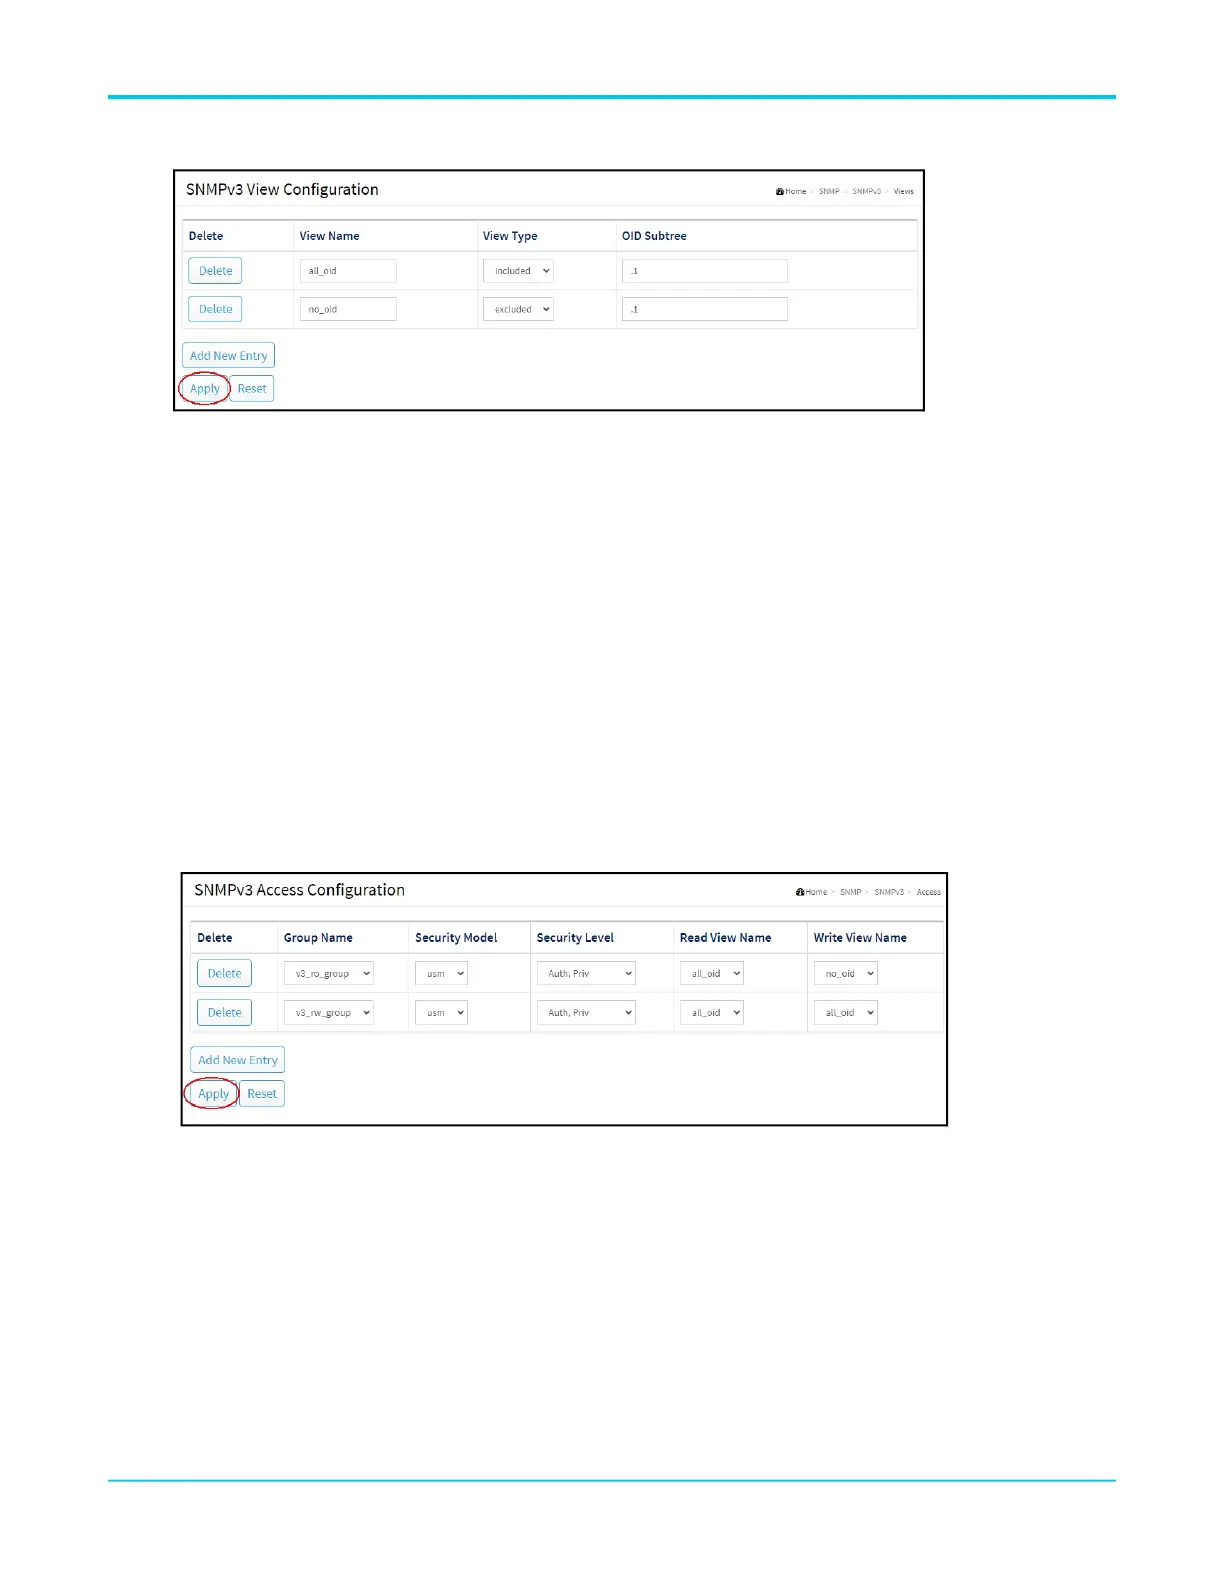
Step 5: Configure Access to SNMP Information
Configure the SNMP security model, access level, and optional SNMP views for a group.
1. Navigate to SNMP > SNMPv3 > Access and select Add New Entry.
2. Select the name of the read only group for the Group Name. This is the name of the read only group
created in Step 3 on page 22.
3. Select usm for the Security Model.
4. Specify whether authentication and privacy keys are used for the Security Level.
5. Select the name of the view that includes all OIDs created in Step 4 on page 22 for the Read View Name.
Select the name of the view that excludeds all OIDs for the Write View Name.
6. Repeat steps 2-4 to set up access for the read/write group. The view that includes all OIDs should be
selected for both the Read View Name and Write View Name.
7. Select Apply to save your changes.
Step 6: Configure the Community and Source IP Addresses
1. Navigate to SNMP > SNMPv3 > Communities and select Add New Entry.
2. Specify the community name (this is also referred to as a security name in SNMPv3) for the Community.
3. Specify the IPv4/IPv6 SNMP access Source IP address and Source Mask/Prefix.
4. Select Apply to save your changes.

 Loading...