2 Copyright © 2014 ADTRAN, Inc. All Rights Reserved. Quick Start Guide, 617004660F1-13D, May 2014 3
COMMON CLI COMMANDS
The following are common CLI commands and tips for getting started with the CLI.
• Entering a question mark (?) shows contextual help and options. For example, entering ? at the prompt
will show all commands available from that prompt.
• To view interface statistics, enter show interfaces <interface type> <interface number>.
• To view the current configuration, enter show running-config.
• To view all the IP addresses currently configured, enter show ip interfaces brief.
• To view the AOS version, serial number, and other information, enter show version.
• To view the routing table, enter show ip route.
• To save the current configuration, enter write.
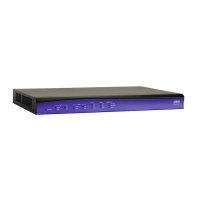
CONFIGURE THE UNIT’S IP ADDRESS
The NetVanta 4660 unit’s IP address can be configured from either the Gigabit Ethernet subinterface (for a user
network interface (UNI)) or the system management Ethernet virtual connection (EVC) (for a network-to-
network interface (NNI)).The following steps assign an IP address and subnet mask for the GIG 0/2.1 Gigabit
Ethernet subinterface.
1. At the # prompt, enter config terminal.
2. At the
(config)# prompt, enter interface gig 0/2.1 to access the configuration parameters for the Gigabit
Ethernet subinterface.
3. Enter ip address 192.168.1.1
255.255.255.0 to assign an IP address to the Ethernet subinterface using a
24-bit subnet mask.
4. Enter exit to exit the Gigabit Ethernet subinterface commands and return to the Global Configuration
mode.
5. Enter ip route 0.0.0.0
0.0.0.0 192.168.1.254 to add a default route to the route table. 0.0.0.0 is the default
route and the default subnet mask, and 192.168.1.254 is the next-hop IP address to which the AOS unit
should send all of its traffic. You will need to enter the proper route, subnet mask, and gateway for your
network. This information is typically provided by an Internet service provider (ISP) or local network
administrator.
6. Enter do write memory to save the current configuration.
The configuration parameters used in the examples outlined in this document are for
instructional purposes only. Replace all underlined entries (example
) with your
specific parameters to configure your application.
ENABLE TELNET USER LOGIN ACCESS
The following steps create a password of adtran for Telnet access. By default, Telnet access is enabled with a
password of password.
1. Verify that the prompt of your unit displays (config)#.
2. Enter line telnet 0 4 to change the configuration parameters for the Telnet sessions.
3. Enter login to require a password for Telnet access.
4. Enter password adtran
to change the login password for the Telnet sessions.
5. Enter exit to return to the Global Configuration mode.
6. Verify that the prompt of your unit displays (config)#.
7. Enter do write memory to save the current configuration.
CONFIGURE YOUR APPLICATION
The applications you will need to configure vary by product and by network. Review the list of defaults for your
unit before deciding what applications to configure. The following are some common applications that should be
configured on startup. These instructions are all available on ADTRAN’s Support Community
.
NETVANTA 4660 DEFAULTS
Layer2/Layer3 Carrier Ethernet Services in AOS Configuring Port Forwarding in AOS
Configuring Etherent OAM Using Y.1731 Configuring DHCP Server in AOS
Configuring Network Synchronization
in AOS
Configuring Internet Access (Many to One NAT) with the
Firewall Wizard in AOS
Network Monitoring in AOS Configuring QoS in AOS
Important: For additional details on product features, specifications, installation,
and safety, refer to NetVanta 4660/5660 Hardware Installation Guide at
https://supportforums.adtran.com
.
Feature Default Value
User Name
admin
Password
password
Enable Password
password
HTTP Server Disabled
Event History Enabled
IP Routing Enabled
 Loading...