Do you have a question about the ADTRAN SMART/RG SR555ac and is the answer not in the manual?
Steps for connecting the splitter cable to the gateway and modem ports.
Connecting the gateway to a PC via Ethernet and plugging in the power adapter.
Details on 3G USB and Ethernet uplinks, and their limitations.
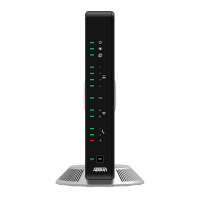
Explanation of LED colors and their meanings for gateway status.
Describes the states of the POWER and DSL LEDs for connectivity.
Details the states of the INTERNET LED indicating connection status.
Steps to access the gateway's web interface and log in using credentials.
Guide to manually establish WAN connection if automatic setup fails.
Navigating to basic wireless settings and enabling the interface.
Steps to connect devices using the WPS secure WiFi method.
Steps to configure WiFi manually, including authentication and passphrase.
Instructions for attaching the optional wall mount to the gateway and wall.
Fields to record SSID and network key for WiFi settings.
Information on contacting ISP support for further assistance.
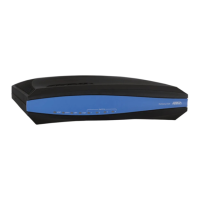
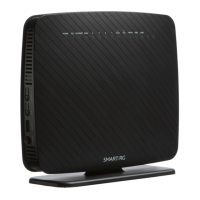
The SmartRG SR555ac is a versatile gateway designed to provide internet connectivity and Wi-Fi services. It supports various WAN services, including xDSL, 3G, and Ethernet uplink, though not simultaneously. The device is intended for home or small office environments, offering a range of features for network management and wireless connectivity.
The primary function of the SR555ac is to act as a gateway, connecting your local network to the internet. It integrates a DSL modem, a router, and a wireless access point into a single unit. This allows it to receive internet service through a DSL line, a 3G USB data card, or an Ethernet WAN connection, and then distribute that connection to multiple devices via Ethernet cables or Wi-Fi.
The installation process is straightforward, beginning with connecting the splitter cable. The splitter has three ports: "Modem" for the gateway's DSL port, "Phone" for a telephone, and "Line" for the incoming line. After connecting the splitter, an Ethernet cable connects a LAN port of the gateway to a PC's network card. The power adapter is then plugged into a wall outlet and the gateway's "Power" port, and the unit is turned on using the On/Off button. The gateway is designed to automatically set up the internet connection, which may take a few minutes. For alternative WAN services, a 3G USB data card can be connected to the USB port, or an Ethernet cable to the WAN interface for Ethernet uplink. It's important to note that only one WAN uplink type (xDSL, 3G, or Ethernet) can be used at a time.
The front panel of the SR555ac features LED indicators that provide visual feedback on the gateway's status. These LEDs help users understand if the device is powered on, if data is being transferred, if the DSL line is connected and acquiring sync, and if the internet connection is active. Different colors and blinking patterns indicate various states, such as green for normal operation, red for errors, and blue for specific DSL line statuses. For instance, a solid green "POWER" LED indicates the device is powered on and ready, while a blinking green "INTERNET" LED signifies data transfer. If the "INTERNET" LED is red, it indicates an authentication or connection failure. The "DSL" LEDs provide detailed information about the DSL line status, including whether it's acquiring sync, connected, or if both DSL lines are connected in a bonded setup.
Accessing the gateway's configuration interface is done through a web browser by typing 192.168.1.1 into the address bar. A login dialog will appear, requiring a username and password. The factory default credentials are "admin" for both username and password, though service providers may use different settings. Once logged in, users can access various settings, including network configuration and Wi-Fi setup.
If the automatic internet connection setup fails, the WAN can be configured manually. This involves navigating to the "Advanced Setup > Layer 2 Interface" and "WAN Services" sections within the gateway's user interface, referring to the SmartRG SR555ac Gateway User Manual for detailed instructions.
The SR555ac supports Wi-Fi connectivity, offering two methods for setup: WPS (Wi-Fi Protected Setup) and Manual configuration.
The SR555ac can be optionally wall-mounted. This involves using a Phillips-head screwdriver to remove the mount from its present location on the bottom of the gateway. A template is then used to mark the drill points on the wall, and two screws are installed (1/16" or 2-3mm deep, with screw anchors recommended). Finally, the back of the mount is slid down onto the screws, securing the gateway to the wall.
The gateway can be reset to its factory default settings using a small reset button located in a circular hole on the rear panel. To perform a reset, a thin wire (like a paper clip) is inserted into the hole and pressed gently for 1 second, then released. This action will cause the system to reboot and revert to its original factory settings. It's important to note that this action will clear all current settings, so it should only be done if a complete reset is desired.
The LED indicators serve as a primary troubleshooting tool, providing immediate visual cues about the device's operational status. If internet connectivity issues arise, users should first confirm that all cable connections are secure and that the gateway's power is on. For Wi-Fi connection problems, especially with WPS setup, referring to the client device's documentation for further instructions is recommended. If manual WAN configuration is unsuccessful, consulting the SmartRG SR555ac Gateway User Manual for detailed steps is advised. For any additional support or persistent issues, users are directed to contact their local ISP.
The manual includes a section to record the SR555ac's Wi-Fi settings, including the predefined and changed network name (SSID) and network key (password). This feature aids in maintaining a record of critical network information for future reference or troubleshooting.
| Device Type | Wireless Router |
|---|---|
| Ethernet Ports | 4 x 10/100/1000 Mbps |
| WAN Port | 1 x 10/100/1000 Mbps |
| USB Ports | 1 x USB 2.0 |
| Wi-Fi Standards | 802.11ac |
| Wireless Frequency Bands | 2.4 GHz and 5 GHz |
| VoIP Ports | 2 |
| Antennas | Internal antennas |
| Security Protocols | WPA, WPA2 |
| Supported Services | TR-069 |
| Power Supply | 12V DC |