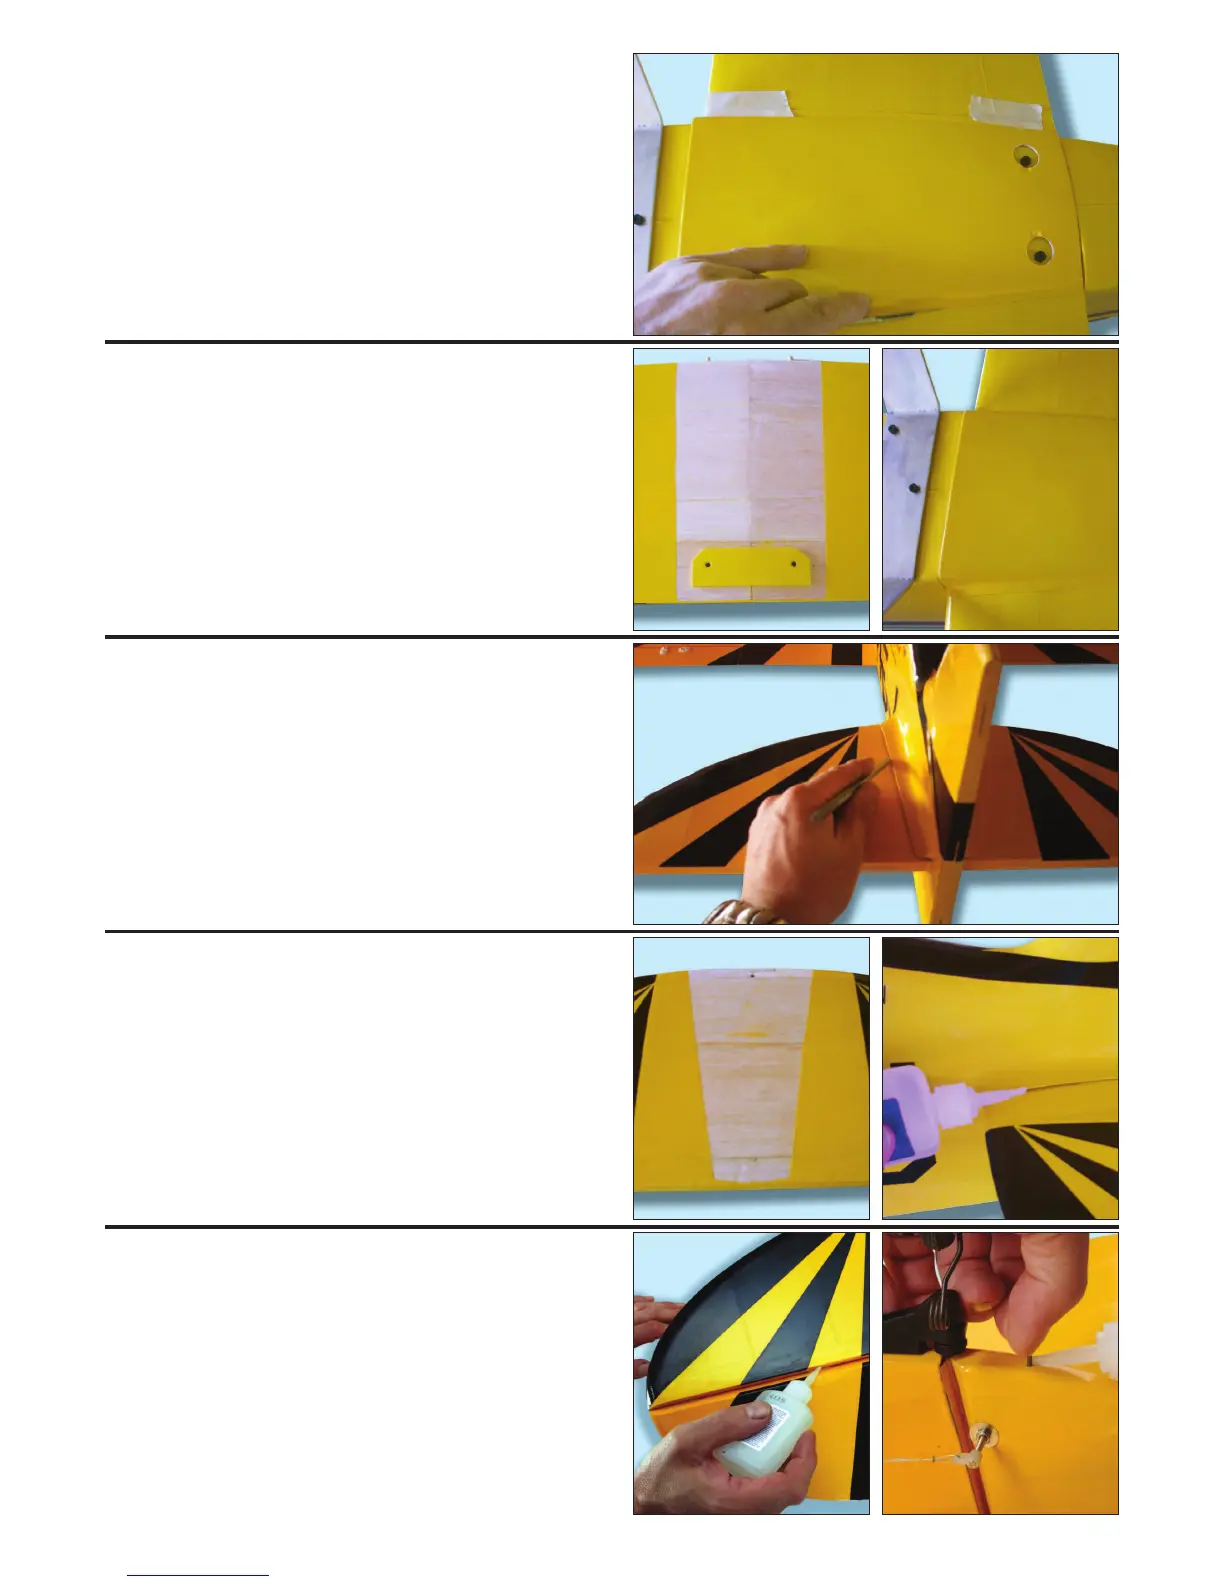
UNDERWING FAIRING
STEP 19.
Temporarily bolt the lower wing in position and tape the
underwing fairing in place, ensuring that it is centred
and level with the fuselage at the front and rear. Mark
the fairing’s position on the wing using a felt tipped pen.
STEP 20.
Using a sharp knife, carefully cut through the film just
inside the lines you just marked. IMPORTANT: It is
essential that you do not cut into the surface of the wing
or it will be sever
ely weakened. Attach the fairing using
medium cyano, taking care not glue the wing to
the fuselage!
TAILPLANE & RUDDER
STEP 21.
Slide the tailplane in position. Car
efully centre it and
check it is true and square to both the wing and
fuselage. Mark both sides (top and bottom) of the tail
where it enters the fuselage then remove.
STEP 22.
Using a sharp knife, carefully cut through the film just
inside the lines you just marked. IMPORTANT: It is
essential that you do not cut into the surface of the
tailplane or it will be sever
ely weakened. Ensuring the
tailplane is squar
e and centred to the fuselage, glue it in
position using medium cyano.
STEP 23.
Hinge the elevators using three hinges per side and the
rudder using a further thr
ee hinges in exactly the same
way as the ailer
ons. Locate the steerable tailwheel wir
e
drive rod and after drilling a pilot hole in the rudder, glue
it in position as shown.
_____
Page 7
_____