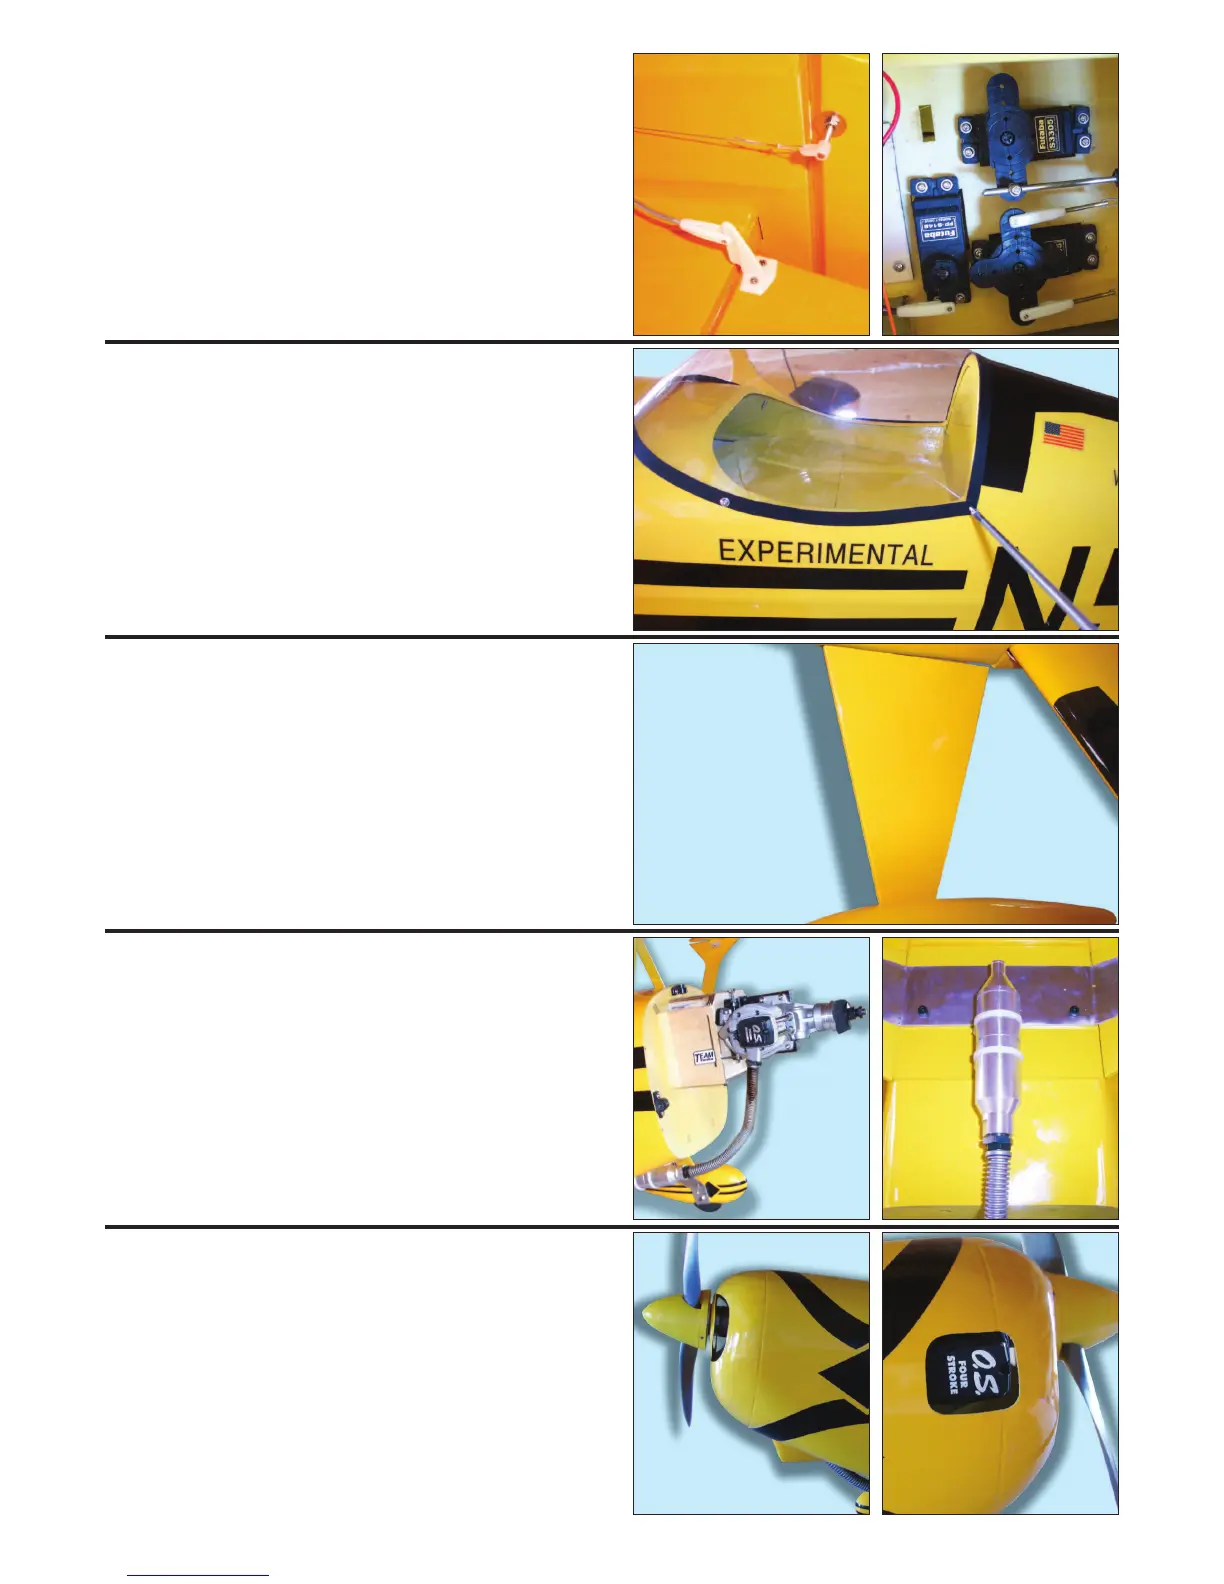
STEP 24.
Use the closed loop components to complete the
rudder linkage as shown. The elevators use a pre-
formed Y shaped pushrod operated from a single servo
as shown. Test the free operation of the elevators and
r
udder.
FINAL ASSEMBLY
STEP 25.
Tape the canopy in position on the fuselage, checking
that the canopy frame is centred. Pilot drill and screw
the canopy in position using the four small self tapping
screws supplied.
STEP 26.
Locate the under
carriage fairings and attach them to
the aluminium undercarriage legs using five minute
epoxy. Note that they are handed left and right.
STEP 27.
The most convenient way of mounting the silencer is
using a flexible manifold as shown her
e. Attach the
silence using a nylon mount scr
ewed to the base of the
fuselage in front of the undercarriage or your
preferred method.
STEP 28.
Attach the cowl using the moulded captive cowl
r
etainers you fitted to the bulkhead earlier
. T
rim the cowl
as necessary to clear the engine’s cylinder head and for
access to the glowplug. Extend the needle valve
as r
equired.
_____
Page 8
_____