1.3 Mxp-013-XXXF
The Mxp-013-050, Mxp-013-100 and Mxp-200 are mounted onto a fascia plate on the door. The cards are
attached to the fascia plate using 6 nuts.
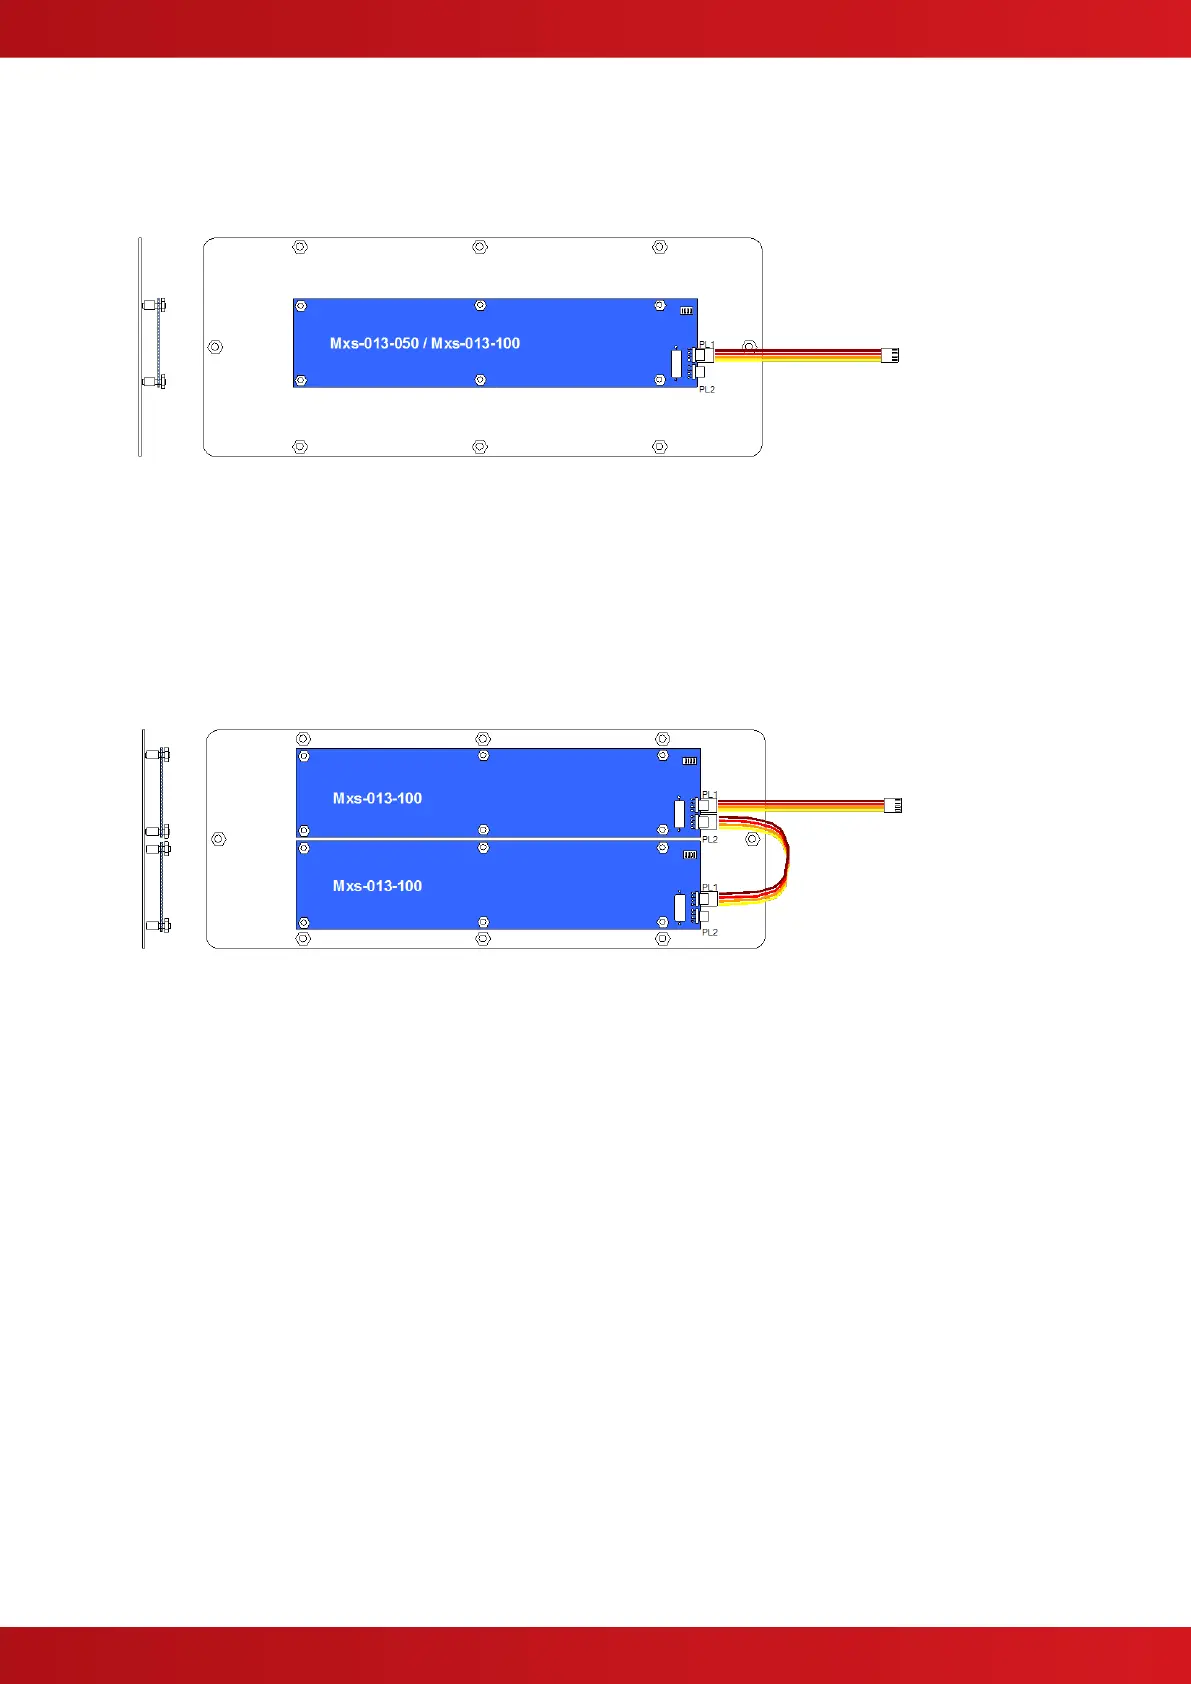
1.3.1 Mxp-013-050 / Mxp-013-100
To replace a card:
a) Unplug the ribbon cable from the LED card.
b) Remove the 6x nuts and remove the card. Be careful not to lose the spacers.
c) Fit the replacement card (Mxs-013-050 or Mxs-013-100 as appropriate) and fix in place with the 6x nuts.
d) Re-connect the ribbon cable to PL1 position.
e) Check the configuration of the Zone range (refer to Configuration Section).
f) Test the LED operation (refer to Operation Section).
1.3.2 Mxp-013-200
The Mxp-013-200 consists of 2x 100 LED Indicator cards mounted on the fascia plate and connected together
using an interconnecting ribbon cable.
To replace a card:
a) Unplug the appropriate ribbon cable(s) from the LED card.
b) Remove the 6x nuts and remove the card. Be careful not to lose the spacers.
c) Fit the replacement card (Mxs-013-100) and fix in place with the 6x nuts.
d) Re-connect the ribbon cable to the appropriate positions.
e) Check the configuration of the Zone range (refer to Configuration Section).
f) Test the LED operation (refer to Operation Section).
www.acornfiresecurity.com
www.acornfiresecurity.com