3. Align the cuts on the lower dome with the lock screws on the back box to reinstall the
lower dome. Tighten the lock screws.
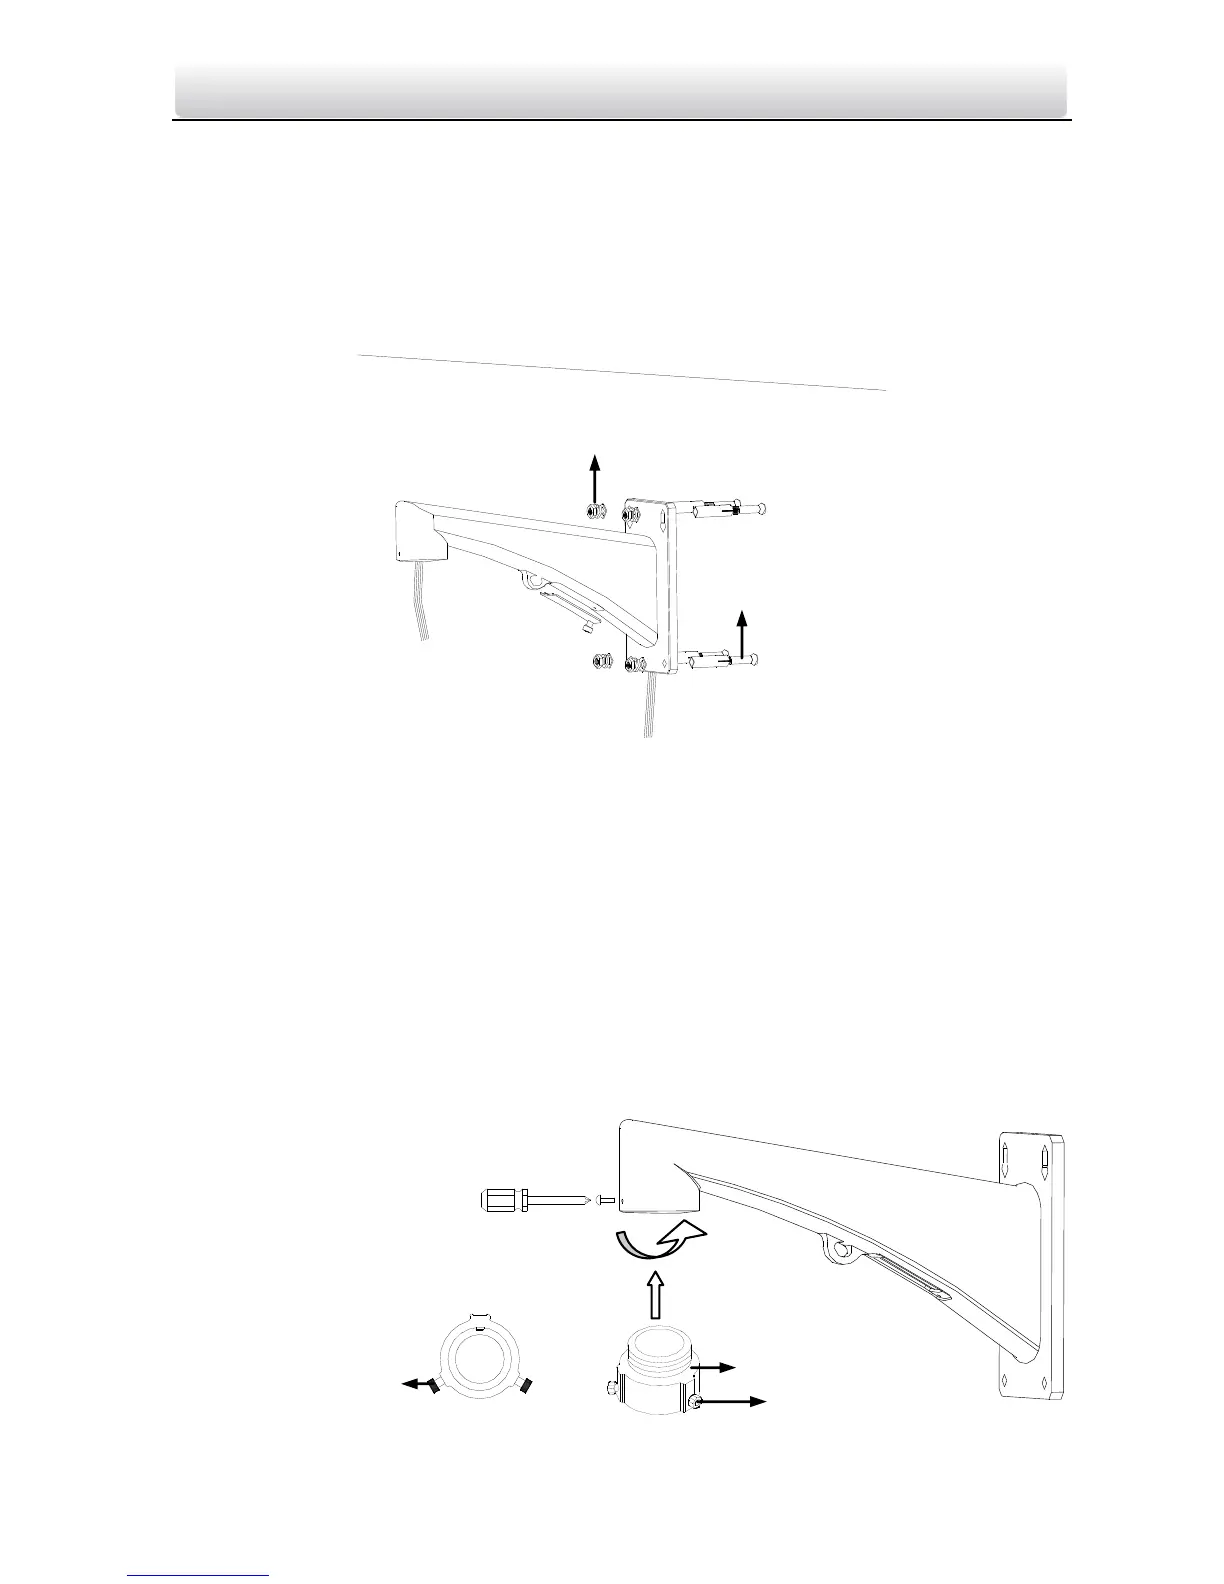
4. Drill 4 screw holes in the wall according to the holes of the mount, and then insert M8
expansion screws into the mounting holes.
5. Attach the gasket then wall mount to the wall by aligning the 4 screw holes of the
mount with expansion screws on the wall.
6. Secure the wall mount with 4 hex nuts and washers.
Figure 2-3 Secure the A-200-WM most commonly used but sold separately
Notes:
For cement wall, you need to use the expansion screw to fix the mount. The mounting
hole of the expansion pipe on the wall should align with the mounting hole on the
mount.
For wooden wall, you can just use the self-tapping screw to fix the mount.
Please make sure that the wall is strong enough to withstand more than 8 times the
weight of the dome and the mount.
7. Apply thread tape to the thread of the pendant adapter and rotate the pendant
adapter to the mount. Secure the pendant adapter to the mount with a set screw.
8. Loosen the lock screws of the adapter, as shown below:
Figure 2-4 Install the Pendant Adapter